10th June 2012

Putting it together

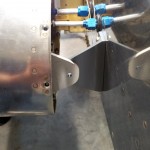
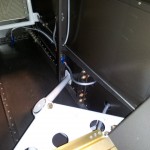
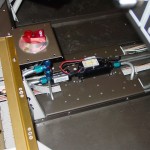
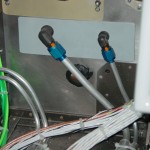
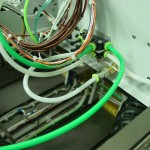
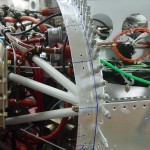
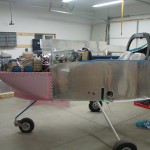
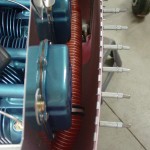
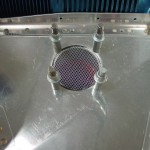
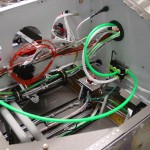
Final assembly continues.  Finished off the wing bolts — all the -4′s for each wing, and the rear spar bolts.  Also installed the screws along the belly skin-to-wing joints.  Vacuumed the crud out of the seat pan area, and reinstalled the comm antennas.  Trimmed & connected the AOA pressure lines.  I need to grab the pitot union connector from home to hook that up.

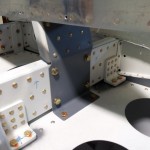
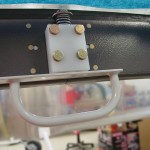
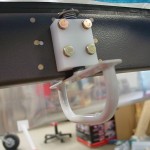
Found my latest mistake, though: I was supposed to install a nutplate on the tank attach bracket before mounting the wings.  Oops.  The brackets in question are well-attached to the fuel tank, but I should be able to remove their mates from either side of the fuselage for access, drill and rivet the nutplates, then reinstall the fuselage brackets and we’re back in business.  Less than an hour, I’d estimate.  (I would have done this today, but didn’t think of it until now…in my mind, I needed to email Van’s to see if a different bolt arrangement would work here.)

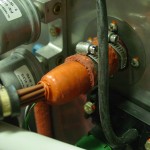
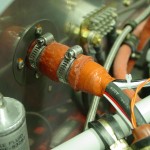
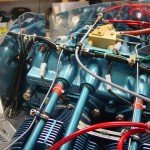
Massaged the RH fuel feed line to adjust its position in relation to the tank nipple.  Removed the vent line stubs from both sides and replaced them with new, longer versions.  Tightened and marked feed & vent lines on both sides.  Adjusted the tension bolt on the fuel caps.  Installed ring terminals on the fuel level sender wires, and connected them to the senders.  The fuel system is now complete.

One by one, removed the four bolts holding the VS to the HS forward spar, and added a washer under the bolt head.  This in response to consensus on a recent VAF thread after someone found a crack propagating from one of these slotted holes.  The washer’s purpose is to provide a larger bearing area for the clamping force of the bolt.  Retorqued & marked.

Loosely connected the aileron pushrods to the bellcranks and control column, and inserted the smaller pushrods from the rear of the wings.  Pinned the ailerons in place and fooled around with pushrod positioning, stops, surface throw, etc.  It’s nearly right as is, but I want to bring a round file and Dremel sanding drum and “customize” the pushrod holes a wee bit more, to make it just right.  I also need to rivet on the aileron stops, which are only clecoed right now.  Once that’s done, the ailerons can be installed and we can move on to flaps.

Hours: 7.5 | Posted in Endgame, Plumbing, Wing & Tail Joins | Comments Off
17th March 2012

Punching the list

Another warm day (but this time breezy and hazy as well).  Trying to cross things off the list…

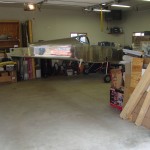
First on the agenda: loaded up the empennage and moved it to the hangar, where it will wait with the wings until final assembly.

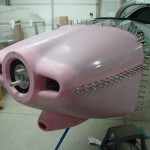
Next, set up the day’s fiberglass job.  Added a couple plies to the nose flange layup from yesterday, to give it more stiffness.  Closed off the inboard ends of the cooling inlet ramps with a 2-ply layup.  Added flox to a couple spots and deep voids.  Again today, I meant to get two rounds done, so one could cure overnight, but ran out of day.

Spent awhile fussing with canopy seals.  The edge-gripper bulb seal I wanted to use on the front seems a bit too thick, as it’s interfering with the closing of the canopy — the latch requires immense force to actuate.  So, that was removed for now.  I added the same bulb seal to the side rails, and that also cause latch trouble, so I ended up slicing the bulb in half for about 60% of the length of the side rails.  It looks ragged when open, but seals fine when closed.  This is easy to replace later — I’m searching for a smaller bulb, but the 3/8″ is the smallest I’ve found so far.  I may have to explore using foam strips or something.  Also ran into trouble with the rear rollbar seal, again, difficult to close & latch.  Will explore more seals; it seems this is a spot everyone struggles to make work.

On to the “little stuff:”

  • Slipped some clear tubing over a couple fluid lines in the tunnel to prevent any possible chafing from wire bundles (clearance is fine, but vibration does things…)
  • Installed the fuel selector & torqued all the fluid fittings in the center tunnel.
  • Installed the fuel pump and torqued those fittings.
  • Installed the metal plug in the hole that provides access to the nose leg bolt.  Sealed up with a good layer of firewall sealant on both sides.
  • Installed the bolts on the RH lap belt, having received my order of hardware from Spruce.
  • Finished off the firewall wiring passthrus per instructions, since wiring is complete.
  • Torqued the forward bearing on the aft elevator pushrod.
  • Checked that all bolts on the flight controls were torqued, and torqued them where they were not.
  • Swept the shop and put away tools, brake bleeding stuff, and so on.

Hours: 8.0 | Posted in Cabin & Interior, Canopy & Frame, Cowling & Baffles, Engine, Plumbing, Wing & Tail Joins | Comments Off
26th February 2012

Filling (&) leaks

Mixed up some Super-Fil and worked it into the remaining pinholes on all the fiberglass parts that were sprayed yesterday.  Next will be sand the filler & spray another coat.

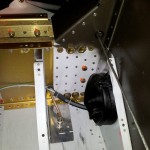
Pulled the top skin off and moved a couple pins on the ADS-B connector, since newer versions of the box have a slightly different pinout.

With the top skin off, found that a few of the elbow fittings on the brake cylinders were leaking fluid.  Removed the hoses and turned them in one more rotation, which, at least initially, seems to have cleared up the slight leaks.  Re-bled the brake system with fluid, and in the process managed to snap the nipple off one of the bleeder screws.  Dangit — at least it was only the nipple, so the brake system is closed, and I just need to order another bleeder screw.

Reconnected the oil temp sensor wire, which had been removed in a previous session to install an oil line.

Hooked up the new serial converter and it works; checked communication with the Pmags, and verified the configuration in the APRS tracker.

Hours: 6.5 | Posted in Canopy & Frame, Electrical, Plumbing, Wing & Tail Joins | Comments Off
2nd February 2012

Venting

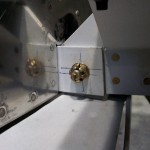
Drilled and installed the fairing nutplates on the HS.

Countersunk and re-primed the top cowl camloc strips (oops).

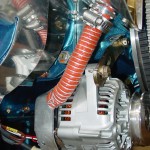
Cut and attached the blast tube to the alternator with a double-wrap of safety wire.  I’m all ears if someone has a better way of doing this, but it’s reported to have worked.  Also rumors that the alternator doesn’t need it, but cooler is always better for electronics.

Tightened and re-saftied the dipstick tube, as it was weeping just a bit at the gasket, since the engine is full of oil now.

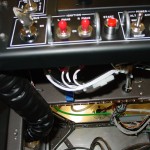
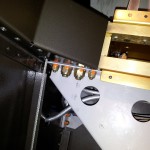
Installed the alternate static toggle low on the subpanel behind EFIS 1.  I bought a toggle switch guard to put over it, since the actuating force to open the switch (thereby venting the static system to the cabin) is quite low.  The guard needs a good strong push to open & latch, and it holds the valve firmly closed in the down position.  I sat in the seat and the switch is out of sight, though easy to reach under the panel.  It still needs a placard, though, because my labeller was too cold to print labels.  (It looks like the wire bundle is very much in the way, but it’s just a result of the camera location.)

Checked to be sure I’d run the remote output port from the transponder to the ADS-B connector (I had), as the need for that connection came up on a recent VAF thread again.

Wasted the rest of the night sitting in the seat playing with the avionics.

Hours: 2.4 | Posted in Engine, Plumbing, Wing & Tail Joins | Comments Off
31st July 2011

Moving day, part the first

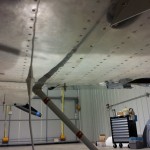
We rented a 12′ trailer after church today (my 10′ is too short) and took the wings to the airport, secured to their cart.  Definitely more space in the shop now, with that missing.  The 11′-something wing cart, seemingly a large piece in the shop, sure looks small in a big hangar.  Allison sees this as a sign the light at the end of the tunnel is approaching, and has visions of her car nestled in the garage this winter.


Back home, time to get the rest of this thing finished so it can go to the hangar too…(someday).

Torqued and sealed many of the FWF hoses; the oil lines and connections at the transducer remain.

Finished install of the heater SCAT tubing, trimming to length and securing, installed a heat shield on the #2 exhaust pipe where the tubing passes by.

Spent quite awhile sorting out the routing of ignition wires and securing them behind the engine so they’re not rubbing on anything, and have enough slack to account for movement of the engine.  The ignition leads are now complete.

Ovalled an adel clamp and used it as a bracket to hold the battery charger plug near the oil filler, where it can easily be accessed via the oil door.  Trimmed the charger leads shorter and put on new ring terminals; secured the battery cables to the battery.

Cut a new FAB top mounting plate with the fuel servo hole moved as far the to right as it would go; this will help account for the servo’s offset to the left, and give more clearance between the FAB and the cowl.  Fit and drilled the FAB plate to the fiberglass shell, temporary-bolted the mount plate on, then fit that assembly to the engine.  A bunch of iterative fitting & trimming with the bottom cowl ensued to get alignment with the air scoop; I tweaked the front of the top plate, and had to split the fiberglass shell to angle it downward.  That’ll require laying up some glass to bridge the gap.  I drilled the forward part of the box to the plate, to hold it in the correct position.

Hours: 9.5 | Posted in Engine, Plumbing, Wings | Comments Off
8th July 2011

Small victories

Some days, checking off little tasks can give a good feeling…today was one of those days.  Not much got done, really, but it was nice to call a couple things finished.

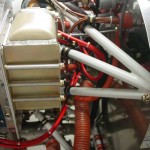
The major victory for today was the installation of the secondary canopy latch with spring modification.  I’ve mentioned a bit about this before; today I headed to the hardware store to dig around and come up with some springs that would work.  A found a 5/8″ by 1 9/16″ compression spring that was a perfect slip fit on the 1/2″ shaft of the latch, and had a good strong spring force.  To accommodate the length of the spring (it needs to be long enough to allow the latch to pull down far enough to clear the canopy frame), I chose not to cut the UHMW block down to capture only 2 of the mounting bolts, but rather to counterbore the block for the spring.  Since the 1/2″ hole is already drilled, I used a Unibit to enlarge it to the 5/8″ step, followed by a 5/8″ forstner bit in the drill press to bore the hole to the required depth (I went almost 3/4″ here).  Cleaned up the hole so the shaft slid freely, installed the spring into the hole, and capped with washer and cotter pin.  Pretty slick, I think.  I bolted the latch to the canopy frame, with the latch block spaced out from the frame by placing an AN960 washer on each mounting bolt, between block and frame.  This provided just enough space that the washer and cotter pin have clearance from the frame.  I did find a smaller diameter piece that could be used in place of the washer (sold as a 1/2″ ID x 1/8″ spacer), but the head of the cotter pin still needed clearance.  It’s easy enough to change if needed, but I don’t forsee a need to replace it; the latch arm has plenty of reach to the aft side of the canopy frame, to engage the rear window bow.

Number two: installed a newly-purchased screw to complete the installation of the pitot-static manifolds.

Number three: riveted in the magnetometer mount, and mounted the EFIS 1 magnetometer.  Also slid the elevator pushrod into the tailcone.

And, finally cleaned up the shop, including the massive nest of short wire bits that had collected on the bench…

Hours: 2.5 | Posted in Canopy & Frame, Electrical, Plumbing | Comments Off
3rd July 2011

Working the list

Worked on various things today, all generally related to FWF…

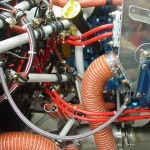
  • Measured for, built, and installed an angle brace for the oil cooler.  To avoid interference with injector lines, ignition wires, and purge valve cable, I tied it into the clip that was fabricated earlier for the purge valve cable.  This, as promised, stiffened up the oil cooler quite well.
  • Made up the tubing spacers which go between the flanges of the oil cooler to keep it from being deformed by the mounting bolts.  Installed spacers and cooler, after removing/reinstalling the aft left baffle to drill the bolt hole for the brace.
  • Worked through the engine control linkages FWF.  Drilled the mounting brackets for bolts and installed, torqued rod ends, and replaced temp fit bolts with proper length ones, torqued and sealed all fasteners.  Was going to install the fuel servo & bracket, but it seems I never ordered the proper nuts (5/16 coarse thread all-metal locknuts) to do so.
  • Unbolted the purge control cable and threaded it back into the cabin in order to install the eyeball passthru in the firewall.  Re-ran the cable, installed final bolts, torqued & sealed fasteners.
  • Riveted the left side heater air takeoff and screen to the baffle ramp.
  • Torqued and sealed the brake lines which run from the fuselage to the caliper.  At this point, the brake system is completely installed (except for fluid).
  • Looked at the exhaust system hanger clamps; it appeared that these could be adjusted on the pipe, but they are fixed in place with a welded pin.  I don’t understand how the hangers mount and where they run to, so will need to do some research.  The brackets seem to me like they’re facing the opposite direction of where they should (with the side ear facing outboard instead of in).
  • Worked on refitting the top cowling, which means trimming the baffles.  On this initial trim, the goal was to get them trimmed just far enough that the cowling can be fixed in place, not to get them to the final cut line.  It took several initial trims, then I spaced the top cowl up by clamping some wooden shims across both cowls, setting the top-to-bottom spacing consistent all around.  Then, cut a block and drilled a hole the same distance from one end as the space between the cowls.  Reaching inside with a sharpie through the hole in the block, I was able to slide it around and mark the contour of the cowl on the baffles, to establish a trim line.  (This method stolen from a VAF post)  Removed the top cowl and trimmed to the line, then a couple more re-fits to tweak, and it’s fitting well.  There will be more trimming ahead, for sure, but this was a good start.
  • In order to fit the top cowling, the camloc strips were reinstalled to the firewall edge, after having excess width trimmed from them (1/2″ trim, for a 2″ total width).  These are not yet drilled for the camlocs, so that 1/8″ clecoes can be used to secure the cowling to the strip.  The camlocs won’t be installed until the strips are installed, which isn’t until after the top skin is installed.  Chicken-and egg, yes…and there must come a point where the easy access under the top skin needs to be sacrificed in the name of getting the skin on so progress can be made, but not yet.
  • Neighbor Jeff and his brother stopped in to check out the progress.

And, crossed the 1400-hour mark tonight.

Hours: 8.2 | Posted in Cowling & Baffles, Engine, Plumbing | Comments Off
26th June 2011

Working the list

Worked on various little projects around the plane:

  • Finished install of cabin brake lines.  Torqued and marked.
  • Bolted rudder pedals in place.  Tried the middle holes, but with the seat put in, they’re too close for me, so moved them to the forward holes.
  • Messed with ignition leads to see how much too long they are (some are just right, others are several inches too long).
  • Cut pieces of screen for the second heater air takeoff, and the cabin fresh air vents.  Installed the vent screens between the scoop and the duct.  RTV’d the heater takeoff screen and clecoed the flange in place to cure; this’ll get riveted next time.
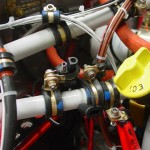
  • Played with routing for the left heater feed, which comes off the baffle inlet ramp.  Discovered that there is enough room between engine and cowling to run the SCAT along the bottom of the valve covers with adel clamps.  Will need longer screws to allow attachment of things like these clamps, and ignition wires, to the valve cover screws.
  • Fabricated and installed a bracket for the purge valve cable.
  • Installed new lockwashers, torqued and marked the engine case bolts along the top that were removed for installation of baffles & brackets.
  • Figured out how to install the Reiff preheater power harness along the top of the engine, and did so.  Ran the cable to the sump heaters through the same grommet as the fuel supply to the spider.
  • Installed clamps to secure the transducer-spider fuel hose.
  • Started work on finishing up the engine side of the thermocouple wiring.  I’m planning to leave these wires long and double them back, leaving plenty of extra length, as they would be a pain to replace in the event that one needed to be trimmed and no extra length available.

Hours: 5.5 | Posted in Engine, Plumbing | Comments Off
24th June 2011

Stop

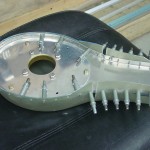
Started installing brake lines tonight; put in the elbows at the calipers and fit those lines, along with the right-side cabin elbows, lines, and reservoir tee.

Hours: 1.5 | Posted in Plumbing | Comments Off
10th April 2011

Random pieces

Long week with no work on the project; the busy season has begun at the office.  Some positive news on the financial picture front this week though, so I at least ordered a bunch of pieces that I’ve been holding off on, for upcoming installation (lights, exhaust, APRS stuff, ELT, oil cooler, etc).
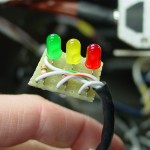
Got a few things done and half-done today; starting off with the wiring for the pitot indicator.  I bought my Gretz pitot secondhand, and it didn’t include the indicator board, since the previous owner had installed it in his plane.  No problem, it’s just a few LED’s with appropriate resistors, but I hadn’t yet taken the time to measure the voltage, find the right resistors, and build the board.  I used a chunk from a leftover piece of prototyping board, trimmed to fit the necessary components.  I also put a 4-pin Molex connector on it, for ease of connection (the soldering could happen on the bench, rather than in the plane) and service.  A matching connector on the wire behind the panel, and we’re in business.  I connected up the pitot for testing, and rolled the wing cart over to plug into the fuselage.  Power on, and everything looks good: the lights indicate as they should, the heater cycles, and the tube tip gets hot.  While I had the left wing hooked up, I checked the function of the leading edge light and made some minor programming changes in the VP-X (renaming some pins).
Installed a standard NMO mount and the Antenex Phantom Elite antenna I ordered, which will be for the APRS installation.  I also ordered the new MicroTrak RTG FA from Byonics, which should arrive next week.  The antenna is mounted halfway between the comm antennas and the transponder antenna.  I could have mounted it aft of the transponder antenna instead, but since the VOR/Loc antenna location is at the tail end, I thought it better to keep the APRS more distant, since the APRS and Nav signals are on nearby frequencies, while the transponder is removed by several hundred MHz.

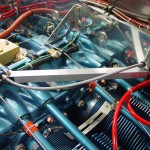
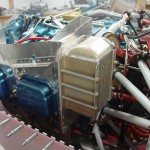
Thanks to some photos helpfully posted on a VAF thread, I decided to figure out the installation of the fuel flow sensor.  I fabricated a mounting plate from some scrap .125 bar stock, which attaches to a pair of engine mount tubes via Adel clamps.  The sensor mounts to the plate using it’s own 1/4″ mounting holes, for which I of course don’t have the correct length bolt (AN4-17A).  I also need to order the steel nipples for the in and out of the sensor; the sensor ports are 1/4″ NPT, rather than the 1/8″ commonly associated with the -4 fluid lines, so that will require the “-4-4″ nipple, which is 1/4″ NPT to -4 flare.  I cut off the spade terminals on the sensor wires and fit a 3-pin Molex instead, then ran the harness wires to the sensor location and connected the two.  I also installed Adel clamps to strain-relief the wires both at the sensor and at the connector.  Since the mounting plate floats in space between the two engine mount tubes, it’ll be possible to wrap the entire assembly in a piece of firesleeve.

With the FF sensor located, I set about measuring for fuel lines, and re-checked all the ones I’d measured previously.  I have a list of 8 hoses that need to be made up now.  There are two more yet to be measured, for the oil cooler lines, which won’t be evident until the oil cooler arrives and is at least mocked up in place.  Plus, the brake lines, but at least those are already known lengths.  The steel oil cooler fittings will also need to be ordered.

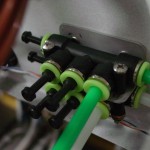
Moving back inside, I experimented with various locations for the pitot/static manifolds.  Fabricated a bracket to mount both, one atop the other, and mounted it to the subpanel.  I need to pick up some longer #6 screws to mount the manifolds to the bracket, though.  Trimmed and inserted the pitot and static lines, and a pair of jumpers for EFIS 1.

Also spent time cleaning the shop, tossing/recycling the large pile of debris that had collected under the plane.  Storm season is here, and I need to get at least one vehicle inside when weather threatens (as it is this weekend).  I figured out that I can move the fuselage 90 degrees to the right and Allison’s car will tuck nicely under the tail.

Passed 1300 hours in this session.

Hours: 8.2 | Posted in Electrical, Engine, Plumbing | Comments Off