4th March 2012

Moving on from tips

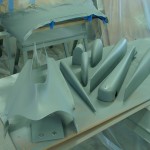
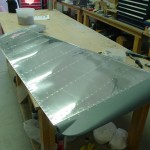
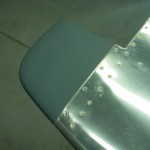
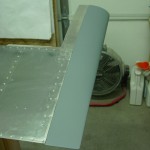
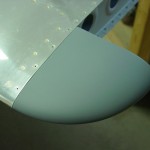
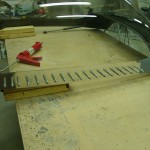
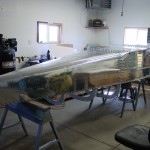
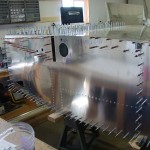
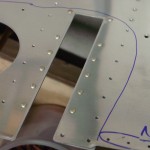
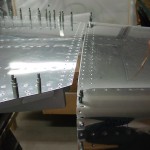
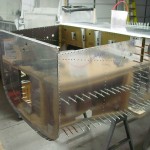
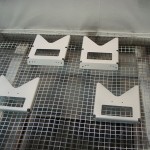
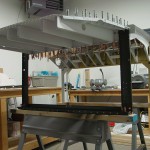
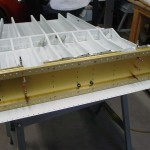
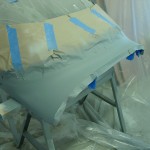
With the first batch of fiberglass parts done, today saw the attachment of all the empennage tips to their respective stabilizers and control surfaces.  The emp fairing was set aside for the day the tail is installed at the airport, and the spray booth collapsed until the next round.  The only remaining item for the emp is that the taillight screw holes on the rudder need to be tapped to remove some excess micro that got in them.  After that, the emp parts will make their way to the airport at some point, to wait with the wings for the Big Move of the fuselage.

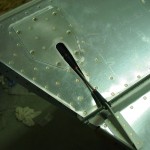
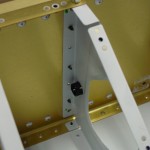
While working on the left elevator, also final-installed the trim pushrod and cotter pins.

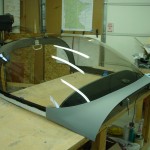
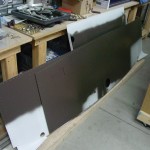
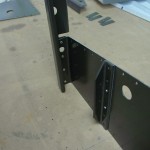
The plastic covering on the canopy was the original as shipped in the finish kit, and had become quite tattered, along with being covered in dust and overspray of all sorts — I removed it, and will cover the canopy with layers of saran wrap to keep it pretty in the interim.  Today, cleaned, prepped, and attached the canopy side skirt pieces to the canopy frame.  Currently, they’re clecoed in place to let the bead of Sika cure, then I’ll add the rivets.  Also fabricated the exterior canopy lift handle (pilot’s side only, thanks) and drilled to the frame.  The canopy is very static-y when cleaning with a microfiber cloth, which means it didn’t stay clean for long, but every dust particle in the shop was attracted to it.


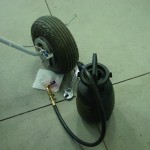
Re-bled the right brakes again, but still have a soft right brake pedal compared to the left.  I see no leaks, even under pressure, where air might be entering, so I can only blame the bleeder tank somehow.  Sort of disheartening, as the original system fill was rock-solid on both sides…too easy.  But the leaks at the pedals had to be fixed.  I wonder if draining the whole right side and refilling would provide better results.  I also wonder about the design of the bleeder valve, and whether air can’t find a path to enter there.

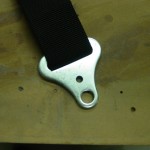
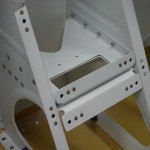
Decided to look at the installation of the crotch straps.  Pulled the seat pans and found that it would work well to simply drill a new hole in the crotch strap bracket, up from the giant factory hole.  I marked them in situ, and drilled both to 1/4″.  The geometry of this area requires an angle drill, but my largest bit is 5/16, so I will need to procure a 1/4″ threaded bit to complete the installation.

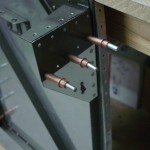
While messing around in the fuse with seatbelts, I happened to notice that four bolts were never put in the center section — whoops!  These are the bolts that go through the inboard tubing support brackets, just outside the fuel selector, top & bottom on both sides.  Obviously, I installed those bolts.

Hours: 7.2 | Posted in Center Fuselage, Gear & Fairings, Wing & Tail Joins | Comments Off
12th February 2011

The small stuff

Not alot of visible progress for the hours today, just working on a number of small things.

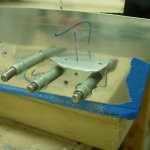
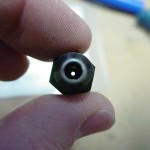
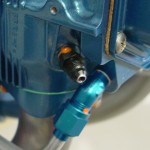
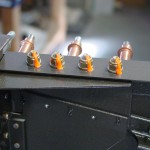
  • Assembled a .040″ restrictor orifice into a -4 straight nipple fitting, and installed into the #3 cylinder for pickup of manifold pressure.  The #10 sized orifice from McMaster-Carr (2943T887) works nicely in a -4 fitting size, just requiring the fitting to be tapped.  After tapping the fitting, I installed the orifice with high-temp threadlocker.  I also tapped the orifice from the hose side, rather than the cylinder side, so that if it were to somehow work loose, it could not travel into the engine, but into the hose.

  • Finished installing the wing wiring connectors by terminating the wires on the left wing.
  • Reinstalled the fuel vent line tubing that passes through the fuselage sides; torqued the fittings.  Cut the vent lines to proper length.
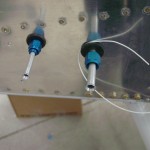
  • Smoothed and flared the ends of the fuel pickup and vent tubes that protrude from the fuselage.

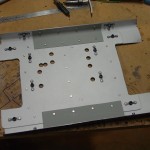
  • Riveted the doubler plate for the fuel pump to the tunnel cover.  Fabricated a pair of stiffener angles for the same cover, to beef up the sides of the assembly and reduce vibration.  Affixed the pump to the cover plate, and test fit it in the fuselage; tweaked a couple fuel line bends to get the selector-pump-firewall plumbing aligned.  Cut and terminated the fuel pump wires.

  • Put some temporary zipties on the tubing in the tunnel to hold things in place for now.
  • Removed the firewall passthru fittings to fabricate and install a doubler on the inside of the firewall.  I had used the thick aluminim spacer/washers that Van’s sends, but there was too much flex in the FW still for my taste; this beefed it up nicely.  Reinstalled fittings with doubler aft and spacers forward, and torqued fuel & purge return lines at the firewall.

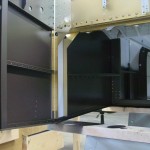
  • Installed the closure pieces for the inboard seat pan ribs, that bridge the gap which is cut to allow installation/removal of the control column.
  • Temporarily installed the roll trim assembly in order to find the correct angle for the metal tabs that bolt to the lower end of the control sticks, so I could torque the bolts on the rod ends that tie the sticks together in roll.  Also to see how the trim goes together.  Followed the plans for setting the spring lengths, but they seem as though they might be overly tensioned…need to see where others have ended up on the length.  The issue may be that the plans have you use the forward-left-most stick position to set the spring lengths, and without the elevators and ailerons attached to hit their stops, I suspect the stick travel is a fair bit more than it would be normally, which would result in stretching the springs excessively.  So, setting the spring length may end up part of the after-final-wing-mating task list.
  • Also torqued the bolt for the elevator pushrod at the control column.

I found that the Goop used on the stick grips cured well, and the grips are solid.  Also sent off what I hope will be the last of the minor revisions on the panel layout, so that should be cut sometime next week and on its way.  Hoping to have the harnesses from SteinAir sometime soon, as that’s all I’m waiting on to wrap up the airframe wiring.  Had made contact with the engravers about doing the placards for the panel, but they seem to be slow on the email (or at least haven’t replied yet), so I’m not sure the current status of that piece.

Hours: 6.8 | Posted in Center Fuselage, Electrical, Plumbing | Comments Off
30th January 2011

Tailcone closeout work

I’m trying to close out wiring and stuff aft of the center section, so that the wiring runs in the tunnel can be cleaned up and tied down, then work forward with the wiring.  To that end, I finished running all the wires I could aft of the center section, which today was the ELT remote (4-22 shielded) and the GPS signal run (3-22 shielded) which will feed both the ELT and the APRS tracker that I’ll mount in the same area.  That finishes the aft wiring, except for five wires: 4 audio cables (pilot & pax headset & mic runs), and the cable(s) to the magnetometer(s) — I’ll run wires for 2, since each screen with airdata needs it’s own magnetometer — all of which will be included in the harness kits from SteinAir, so I’m waiting to run those.

With most of the wiring aft of the firewall in place for the time being (until the harnesses are ready in a few weeks), I moved on to other aft-of-the-spar tasks — namely, the control system.  I removed, primed, and reinstalled the pushrod that connects the two sticks in the roll axis, and built the forward elevator pushrod, as well as bent and installed the tabs that bolt onto the control column to connect the roll trim springs.  I used a piece of light safety wire to thread the washers and rod ends into the sticks properly, but still need to torque those bolts.

I finally got around to some housekeeping — vacuumed out the forward part of the cabin of metal shavings and debris.  I need to reclaim my shop vac from the office and vacuum out under the seat pans, as I’m sure there is schmutz down there as well.  Also, taped over the intake to the fuel servo to prevent the shop spiders from taking up residence in the induction system.

Another task for the evening was to cut the sticks down.  I measured both sides and decided to cut off enough to compensate for the length added by the stick grips (~ 2.5″), plus another half inch.  Some builders cut them way down, but I’m taking a wait-and-see approach to that, as it’s easy to cut them down farther later, but far more difficult to add some back on.  After I cut them down, I (of course) had to load in the left seat and panel blank, and test it out.  The length seemed pretty comf0rtable to me, and it does not appear that they will hit the panel (using a ruler to simulate the ~1.5″ I’ m adding to the bottom of the stock panel.

I’m working with a gent who posted on VAF about doing some panel cutting for the cost of materials and shipping, and I think we have the measurements worked out; I’ll be drop-shipping an oversize blank to him this week for cutting, so that’s coming together as well.

Hours: 5.5 | Posted in Center Fuselage, Electrical | Comments Off
3rd April 2010

Milestone: the canoe is flipped!

This was the big day.  Allison was back in the shop, and we started the fun by re-setting the outboard floor stiffeners from yesterday, then completed the inboard stiffeners.  Riveted the aft row of rivets at the firewall (the forward row doesn’t get installed until cowling work).  There’s a few tricky ones in there: the outboard few where the firewall weldment is very nearby, and the couple which are almost under the inboard angle brackets where the engine mount bolts on.  With a few different bucking bars (including a big crowbar), we made it work.

While Allison took a break, I squeezed the longeron rivets that do not attach any top skins, leaving a patten of holes open on the left side for the clips that will retain the static air tubing.  Next, I climbed under the fuselage and riveted the aft baggage-rib-to-bulkhead rivets.

After that was done, it was on to the tailcone join, which went quite quickly, just a couple rows of rivets, and up the side of the conical bend area.

Allison showing off her rivets Fuselage riveting complete Fuselage riveting complete

With all the riveting done, there was nothing left to do but take the plane through its first (and only) aileron roll…  (can you do an aileron roll with no ailerons?)  The canoe is flipped!  Total build time to this point: 745.1 hours.  Now the real fun begins!

Flipped the canoe! Fuselage upright from aft Cabin area upright

Hours: 2.4 | Posted in Center Fuselage | Comments Off
21st March 2010

More fuselage riveting

Riveted the baggage wall ribs to the side skins, and the double row of rivets at the tailcone join, up as far as I could reach.  All the remaining riveting will require a second pair of hands, as my arm-length is maxed out.  After the riveting I could do was done, I putzed around looking at things on the fuselage and in the plans, shaping the picture in my head of how the next set of parts goes together.

Hours: 2.0 | Posted in Center Fuselage | Comments Off
20th March 2010

Fuselage assembly & riveting

Progress is being made on the fuselage riveting…I first set the two remaining rivets on the inboard floor stiffeners, then clecoed in the armrests and baggage side wall ribs.  The lower longerons were bolted to the firewall weldments; torqued, sealed, and the bottom floor skin clecoed in place, followed by the outboard floor stiffeners.

Lower longeron-firewall bolts Inside fuslage at 904 looking aft Fuselage ready to rivet

With all the components now clecoed together, there’s nothing left to do but rivet!  Working from a stepstool as a seat, I was able to reach about 2/3rds of the way up the side walls, and completed everything I could reach back to the 705 bulkhead, along with all the longerons and bulkheads aft of the 706.  I should be able to get most of the baggage walls and 705/706 bulkhead-skin rivets in a similar manner.  I was also able to reach about half the rivets joining the side skin to the outboard seat ribs, by reaching through the aileron pushrod holes.

Forward fuselage riveting progress Seat rib area progress Tailcone riveting complete

Hours: 5.1 | Posted in Center Fuselage, Forward Fuselage | Comments Off
19th March 2010

Fuselage riveting

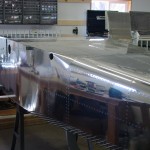
Finished up a couple odds ‘n’ ends, and started the fuselage riveting tonight.  I had read that the rivet immediately above the rear spar bars can interfere with the rear spar stub on the wing, so I dimpled that location for a flush rivet.  Also pre-riveted the center section doublers to the side skins as called for (though the plans call out 5 and 6 rivets, I believe they mean 6 and 7; Smitty came to the same conclusion.)  Riveted the angled side ribs to the skin on all rivets that aren’t shared with the side skin; this required temporarily removing the bolt from the rear spar to gain access to the rivet tail.

Riveting doublers to side skins

With those preparatory steps out of the way, it was time to marry the tailcone and center fuselage for the final time.  Once the double row of holes on the bottom was clecoed, I added the longerons and clecoed up to the 904 bulkhead, then added the side skins and clecoed those in place.  Firewall is added next–the angles clips and side stiffeners must be riveted to the firewall at this point if not already done, as access is limited once the side skins go on.

Tailcone and center fuselage ready for final marriage Tailcone and center fuselage bottom skins joined Adding longerons to fuselage

After the firewall was in place, I added all the structural pieces between the 904 and the firewall.  Squeezed the accessible rivets on the inboard floor stiffeners in preparation for adding the forward bottom skin.  Shortly after that, I squeezed my left pinkie finger, so it was time to call it a night.  The aftmost rivets on the floor stiffeners will need to be set with the gun, as they’re tucked too far under a flange to get at with the squeezer.

Side skins and firewall in place Forward fuselage structure clecoed in Floor stiffener riveted to firewall

Hours: 3.4 | Posted in Center Fuselage, Forward Fuselage | Comments Off
15th March 2010

Crotch strap install

With the install of the crotch strap brackets today, the fuselage is nearly ready for riveting.  Before the brackets could be fit, I riveted the two seat ribs to the bottom skin and vacuumed all the metal chips out of the center section.  After deburring them to prevent scratching up the ribs, the brackets were then fit in place, with spacers clamped between the fore & aft brackets to provide proper spacing.  The angle drill extension allowed me to get in there and drill — this cheapo extension feels like it may be dying inside, so hopefully it’ll hang on to life for a bit yet.  I would be tempted to replace it with a real angle drill with a small head, as the wider body on this one sometimes results in slightly angled drilling.

With the brackets removed, and holes deburred, I vacuumed the center section once more, etched and primed the brackets.  Discovered that the Stewart Systems primer is too thick for the Preval sprayers, so I’ll have to try it thinned down a bit…for now, I just loaded up the gun and shot with that.  After the primer had set (sped up by setting them under the infrared heater, which has been a godsend for cold-weather priming), I clecoed them in place and pulled the 40 blind rivets that hold them in.

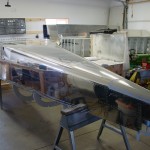
Fitting crotch strap bracket Priming crotch strap brackets Crotch strap bracket riveted in place

Clecoed the angled side ribs to the bottom skin in preparation for riveting, along with the forward tab that connects the rib to the 705 bulkhead.  Need to remember to revisit one rivet location near the rear spar on the side skins, that others report really should be a flush rivet to prevent interference with the rear spars later on.  After the angled ribs are riveted on, the tailcone can be attached again and riveting can commence.

Crotch strap brackets installed Baggage side ribs clecoed in place Center section nearly ready for tailcone join

Hours: 4.8 | Posted in Center Fuselage | Comments Off
14th March 2010

Pre-assembly odds ‘n’ ends

Heard back from Van’s on Tuesday about the seat pan ribs — Joe said it was alright to have the elongated holes, just use a nut and washer.  I’ll be more careful, next time, really!  (Browsing his build log for an unrelated topic, I saw that Chad Jensen actually made the same mistake; he fixed it by a different method–widening the crotch strap brackets–which would have been easier, had I any suitable scrap sheet…)

So tonight, after buying some paint supplies at Menard’s, I shot interior color on the side skins and longerons.  The paint goes on pretty nice with the gun (thinned 8oz/quart with xylol); I think it’s even easier to get an even finish than with the rattle cans, though of course the rattle cans are easier to deal with, esp. for small parts.  Also shot a scrap piece with some tan textured paint we picked up to try for the rudder pedals…I’ll give the test piece to my interior designer (hi, Allison…) for evaluation.

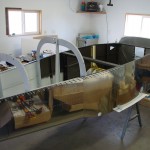
Side skins painted Pedal paint test panel

After the joy of painting ended, I squeezed nutplates onto the various uprights and stiffeners that receive them, and did some other riveting: the gear attach webs, spacers, and tank attach angles; that whole assembly to the side bulkhead uprights, the little angle “clips” to the side stiffeners, and the lower longeron gussets to the firewall side angles.  Touched up primer in a couple spots that needed it on some of the pieces.

Gear web and bulkhead assembly Gussets riveted to firewall side angle

Lastly, I addressed the center section: clecoed the two now-correctly-placed ribs in place and drilled the 3/16″ holes, then removed for deburring, spot primed where needed, and re-clecoed in place.  Once they were fit, I riveted their fore and aft ends to the bulkheads.  One hole in the lower rear spar got a little messed up in the drilling out earlier, and rivets kept clinching over; that one ended up with a short AN3 bolt (always a defeating moment, but probably the best thing to do…and no one will ever see it down there anyway).

Center section fixed Left aft #3 rib aft end attach

Tomorrow, I hope to finish re-riveting those two ribs (easy), and start putting the fuselage back together for final riveting.

Hours: 3.2 | Posted in Center Fuselage | Comments Off
6th March 2010

Primer prep, and a goof caught

Etched all the fuselage components that are done to date, except for the side and forward bottom skins, and the main longerons.  Those are big enough that they really need to be done outside (the etch solution eats the concrete floor, and they’re too big to fit in the big plastic tray I use for etching parts); we’ll see if the weather is good enough tomorrow to get it done.  Should be able to get the priming done this week.

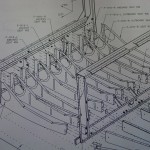
After tiring of etching, I thought I’d look at the install of the crotch strap brackets.  This is where I discovered a dormant screw-up that I was previously unaware of.  Turns out that when I initially fit the seat ribs to the center section, I got the inboard pair of F-916 ribs reversed.  That is, the inboard F-916-L goes on the right side, and vice versa.  Unlike some other parts of the plane, it’s completely possible to reverse these with no ill effects–the seat pans, bottom skin, and everything else all fit perfectly, so nothing screamed “wrong!”  Until I held the crotch strap brackets in place, when it became very evident what had happened.  The space between the ribs that are spanned by the bracket is about 3/4 of an inch too wide.  Since the center section isn’t yet attached to the tailcone, access to drill out and re-rivet these ribs isn’t a problem, so I drilled both out and put them in the correct orientation.  Easy enough, except for one thing: the 3/16″ holes that were match-drilled from the main spar, where AN3 bolts are inserted, are not in alignment with the line of rivets that runs down the forward flange of the ribs, but rather offset by a small amount.  This means that when the already-drilled ribs were flipped into the correct orientation, those 3/16″ holes are out of alignment by about 1/2-diameter, which would result in ovalled holes if drilled.  I’ve sent an email off to Van’s asking their advice–my guess is that they’ll say it’s fine, put in the bolt and move on, since that rib is also held in by a bunch of rivets.  But better to ask…if the ribs need replacing, it should be easy to do that, too…for $17.73 apiece, plus shipping.  Sigh.  I feel like I’ve made several stupid mistakes lately.
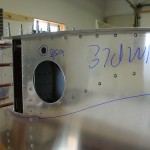
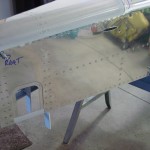
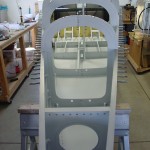
Seat rib installation drawing Moving ribs in center section Relocated rib in center section Misaligned hole on ribs after placing in correct location

(The ribs in question are the third in from each side on the drawing — the inboard “F-916-L/R outboard seat rib”.  Marked by the clecos on the second photo.)

Hours: 4.9 | Posted in Center Fuselage, Forward Fuselage | Comments Off