7th July 2011

Tailcone camping

Received a couple supply orders this morning, from SteinAir and McMaster, so parts were on hand to complete a few tasks.

Installed the intake gaskets and bolted the fuel servo and spacer/bracket to the sump.  I bought some all-metal steel locknuts in 5/16-18, which is the thread on the long studs AeroSport sent to me.  I’ve installed the standard-height ones, but even with a thin washer, the threads are only flush with the bottom of the nut, rather than the usual 1-or-2-thread protrusion we want (though they do appear to be fully engaged; there’s just no excess).  I installed them for now, torqued and sealed, but will ask around to see if this is a real problem; if so, whether using shorter nuts (which I also bought) would be acceptable here, or if I’ll need to locate and install longer intake studs (ugh).  In other FWF news, torqued the engine mount bolts and installed cotter pins.

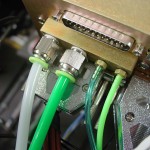
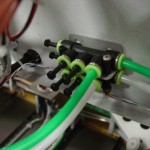
Installed the quick-connect fittings on EFIS 1, into which were installed the pitot and static tubes.  Blowing lightly in the pitot line at the wing root caused the airspeed to come alive, and capping the tube off cause it to hold steady, so the system within the fuselage appears to be tight.  Sucking lightly on a static port indicated a climb, so that’s good too, though that one isn’t guaranteed leak-free, as I wasn’t able to plug the opposite port and hold suction; that test will come later.

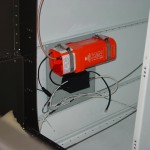
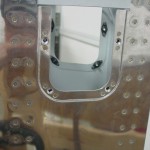
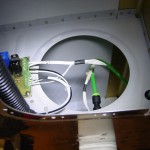
Moving toward finishing the ELT install, I drilled a hole in the aft top skin for the antenna, and fabricated a circular doubler to go inside, per the installation guide.  Routed a coax from the ELT to the antenna, secured and terminated.  Hint: a BNC connector doesn’t fit through the 1/2″ hole for the antenna, and if you install it with the coax pulled to the outside because it’s easier, you’ll have to cut it off and do it again, the hard way…don’t ask how I know.  Routed and secured most of the wiring around the ELT itself, though the wiring is not done yet.  Some fiddly soldering on a 4-pin DIN needs to be done to hook up the power and GPS signal (why they chose that awful connector, I don’t know…).  And, I need to terminate the RJ-11 ends, and of course my RJ crimper is in my toolbag at the office.

In the same area, installed a nutsert for the APRS box, and secured that along with it’s wiring.  Placed a couple ziptie bases along the wire run to the RS-232 service port and status indicator light and secured those wires, as well.  Still haven’t seen any pings from the APRS show up on the internet, though that’s not surprising as it’s been in the garage the entire time.  I might push it out someday and see if it’ll ping, but with the bottom-mounted antenna, I don’t really expect to see anything until she’s airborne.

And as long as I was working in the tailcone, I finished securing the wires that run along the floor, including the addition of a few ziptie bases.  Also removed the test-fit magnetometer mount, deburred and primed it so it can be riveted in place.  I see at least a couple more trips into the tailcone (mag/mount install, finish the ELT, install the elevator pushrod) in my future, but hopefully I’ll be done with that soon, at least for awhile.  Once you’ve got camp set up in there, it’s not so bad, but getting in and out is a bear…and even more fun when you get yourself inserted and then realize the tool you need is still on the bench.

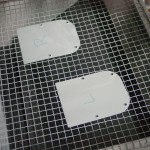
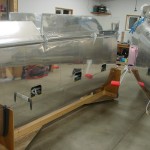
In keeping with the tailcone theme, but on the outside, I installed the rudder cable fairings that were prepped yeterday.  The night’s last act was to install the nutplates on the elevator horn inspection holes, then prep & prime the cover plates.

Checked the FAA registry tonight and saw that my N number is now showing as assigned, with the proper details of my airplane.  So, it appears my registration has been received.  I’ll laugh if the state tax people call up in the middle of the current government shutdown to ask for their pound of flesh…

Hours: 5.2 | Posted in Aft Fuselage, Electrical, Engine | Comments Off
6th July 2011

Odd jobs

Trimmed the UHMW block for the top canopy latch, and drilled the holes which bolt it to the canopy frame.  Found a washer that fits the shaft of the latch, and drilled the shaft for a cotter pin, but discovered that the washer’s OD is too large to fit on it; it hits the canopy frame.  I’ll have to dig deeper in the bags, as I must have pulled the wrong washer.  I’m also planning to install the spring modification that others have done, which allows the latch to tuck up parallel to the canopy frame, eliminating the possibility of locking oneself out of the plane if the latch were to slip.

Installed plugs in the open ports of the pitot & static manifolds.  I installed these manifolds to allow for easy expansion in the future, to run lines to a second/third EFIS, autopilot, and whatever new gadget comes along that needs it.  I haven’t found the second long screw I bought to secure these, though…looking like a fresh one from Menard’s.

Installed the center bearing block for the rudder pedals.

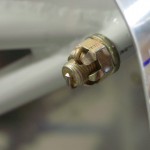
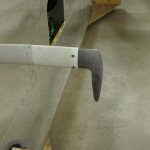
Shaped the upper body of the Gretz pitot tube slightly as needed to fit into the pitot mast, put the nutplates on the mast, and installed it to the wing.  Then, installed the pitot tube to the mast after trimming the pressure line and wires as needed, and wired/plumbed it.  I decided to try using a straight quick-connect union to join the 1/4″ copper line from the pitot tube to the nylon tubing which runs through the wing, since they’re supposed to be OK for all types of tubing.  If it doesn’t work, there’s plenty of room and remaining length on the tubes to do it a different way.  With the pitot installed, I rolled the wing cart over to the fuselage and plugged the left wing in, to verify operation of the heater.  Cooling it off with a cupful of ice water caused the heater to kick on, and the indicators indicated appropriately.  Check.

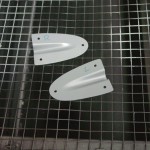
Drilled attachment holes in the rudder cable fairings, then match-drilled them to the fuselage.  I went with one hole in each corner for a total of three; if this proves not enough, it’ll be easy to add two more holes halfway along the sides.  I plan to attach these with blind rivets; easy, and easy enough to remove with a drill if needed later.  Primed the inside surface of the fairings and left to dry.

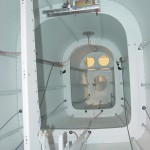
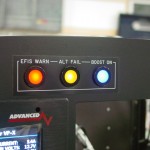
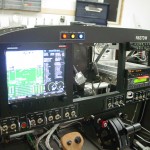
When testing the pitot heater, I had all three of the annunciator lights lit up on the panel, and grabbed a couple photos.  I really like how these LED indicators worked out, even though they were a bit pricey.  They may end up being too bright at night, but with the way they’re wired, it would be simple to add a bright/dim switch, or even a dimmer pot.  And, they should be dark in the normal condition, so it may be a non-issue.  (The camera makes them look brighter than they actually are, too; the hotspots in the photo aren’t apparent to the naked eye.)  I’m still very happy with the panel design & layout; putting that together was, as expected, one of the highlights of the project.

Hours: 3.1 | Posted in Accessories & Mods, Aft Fuselage, Canopy & Frame | Comments Off
5th June 2010

Aft fuselage miscellany

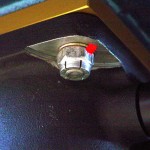
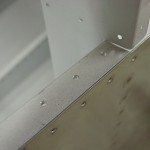
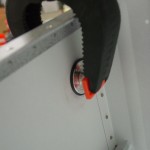
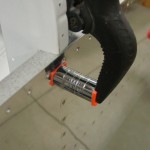
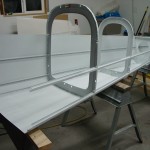
Not a whole lot of productive shop time today, but I was able to cross a couple things off the list: drilling the gussets which fix the tailcone bulkheads to the longerons, and installing the static ports.  I chose to proseal the ports in place (after removing a circle of primer), and clamped them while the proseal sets by using a large socket, with the drive hole placed over the protruding port.  I’ll give it a few days to set up before removing the clamps.  I did move the ports forward by about 3/16″ from the suggested location, due to interference between the flange of the port and the flange of the bulkhead.

Gusset plate attach holes in longeron Static port clamped in place Static port clamped in place

Other niggling items: I reversed the direction of the rudder cable snap bushings in the 706 bulkhead, so they are inserted from the tailcone, which is accessible via the baggage wall, rather than from behind the riveted-in-place aft baggage side panel.  I’ve read that you need to remove the snap bushings in order to squeeze them a bit to allow the end of the cables to pass through, and this will allow that removal to happen.

I also happened to notice that two rivets were never set in the bottom of the 706 bulkhead, at the very bottom of the tunnel.  Those will not be fun to get at now (they should have been set before the bulkhead was installed in the tailcone…not sure how they were missed!  They will require an offset set and some contortions, but should be doable even if a pain.

Hours: 2.0 | Posted in Aft Fuselage | Comments Off
11th January 2010

Tailcone riveting done

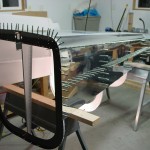
Finished riveting the tailcone assembly, easy enough.  Then, started to disassemble the center section in preparation for the replacement of the right side pieces.

Tailcone riveted

Hours: 2.4 | Posted in Aft Fuselage | Comments Off
10th January 2010

Tailcone riveting

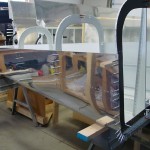
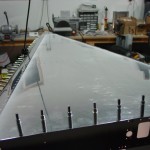
Riveted the two aft bulkheads to the tailcone skin, then clecoed the entire tailcone together.  Set a rivet at each bulkhead/stringer/skin junction (so, 4 places per bulkhead) before flipping the tailcone upside down on sawhorses for riveting.  Allison graciously drove all the bottom rivets I couldn’t reach solo, while I bucked from inside the tailcone.  After that was done, we flipped it back right-side-up, and I continued riveting; ended the night with about half of the right side done.  Should be able to finish this up tomorrow night.  Space in the shop getting rather tight now with two cars, garden tractor with snowblower, mower deck, generator, wing cart, workbench, and tailcone all competing for floor space…

Aft bulkheads riveted to tailcone skin Clecoing tailcone for riveting

Riveting bottom of tailcone Tailcone bottoms rivets done Riveting tailcone; levels to check twist

Hours: 5.5 | Posted in Aft Fuselage | Comments Off
9th January 2010

Tailcone prep & prime

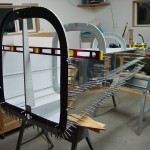
Etched and primed the stiffeners and skins of the tailcone, plus some touch-up on bulkheads where primer had been scratched during the fitting process.  Now ready to reassemble and rivet.

Aft tailcone parts primed Priming aft side skin

Hours: 4.2 | Posted in Aft Fuselage | Comments Off
2nd January 2010

Tailcone dimpled

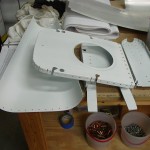
Dimpled the tailcone components; they are now ready for etch & prime, but I am essentially out of primer. Also drilled and dimpled the #8 screw hole that will eventually hold the sleeve for the rudder cable in place as it passes out of the tailcone.

Ordered more primer and etch solution from Stewart Systems, which will hopefully arrive later this week, along with a boxful of Scotchbrite pads and some other assorted items: 1″ deburring wheels and the like from Cleaveland Tool, just down the highway in Boone, IA.

Trying to decide whether to join in on the group buy for Andair boost pump/filter/mount assemblies, which could save 12% or so off regular price, though I won’t actually need those components until later…and the possibility of them having an Oshkosh pump/filter/valve deal again this summer as they did last summer?

Tailcone parts, ready for priming Tailcone skins ready for priming

Hours: 2.4 | Posted in Aft Fuselage | Comments Off
1st January 2010

Tailcone drilled & deburred

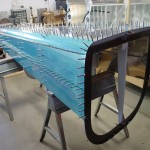
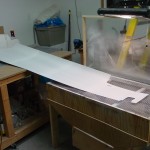
Finished drilling the J-stringers, then match-drilled the rest of the holes in the tailcone. Flipped it upside down to drill the bottom, rather than crawl on the January-cold cement.   Then it was time to take it apart again, and let the deburring begin.  Ran through the bulkheads, stiffeners, and skins, leaving them ready for dimpling.

Tailcone looking from aft Drilling bottom of tailcone

Hours: 6.5 | Posted in Aft Fuselage | Comments Off
31st December 2009

Tailcone & preliminary J-stringers

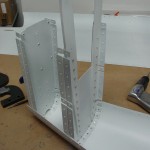
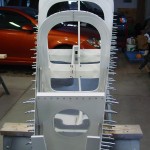
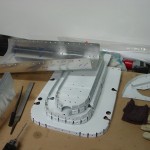
Finished clecoing the tailcone together — bottom skin, side skins, bulkheads, stringers, and the aft tailcone skin.  This last part is the trickiest, and required a couple fittings to get it satisfactorily in place; even then, it’s not perfect, but some of the holes that attach it to the side skins & J-stringers are slightly off as you move aft.  The J-stringers are not pre-drilled, so there’s no issue there, but some of the other holes may become slightly ovalled; I’ve read of others dealing with this frustrating issue by just living with it, and/or moving up to 1/8″ rivets.  Works for me; the worst holes (aft-most) are only out by a max of 1/2 diameter.

Bulkheads clecoed to bottom skin Side skins clecoed to tailcone Aft end of tailcone assembly Classic view, looking down tailcone

Began fitting the J-stringers to this skeleton by drilling every 4th hole and placing a cleco…will come back in the next session and do every second hole, then go back and drill the remainder.  I did make a little block that made the drawing of the center line easy–one thick piece of cut-off bar stock, with a thin piece attached to it at a right angle with a cleco clamp.  Drill a #55 hole (just the right size for a fine-point Sharpie) at the required distance, then slide the whole thing down the length of the stringer to be marked, holding the Sharpie point through the hole.  I can’t remember where I got this idea from awhile back, but it works a charm.

Centerline marking tool

Hours: 2.9 | Posted in Aft Fuselage | Comments Off
30th December 2009

Tailcone beginnings

Bought a third sawhorse to match the two I already had, saving me from buying a whole set of three.  Upon confirming that it was the same height, how could I resist setting the bottom tailcone skin on it and clecoing in a couple bulkheads?

Hours: 0.4 | Posted in Aft Fuselage | Comments Off