3rd
July
2011
Working the list
Hours: 8.2 | Posted in Cowling & Baffles, Engine, PlumbingWorked on various things today, all generally related to FWF…
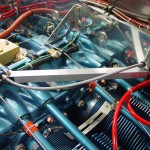
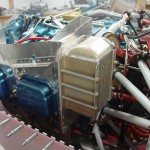
- Measured for, built, and installed an angle brace for the oil cooler. To avoid interference with injector lines, ignition wires, and purge valve cable, I tied it into the clip that was fabricated earlier for the purge valve cable. This, as promised, stiffened up the oil cooler quite well.
- Made up the tubing spacers which go between the flanges of the oil cooler to keep it from being deformed by the mounting bolts. Installed spacers and cooler, after removing/reinstalling the aft left baffle to drill the bolt hole for the brace.
- Worked through the engine control linkages FWF. Drilled the mounting brackets for bolts and installed, torqued rod ends, and replaced temp fit bolts with proper length ones, torqued and sealed all fasteners. Was going to install the fuel servo & bracket, but it seems I never ordered the proper nuts (5/16 coarse thread all-metal locknuts) to do so.
- Unbolted the purge control cable and threaded it back into the cabin in order to install the eyeball passthru in the firewall. Re-ran the cable, installed final bolts, torqued & sealed fasteners.
- Riveted the left side heater air takeoff and screen to the baffle ramp.
- Torqued and sealed the brake lines which run from the fuselage to the caliper. At this point, the brake system is completely installed (except for fluid).
- Looked at the exhaust system hanger clamps; it appeared that these could be adjusted on the pipe, but they are fixed in place with a welded pin. I don’t understand how the hangers mount and where they run to, so will need to do some research. The brackets seem to me like they’re facing the opposite direction of where they should (with the side ear facing outboard instead of in).
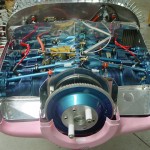
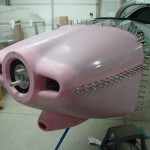
- Worked on refitting the top cowling, which means trimming the baffles. On this initial trim, the goal was to get them trimmed just far enough that the cowling can be fixed in place, not to get them to the final cut line. It took several initial trims, then I spaced the top cowl up by clamping some wooden shims across both cowls, setting the top-to-bottom spacing consistent all around. Then, cut a block and drilled a hole the same distance from one end as the space between the cowls. Reaching inside with a sharpie through the hole in the block, I was able to slide it around and mark the contour of the cowl on the baffles, to establish a trim line. (This method stolen from a VAF post) Removed the top cowl and trimmed to the line, then a couple more re-fits to tweak, and it’s fitting well. There will be more trimming ahead, for sure, but this was a good start.
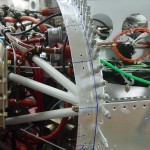
- In order to fit the top cowling, the camloc strips were reinstalled to the firewall edge, after having excess width trimmed from them (1/2″ trim, for a 2″ total width). These are not yet drilled for the camlocs, so that 1/8″ clecoes can be used to secure the cowling to the strip. The camlocs won’t be installed until the strips are installed, which isn’t until after the top skin is installed. Chicken-and egg, yes…and there must come a point where the easy access under the top skin needs to be sacrificed in the name of getting the skin on so progress can be made, but not yet.
- Neighbor Jeff and his brother stopped in to check out the progress.
And, crossed the 1400-hour mark tonight.
