31st
December
2009
Finished clecoing the tailcone together — bottom skin, side skins, bulkheads, stringers, and the aft tailcone skin. This last part is the trickiest, and required a couple fittings to get it satisfactorily in place; even then, it’s not perfect, but some of the holes that attach it to the side skins & J-stringers are slightly off as you move aft. The J-stringers are not pre-drilled, so there’s no issue there, but some of the other holes may become slightly ovalled; I’ve read of others dealing with this frustrating issue by just living with it, and/or moving up to 1/8″ rivets. Works for me; the worst holes (aft-most) are only out by a max of 1/2 diameter.
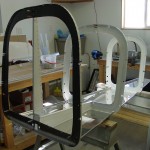
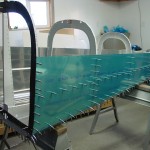
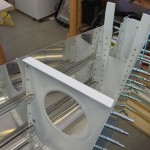
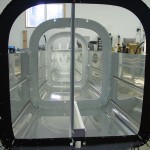
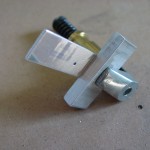
Began fitting the J-stringers to this skeleton by drilling every 4th hole and placing a cleco…will come back in the next session and do every second hole, then go back and drill the remainder. I did make a little block that made the drawing of the center line easy–one thick piece of cut-off bar stock, with a thin piece attached to it at a right angle with a cleco clamp. Drill a #55 hole (just the right size for a fine-point Sharpie) at the required distance, then slide the whole thing down the length of the stringer to be marked, holding the Sharpie point through the hole. I can’t remember where I got this idea from awhile back, but it works a charm.
Hours: 2.9 | Posted in Aft Fuselage |
30th
December
2009
Bought a third sawhorse to match the two I already had, saving me from buying a whole set of three. Upon confirming that it was the same height, how could I resist setting the bottom tailcone skin on it and clecoing in a couple bulkheads?
Hours: 0.4 | Posted in Aft Fuselage |
29th
December
2009
Finished final assembly on the bulkheads by riveting the area around the pitch bellcrank on the baggage bulkhead, and bolting the seatbelt anchors in place. I did realize, looking around the web later on last night, that I riveted the reinforcing angle to the F-728 channel prematurely — when the manual said “leave the 728 channel clecoed for now,” I took that to mean that the 728 assembly was to be clecoed to the bulkhead until later. This is indeed the case, but they also want you to leave the angle off; looking forward in the manual, this appears to be for better access to buck some rivets, though I’m not entirely sure. Since this piece isn’t permanently riveted in place for some time yet, I can always pull it and drill out the couple dozen rivets holding it together.
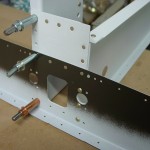
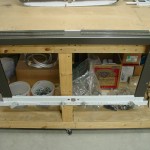
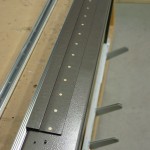
I do rather like the warm dark brown of the interior paint…just cheap Rustoleum Hammered, Dark Bronze color. I was originally intending something lighter, but this was available, priced right, and Allison chose the color from the various options. It’ll definitely guide upholstery color choices, and perhaps even affect exterior paint color, but that’s all fine. I’ve seen pictures of both light and dark interiors. I like the way the rivets look against the dark paint as well, which is why I’m going to the effort to paint the pieces before assembly.
Cut the J-stringers to length, and trimmed the ends to fit the bulkheads…this area is a bit confusing, since the plans show an aft trim detail, but no forward detail…the manual says “trim ends.” Holding things together as they’ll eventually go, it’s clear that the forward ends need to be trimmed as well. (Smitty’s site concurs.) A cutoff wheel in the Dremel makes quick work of the cuts here, and a quick debur of the trimmed ends leaves us ready to begin assembly of the tailcone. (Ok, there is one more middling task–to draw a centerline on each of the J-stringers.)
Hours: 2.1 | Posted in Aft Fuselage |
28th
December
2009
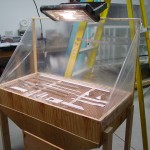
After an afternoon of etching (thankfully, the parts are generally small enough to be rinsed in the kitchen sink; winter priming the skins might pose a bit of a problem…), I put the newly-constructed priming table to the test. It does seem to have worked quite well, with no paint on the cars, floor, etc. The furnace filter, on the other hand, was quite covered in paint, fulfilling it’s intended role. The drying of the primer, a problem during last winter’s wing rib priming, was greatly aided by clamping a two-tube quartz infrared heater to a ladder to suspend it over the table; this kept things moving at a decent pace, and also provided some extra light from the built-in halogen worklight.
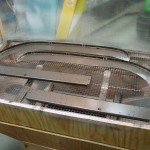
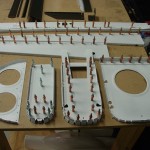
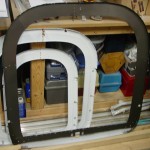
Using some photos from Mike Behnke’s log, I determined which parts would be visible from the cabin interior–those received the Rustoleum hammered brown paint over the primer. This was basically the sides and top of the 705 bulkhead, and the forward side of the 706 “baggage” bulkhead.
Once the priming was finished, I cleaned out the gun and had some dinner, followed by a bit more work–it’s hard to resist assembling some parts. I riveted together all the aft bulkheads, and most of the 705 and 706 bulkheads, which need just a few more parts attached, before calling it a night.
(Pointless note: beginning with the entry of 11/29, I’m experimenting with the fullsize pictures being at a larger resolution, 1280×960, than they were before…this saves me the step of having to resize them all before uploading, as my camera takes them at this size)
Hours: 9.3 | Posted in Bulkheads |
27th
December
2009
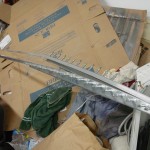
After building the priming table and cleaning up the shop, I needed to get the longerons out of the way to make space for priming…why not bend them too? I had to move the vise to the main workbench, but the bending of the longerons went fairly easily using the “Orndorff method.” The only glitch was that there is some minor scratching of the angles, despite having padded the vise jaws with 2 layers of rubber drawer liner, plus masking tape–so that’ll have to be smoothed out. Fitted the canopy decks to the longerons at the appropriate place, and drilled them together before setting them out of the way…at least as out-of-the-way as you can get 15′ pieces of angle with odd bends in them.
Hours: 3.0 | Posted in Aft Fuselage |
27th
December
2009
Before progress can continue, some changes in the shop needed to occur, which ended up taking most of an entire day to effect.
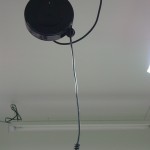
Mounted up a pull-down cord reel Allison got me for Christmas; when I built the shop, I installed an outlet on the ceiling for just this purpose:
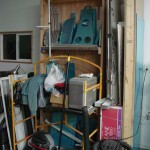
Built a simple shelving unit out of the fuselage crate, to get it off the floor and free up floor space to build the tailcone, especially important now that the garden tractor has the snowblower mounted for the winter, and is competing for even more space, and not wishing to throw a car out into the snow and freezing rain:
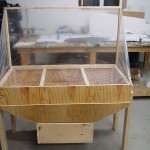
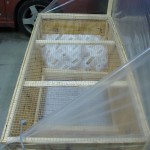
And finally, built a downdraft priming table of sorts, with a 20″ box fan, a furnace filter, half a sheet of 1/4″ plywood, some 1×3′s, and other scrap bits of wood from around the shop. The box fan is mounted in the box at the bottom, and draws air down through a furnace filter suspended over it; air which is pulled down through the hardware-cloth table surface on which the parts to be painted are laid. Plastic sheeting on a simple frame should help to contain overspray as well. A slot left open just above the filter allows it to be removed and replaced with a fresh one. This will hopefully make winter priming possible, more easily than last winter’s garage-door-frame-and-plastic-sheeting assembly, which had airflow and heat issues.
Posted in Shop |
5th
December
2009
Finished deburring the rest of the bulkhead components, and cut the tapers into the bars for the 711 bulkhead…yes, 40 inches of taper with a hacksaw. Not having the ability (space- or time-wise) to prime these parts soon, I rather continued by clecoing the aftmost bulkheads together and fitting them to the tailcone skin. Or rather, fitting the tailcone skin to the bulkheads. This is a notorious place that needs a bunch of trial-and-error fitting, so I spent some time assembling and disassembling, adjusting the bends of the tailcone skin until things were fitting well. Also pulled the blue plastic off the tailcone skins.
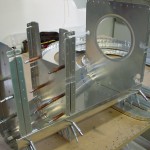
Flipped to the next page in the manual and saw the next big task–longeron bending. Nothing to do but pull them out, so I did. Clamped them together and marked the measurements, then wrapped up for the day. I need to get a bagful of small C-clamps, in preparation for the “Orndorff method” of longeron bending, and also figure out the business people talk about with marking the longerons every inch. Located and removed plastic from the canopy side decks, which are used to set the longeron bends.
Hours: 4.2 | Posted in Bulkheads |


