28th
September
2009
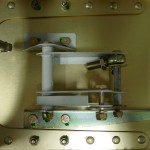
Some odds and ends on the ailerons…put torque-seal on the bracket bolts, short pushrod ends, and put the ailerons back on the wings for safe-keeping. Spent some time tidying the shop as well. Still haven’t primed the long pushrod parts, as it’s been an insanely busy week.
Hours: 1.0 | Posted in Ailerons |
21st
September
2009
Prepped the long aileron pushrods for primer, along with touching up spots on the wing needed to be spot-primed after assembly. Greased and installed the aileron bellcranks; torqued the bracket-spar bolts, and the pivot bolts. Also replaced the 4 bolts on each aileron that may have been overtorqued with fresh bolts & nuts. The removed ones showed no signs of distress, but better to be sure than wondering when it comes to control surfaces.
Hours: 2.4 | Posted in Ailerons |
11th
September
2009
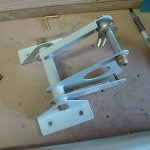
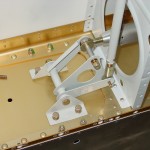
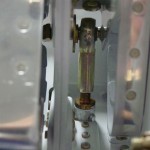
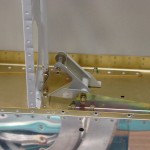
Spent some time monkeying with the internal workings of the wing. Reamed the bellcrank bushings and turned them down to the proper length, then assembled both bellcranks. Some of the bolts that came with the autopilot servo install kit are too short, so it looks like I will need to order a few longer bolts…add to the list. I also need to look up what an appropriate grease is for the bellcrank bushings–the manual says “your favorite multipurpose grease.” The stuff I have says it is rated to -20F. Presumably, the possibility exists that the thing could be colder than that at altitude, so is it appropriate? (Of course, my truck is lubed with the same stuff, and has worked fine in temps colder than -20F…) I’m sure there’s a common aviation grease of some sort for this purpose, too.
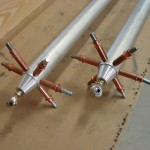
Cut and drilled the pushrods, making them a bit longer than plans, as I’ve heard of some people wishing they had, when they had a hard time obtaining the required amount of thread engagement on the rod ends. After dosing the insides with primer, I assembled the short steel pushrods (riveted per plans), but the longer aluminum ones still need to be primed & riveted. Also had a bugger of a time locating the jam nuts for the rod ends (hint: look in the bag marked “spar bolts & misc”).
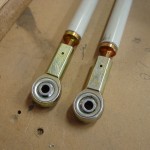
Temporarily put the bellcranks in the wings (I didn’t realize before that the bellcrank brackets had to come out, as the center bolt is too long to insert with the bellcrank in position.) and set the pushrod length using the straightedge aligned with the tooling holes and the bellcrank alignment tool. I’ll have to get the protractor out and see if there is enough aileron travel the way it is, or if the spar pushrod holes need to be relieved to allow more clearance; the pushrod swings up/down and in/out as it moves through its travel.
Hours: 6.2 | Posted in Ailerons |
23rd
August
2009
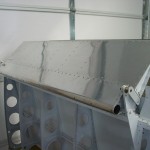
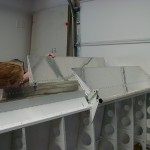
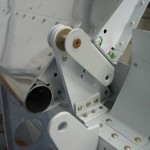
Finished up the ailerons by drilling the brackets to the spars, then bolting them in place. Those bolts/nuts are hard to get at with even a small open-end wrench, so I once again had to estimate the torque by “feeling” the torque wrench and trying to apply the same force to the bolt. Spot-primed where the tigthening process had scuffed some primer off, and added torque-seal to all the bolts. Messed around attaching them to the wing, and left them attached for storage; not all the attach hardware is in place, and none is tight, as the book seems to indicate that they’ll come off again in the process of fitting the bellcrank & pushrods.
The up travel on the aileron is limited by contact in the hinge brackets (later by the physical stop, once installed); down travel seems to be limited by the nose of the aileron contacting the bottom of the top wing skin/gap fairing. This is the same on both sides and appears to be normal, but I don’t have a tool handy right now to measure the up/down travel to verify things are to spec.
Ailerons are done!
Hours: 2.4 | Posted in Ailerons |
22nd
August
2009
A good long day (and a beautiful weather day, at that) with ailerons. Started off by finished up the deburring, drilling, dimpling, countersinking, and the like remaining from yesterday’s session. Followed that up with an etch-and-prime lunch, wherein I managed to tear a hole in my rubber etching glove with enthusiastic scotchbriting (luckily, on the final piece). The full sun really makes the priming go much faster, as the light coats dry quickly. Leaving them in the sun after they’ve dried to the touch also seems to provide a harder finish faster, allowing progress to move forward.
Let the assembly begin! I riveted the reinforcements plates to the spars, then added the counterbalance assembly, main ribs, then skins, following the recipe. Riveting of the skin-to-spar lines was easy enough with the ailerons clamped upright; standing on a short stepstool gave the right height, and the tungsten bar slips inside easily. Left first, then right.
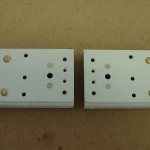
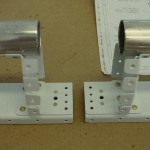
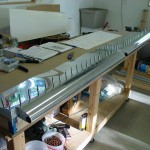
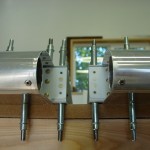
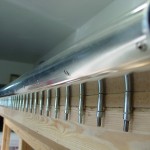
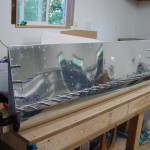
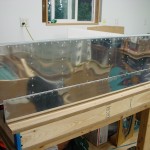
Clamped and weighted everything down to the flat table for riveting the skins to the ribs, then riveting the trailing edge closed. I used the same process I used for the empennage surfaces, where the TE rivets are squeezed entirely, not back-riveted like the manual shows. No Proseal, either. Just dropped clecoes in every hole, using a random pattern to insert them, then removed them randomly, one at a time, and squeezed a rivet in its place.
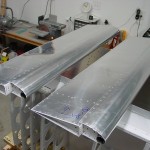
Both TE’s are straight, and the left aileron is straight, with no measurable twist. The right one might have 1/32″ or so of twist evenly across it’s length. My guess is that something got out of whack during the initial riveting process (counterbalance, perhaps?) and all the clamping & weighting couldn’t hold it true enough for the rib & TE riveting to take it out. I don’t know how big of a factor that may be, so I’ll do some reading and see if others have made notes. The manual doesn’t have a clear “x amount of twist is acceptable” like it did for the wings, but it seems like this is a small amount. It wouldn’t be difficult to build a replacement aileron at a later date, should it prove to have undesirable flying characteristics.
Hours: 10.4 | Posted in Ailerons |
21st
August
2009
No work today, so I was able to get in a long afternoon/evening session. It’s supposed to be a beautiful weekend after the last few days of clouds…thoughts of flying in the clear fall-like weather are a good motivation. Allison has been after me to schedule a flight review (my flight review currency expires at the end of August), but I haven’t yet. It’s been over a year since my last flight (7/4/08).
Bought a couple bags of pea gravel from the hardware store for weight; discovered that lead shot is expensive! The gravel was a couple bucks a bag; not as easy to handle, but cheap and gets the job done.
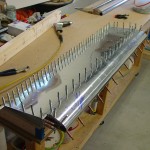
Finished off the drilling of the left aileron components and the trailing edge, then took it apart for deburring, and countersunk the various parts. Drilling the stainless tube went alright…used Boelube and cranked the air pressure down to 20psi on the drill for a slower speed. Didn’t even use up one bit (I had extras on hand, as I’d read reports of others going through several).
After the left one was set aside (ready for skin dimpling and priming), I brought the right aileron through all the steps the left one has seen in the past week. It’s now disassembled, awaiting deburring ans countersinking. With luck, tomorrow I should be able to get everything finished, primed and ready for assembly.
Hours: 7.0 | Posted in Ailerons |
18th
August
2009
Built the flat table for aileron & flap assembly tonight…that sucker must weigh upwards of 100 pounds. The top and bottom are half-sheets of 3/4″ MDF, and the structure is most of four 2×4′s, put together with plenty of screws. It checks out flat with a 4′ straightedge, so I imagine it will serve the purpose. Also reading up on the trials and tribulations of building the control surfaces on others’ build logs.
Hours: 1.5 | Posted in Ailerons |
17th
August
2009
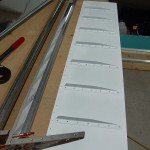
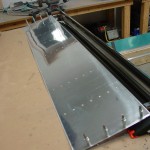
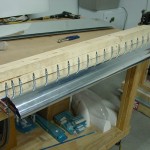
Back-riveted the stiffeners to the aileron skins, then proceeded with the assembly of the left aileron. Clecoed the bottom skin in place, drilled the ribs, deburred and dimpled. Then installed the bottom skin with the two “keeper rivets”, and clecoed the top & nose skins in place as described. The nose skin puts a great deal of force on the aileron, and the trailing edge goes really wavy, but I’ve read this is normal. Tomorrow’s task will be building the flat table for the driling & riveting of these guys, and I need to get some weights of some sort–sandbags or lead shot, I’m thinking–to hold the aileron flat to the table.
Hours: 2.0 | Posted in Ailerons |
16th
August
2009
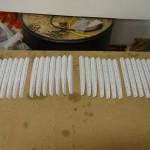
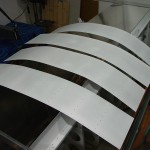
Allison helped out tonight, dimpling the aileron skins & stiffeners while I etched for primer. After everything was dry, I went ahead and shot the primer–in a race with the setting sun–so the stiffeners are ready to back-rivet to the skins.
Hours: 3.1 | Posted in Ailerons |
15th
August
2009
Back home after two-and-a-half weeks away on “vacation.” Almost three weeks since I did any work on the plane, but I’m ready to dive into the ailerons. To that end, I started out with the tedious work — cutting, shaping, and deburring the 28 aileron stiffeners using snips, disc sander, and scotchbrite wheels.
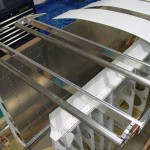
Next, clecoed the aileron spars together with the nose ribs, then marked and drilled the counterbalance pipes (after deburring the ends to remove the very sharp stainless steel burrs). I cut a V into a scrap of 2×4 to make a holding fixture for drilling the pipe — slowest speed on the drill press, light pressure, and Boelube made easy work of the holes.
Put in the temporary rivets to attach the counterbalance to the nose ribs, and clecoed the ribs back onto the spar, then clecoed the end ribs in place. I goofed when I was match-drilling the reinforcement plates, and drilled out a couple wrong holes, which were the two holes intended for -3 rivets on the left outboard rib. I can’t see any reason why simply upgrading to -4 rivets won’t work there, or even oops rivets. Luckily, I caught myself before I had drilled all four sets…just one set is big.
Identified the various top & bottom skins and marked the for left/right, top/bottom, inside/outside, then drilled the stiffeners to all four skins. Finally, more tedious work — deburring the holes in all four skins and 28 stiffeners. Finished up by edge-finishing the four skins, and scuffing the lines where dimples are to go. The stiffeners & skins are ready for dimpling, prep, and priming.
Hours: 4.9 | Posted in Ailerons |


