31st July 2011

Moving day, part the first

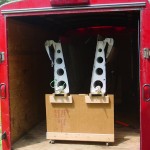
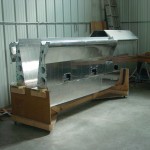
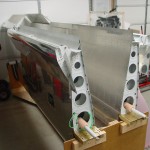
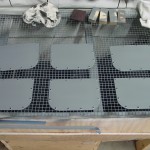
We rented a 12′ trailer after church today (my 10′ is too short) and took the wings to the airport, secured to their cart.  Definitely more space in the shop now, with that missing.  The 11′-something wing cart, seemingly a large piece in the shop, sure looks small in a big hangar.  Allison sees this as a sign the light at the end of the tunnel is approaching, and has visions of her car nestled in the garage this winter.


Back home, time to get the rest of this thing finished so it can go to the hangar too…(someday).

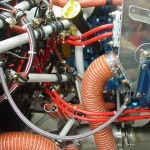
Torqued and sealed many of the FWF hoses; the oil lines and connections at the transducer remain.

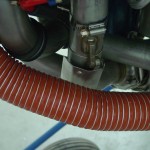
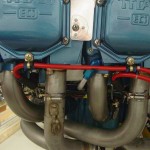
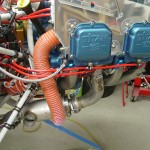
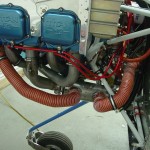
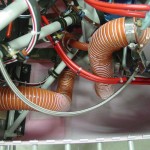
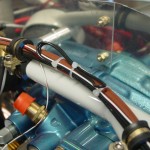
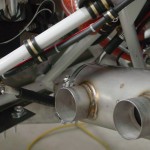
Finished install of the heater SCAT tubing, trimming to length and securing, installed a heat shield on the #2 exhaust pipe where the tubing passes by.

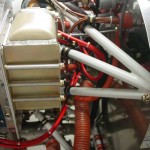
Spent quite awhile sorting out the routing of ignition wires and securing them behind the engine so they’re not rubbing on anything, and have enough slack to account for movement of the engine.  The ignition leads are now complete.

Ovalled an adel clamp and used it as a bracket to hold the battery charger plug near the oil filler, where it can easily be accessed via the oil door.  Trimmed the charger leads shorter and put on new ring terminals; secured the battery cables to the battery.

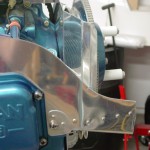
Cut a new FAB top mounting plate with the fuel servo hole moved as far the to right as it would go; this will help account for the servo’s offset to the left, and give more clearance between the FAB and the cowl.  Fit and drilled the FAB plate to the fiberglass shell, temporary-bolted the mount plate on, then fit that assembly to the engine.  A bunch of iterative fitting & trimming with the bottom cowl ensued to get alignment with the air scoop; I tweaked the front of the top plate, and had to split the fiberglass shell to angle it downward.  That’ll require laying up some glass to bridge the gap.  I drilled the forward part of the box to the plate, to hold it in the correct position.

Hours: 9.5 | Posted in Engine, Plumbing, Wings | Comments Off

30th July 2011

Paperclip trick

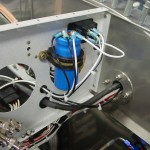
Crimped a ring terminal to the buss end of the SD-8 power wire, and secured it to the VP-X stud with the main buss feed.  Verified proper operation of the SD-8 relay.  Loosened the capacitor and relay to allow bucking bar access above them for riveting the top skin.

Back to baffles for a bit; set up a row of paperclips around the sealing edge and put the cowling on; this pushes the paperclips down and reveals the spacing between the baffle edge and the cowl.  Once the cowl is removed, I marked a line 1/2″ down from the top of the paperclips, and used that as a guide to trim the baffles, aiming for the specified 3/8-1/2″ gap.  Rough cut with snips, cleaned up with files, finished with scotchbrite in the die grinder.  Refitting of the cowl revealed a couple small areas that may need a wee bit more trimming or a change in contour, but that’s easy enough to deal with.  Should be ready to cut airseal fabric soon.

I’ve slowly been adding ignition wires as time goes by, so I decided to put the rest of them in, and start work on tying them up.  I sorted out the various lengths and determined which is intended to go where, then started working from the spark plugs aft.  Swapped around some baffle/valve cover screws to get adel clamps installed on the lower screw of each valve cover, to hold the bottom plug wires.  I’m making spacers to secure adjacent wires with zipties and short pieces of silicone tube left over from the manifold pressure plumbing, similar to what’s shown in the Pmag docs.


Also started work on the heater SCAT tubing, and got most of that routing sorted out and tube secured.

Hours: 4.1 | Posted in Cowling & Baffles, Electrical, Engine | Comments Off

28th July 2011

Three little things

Oshkosh week…I’ve been listening to LiveATC all week at my desk, with the flightline webcams running in another window.

Knocked a few more small items off the list tonight:

  • Loaded the latest software update from AFS on the EFIS.  The biggest new feature in this release is multi-leg flight planning, but I couldn’t play with that since the GPS isn’t connected up at the moment, so it doesn’t know where it is.
  • Did an initial trim of the forward baffles to match the curve of the inlet ramps, just enough to get the cowling on.  Next step here will be the paperclip trim.
  • Cleaned the inside of the canopy using some stuff I got from Spruce called “210 Plastic Cleaner”.  I went a little panicky after the adhesive overspray incident, and ordered too many different things for cleaning, polishing and repairing scratches…the second thing I tried took the light fog right off.  (The first one, Permatex Plastic Cleaner, had a gummed up trigger and wouldn’t spray, so I wasn’t able to try it out.)  With the stock I have now, I ought to be covered on canopy cleaning for awhile…

Hours: 1.5 | Posted in Canopy & Frame, Cowling & Baffles, Electrical | Comments Off

26th July 2011

FWF loose ends

Worked on more engine-related stuff tonight:

  • Finished up making and installing the exhaust hangers
  • Torqued and sealed the case bolts where the hangers bolt to
  • Test fit the lower cowl to check for exhaust clearance, and adjusted the left side a bit to gain more space
  • Rerouted the starter cable to get more clearance from one of the hanger tubes
  • Added an adel clamp to the purge return line alongside the battery box
  • Installed the hose portion of the breather; need to get some large alum. tubing for the lower portion
  • Drilled a hole for the fuel pump vent exit, bent a piece of -4 tube, and secured it (at least temporarily) to the engine mount
  • Cut a slot in the camlok strips to allow for insertion of the vertical hinge pins on the lower cowl


Hours: 3.6 | Posted in Engine | Comments Off

24th July 2011

Working the list

Started out by giving more attention to the HS/VS tips (the elevator/rudder tips don’t require so much work, and I’m glad for it).  Sanded the filler layer of micro I added yesterday, and got things looking relatively decent.  Spent some time reading on what the process is from here; it looks like there should be an epoxy sealcoat or three over the microed area, then a primer, and possibly another primer after that.  I’m reading much of what DanH has written over at VAF, and have found the specs for the PPG coatings used by many of the folks; have to see if there is a local supplier, or if it’ll be a mail-order operation.  DPLF is the basic primer, and K36 is the high-build primer/surfacer.  The finishing steps, as I understand them, are to brush or roll 3 layers of straight epoxy, then sand, shoot DPLF, sand/fill if necessary, then a light coat of DPLF and a coat or two of K36.  I don’t know if the K36 step is needed at this point, or if that’s something that’ll happen at paint prep time.  After sanding them up, I added a fillet of flox to the inside of each tip, to strengthen up the joint at the back.  Hopefully these will be done soon…

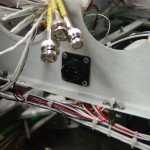
Next I tackled the pre-installation for the SD-8 backup alternator/dynamo.  I’ve installed the relay and capacitor, but haven’t bought the regulator or dynamo to save the $500 for the moment.  This is purely a backup device, so I don’t need it to get flying, but want to add it eventually.  I drew up a full-size paper mockup of the regulator so I could locate nutplates to secure it, and installed those.  Then, I installed all the wiring, and ran the lines which run to the regulator to a CPC connector mounted below where the regulator will go.  When I get the regulator, I’ll put a mating CPC on it, and it’ll be a simple matter of bolt in and plug in.  Also ran a loop of wire FWF and secured the excess length to the wire bundle along the upper engine mount tube, where it’ll stay until the installation of the dynamo.


Started on the installation of exhaust mounts.  Tightening down the bolts on the ball joints to the specified 2-threads caused them to become rather tight, so I may need one length longer bolts there — not sure how tight or loose it’s supposed to be, but the install guide does say that it’s important they be able to flex, and recommends lubricating them regularly.  Got the right side hangers fit, and the left side marked and cut, before quitting time.

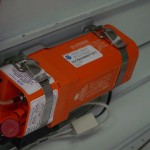
And, stuck the biennial registration sticker on the ELT.

Hours: 5.4 | Posted in Electrical, Engine, Wing & Tail Joins | Comments Off

23rd July 2011

Flavor of the day: nutty for nutplates

Sanded down the filler that was added to the empennage tips, checked fit, and put on another thin layer of micro to fill the voids opened up by the sanding.

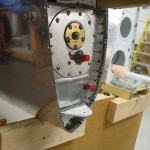
Still working on getting the wings to the point of being ready to move to the airport.  Installed all the nutplates (52) for the wing root fairings, after making a poor man’s nutplate jig (insert a screw partway into the nutplate, then cut the head off) for both the two-leg and one-leg nutplates.  Had to dig a bit to come up with the one-leg dimpled nutplates for the 4 locations that require them.  Nothing difficult, just lots of repetitive little stuff.  There is one nutplate hole on each lower leading edge that’s impossible to dimple with the dimple dies because the tank support bracket is right behind it — I found that it worked to install the nutplate, then use a screw with a tinnerman washer to form the dimple.


Also deburred, dimpled, and primed the wing inspection plates, and poked at the empennage fairing a bit more, to think about the next steps in fitting it.

Hours: 6.7 | Posted in Wing & Tail Joins | Comments Off

20th July 2011

Emp tips

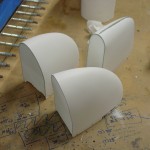
Trimmed and sanded the edges of the glass layups on the HS/VS tips, then mixed up a batch of micro and slathered it on the inside.  Once it’s cured, I’ll remove the foam rib and finish the inside layups.

Hours: 0.6 | Posted in Wing & Tail Joins | Comments Off

19th July 2011

Nutplates & more

Laid up another ply of glass on the back of the empennage tips.  Hopefully that will stiffen it up enough to remove the foam rib and add glass to the inside.  Left to sit and cure overnight…this glasswork looks like it’ll take awhile just because of all the waiting around.

Riveted in the rest of the wing inspection panel nutplates.  All that’s left on the wings for now is to drill, countersink, deburr, and rivet in 52 more nutplates for the root fairings.  Oy.  I’ve dealt well with all the nutplates on the project so far, but this job makes me wish I’d bought a nutplate jig.

Hours: 0.9 | Posted in Skin Panels, Wing & Tail Joins | Comments Off

18th July 2011

Nutty nutplates

Allison tried to escape the heat in the shop tonight (though we finally gave in and got the central air fixed in the house…)  Drilled, deburred and dimpled the nutplate holes for the inspection plates in both wings, and riveted the nutplates on the left wing.

Also put the top & bottom cowls together to see if they still fit together with the inlet ramps glassed in, which they did, rather nicely in fact.

Hours: 1.1 | Posted in Skin Panels | Comments Off

17th July 2011

Fun with glass

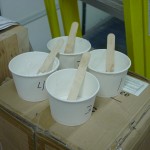
A bundle more of fiberglass work today, including my first real dive into mixing up epoxy with additives, and using it for more than sticking a ziptie base to something.  By the end of the day, I had used four small batches for various things, and had the discarded cups to prove it (I kept the excess in the cups and set them aside so I’ll be able to verify that the batch cured correctly, without any mixing errors/etc, and to observe how, and how quickly, the different mixtures set up):
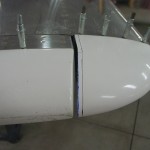
First on the list was to take the necessary steps toward finishing up the empennage tips.  I used a 1/2″ wide steel rule as a spacer to mark a line on the HS/VS tips, that distance from the edge of the counterbalances.  Then, I drew a parallel line 1/4″ back, and cut/filed/sanded to that line, for an even 1/4″ gap.  I suppose this gap could be tighter, but a wider gap leaves less chance of fouling a control surface should something go awry or debris enter in…and, it could always be tightened back up with, you guessed it, more fiberglass work later.
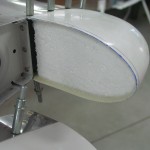
With the gap and shape established, I re-fit the tips to the stabilizers, and formed ribs out of some styrofoam saved from the fuselage shipment; these ribs were inserted into the tips and will serve to hold the shape of the tip during the next steps.  I mixed up epoxy with some flox to a peanut-butter thickness, and formed a small fillet to the rib, to hold it in place.  Herein is the downside to fiberglassing (besides the mess): once it’s in place, it takes several hours to cure to a point where it’s workable.  So, on to other things while it does that.
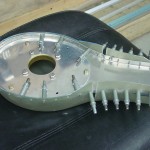
Meanwhile, I wanted to get the “elephant ear” cooling ramps on the upper cowling, so I can continue trimming of the baffles.  I found a position where they fit well with the contour of the cowl, and drilled two #40 holes for keeper clecoes in the inlet flange, to hold the forward edge of the ramps while the epoxy set.  Mixed up another round of the flox paste, and stuck them on (after sanding to roughen them up, air-blowing the dust off, and a solvent wipe).  Again, sit to cure…on to other things.  Later, once it had set up a bit, I came back, pulled the clecoes, and slathered on an epoxy-micro-cabosil mix at each end of the ramps, to start in creating a smooth transition surface.  It’s trowelled on for now, then the micro mix (which supposedly sands really easy) will be sanded down to smooth it out.  It’ll probably require a second application, too.  But for now, good enough.  Left to cure overnight.
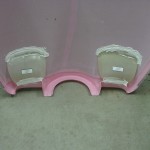
Back to the HS/VS tips; by now the flox fillet cured up well enough that they could be removed from the empennage and they retained their shape.  I cut some pieces of bid cloth and wet them out with straight epoxy in a plastic sandwich, and applied them to the aft side of the tips, covering the foam rib.   I set those aside to cure overnight; the idea is to remove the foam rib, then lay up additional plies of glass on the inside for stiffness.  I may need another ply of glass on the outside before the rib can be removed, I’m not sure — we’ll see how stiff it is tomorrow.  Once the inside plies of glass are added, the remaining void on the back will be filled with micro, and the whole operation sanded down to make a nice smooth tip closure, then primed.
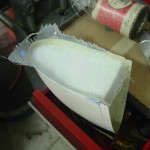
In between waiting for epoxy to cure, I also: cut the slots in the fuselage side tank support brackets, primed them, and bolted them to the fuselage.  Drilled a drain hole in the rudder bottom.  Deburred the wingroot holes for the gap fairing screws.  Drilled and hole-deburred the wing inspection plates. Finished bending the ends on a cotter pin on the engine mount that I’d missed doing that for earlier.  Found the scribe line on the empennage fairing and rough trimmed to it — made the fairing fit much better, it actually looks usable now.  Drilled holes in the corners of the dataplate.
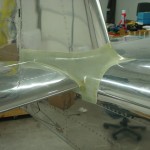
There’s a bunch of nutplates that need to go on the wings (root fairings and inspection plates), then they’re essentially ready to move to the airport — I could also do the tip light wiring before the move, too, but that’s not a big job (cut to length, add connectors, add local ground wire).
Hours: 8.6 | Posted in Wing & Tail Joins | Comments Off