30th June 2012

Let the fuel bills begin

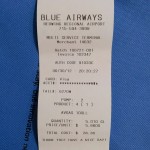
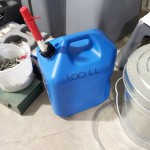
Not perhaps the most auspicious of milestones, but I did put the first avgas money into the project today…5 gallons worth into a new blue fuel jug, for the sake of fuel system testing.

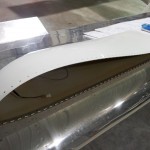
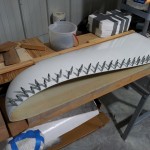
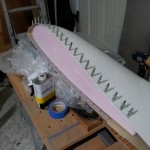
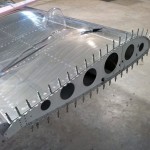
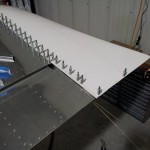
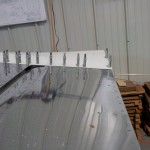
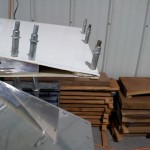
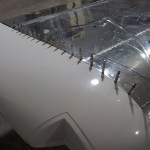
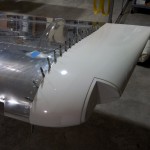
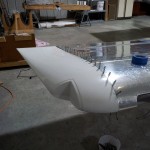
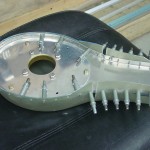
But first…most of the day was actually spent on or near the wingtips.  I spent awhile shaping some foam ribs to go inside the tips, to strengthen, eliminate oil-canning, and hold the proper shape.  Once I had one side looking good, I marked the spot of each rib, traced them on fresh foam, and cut a matching set for the other side, which provided a good starting point.  After setting the location of each rib for proper shape of the tip, I mixed up some flox and buttered the edges, set them in place, and pinned the tips back to the wings to hold the proper shape & alignment while the epoxy cures.  I’ll pull them tomorrow, add more flox to fill in any gaps, and lay a strip of glass tape along the edges of the larger foam rib, for good measure.  (No photos of this because I was covered in foam dust and epoxy.)

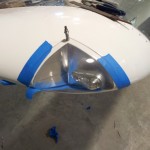
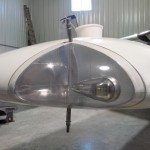
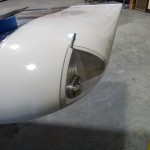
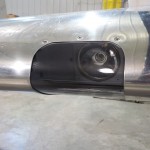
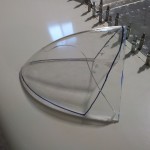
Wingtips curing nicely, I moved on to the lenses which cover the lighting “bay” in each tip.  I remembered to bring the replacement lens this time, and I had dropped the belt/disc sander off the other day, so all the parts were in place.  It’s nothing too difficult, just a lot of repetitive and time-consuming fitting, sanding, filing, fitting again, and repeating the whole process.  Since it fits a curve at two points, each bit you take off changes the fit of the rest of the lens, so it took awhile to get it right.  Once satisfied, I drilled a #40 hole at the corner, top & bottom.  Clecoed to test fit, then enlarged to #27 for a #6 screw, removed, and drilled/countersunk holes for nutplates.  Those will be installed tomorrow when the tips come off after the epoxy cures.

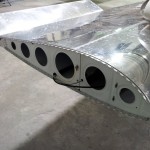
Moving inboard a bit, I removed and cleaned the lenses for the landing & taxi lights.  They were quite dirty on the inside surface, since the wings were stored leading-edge down in the cradle.  Shiny and clear again now, though.

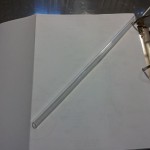
Cut some lengths of acrylic tubing from a 6′ piece I had ordered a while back, and smoothed the ends.  This will become a fuel dipstick for checking the tanks.

On to some engine work in preparation for an eventual first engine start…

  • Removed the paper towels that I’d stuffed in the fuel servo inlet to keep out bugs/etc.
  • Used a syringe to apply some Mouse Milk to the exhaust ball joints.
  • Connected the computer to each Pmag in turn to verify the timing (also cross-checked with the indicator lights on the ignition body), and make sure that the advance was limited to the “basic” setting (35 degrees).  Once the engine has been broken in, we’ll dial this up to the more advanced 40° setting, which should help the engine run more efficiently.  The two ignitions are timed nicely together, and they are timed to 1° after TDC, rather than TDC directly.  Based on the manual, I’m going to leave this be for now, since they do suggest that it be up to 3 degrees after TDC for lightweight props, which mine is.  We can tweak later if necessary.

Later on, I drove down to the fuel pumps to fill up the aforementioned can with fuel.  Poured some into each tank (BTW, I hate the newfangled gas nozzles that you have to push down against a spring to keep the fuel flowing…and their vent inlets are so tiny that the flow rate is pathetic), sloshed it around by rocking the plane, then drained it back out again — the idea being to get as much junk out of the tank as possible.  Filtered it back into the can, and poured from the can back into each tank.  Sumping into a tester showed clearer fuel this time.

Disconnected the fuel line from the servo inlet, but I didn’t have the fittings with me to extend it anywhere useful, nor a measured container to pump fuel into, so I just capped off the line and servo inlet for another day.

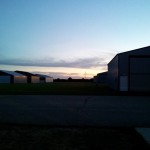
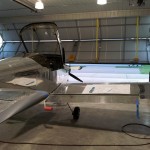
Three project visitors today; Art (Lancair) from the airport brought his Australian pilot friend (Jabiru) around to check on the progress, and Bob Collins (RV-7A) dropped in later in the evening to chat and take a look, while on a flight around his test area.  As the sun was setting, I caught this neat picture out of the hangar door, with the cloud shadows…  A good day.
Hours: 9.4 | Posted in Endgame, Wingtips | Comments Off

25th June 2012

Tips & alarms

Deburred, countersunk for, and installed the wingtip aft closeout ribs.  I added a nutplate to each one for securing the hinge ends, though I’m not sure yet exactly what that will look like.  They were installed with a fillet of flox, after roughing up the surface, and blind-riveted in place.  The rivets will be covered with micro filler eventually, so the pops are not a cosmetic issue, and I was able to reverse the ribs and place the smooth side inboard this way.

After that, sat in the seat with the engine manuals and configured the limits and alarms in the EFIS.  Nice evening outside, quite cool (~60°) considering in 36 hours the heat index is predicted to be over 100°…

Hours: 2.8 | Posted in Endgame, Wingtips | Comments Off

24th June 2012

More tips

Yup, another day working on the wingtips.  I’m not at all convinced that this hinge method is easier, as some said, than doing all the nutplates.  I’m reserving judgement on the outcome until I see it all done, though.  One upside that I do see is the ability to get the tips “done for now,” and then with relative ease, remove them for additional fiberglass finishing later on.  That’s a good thing.

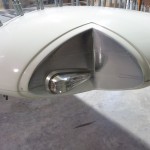
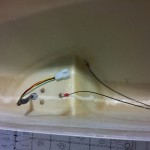
Drilled, mounted, and wired the AeroLEDS wingtip lights.  I lined the wingtip cutouts with strips of aluminum tape to give it a pseudo-mirrored look; the glasswork underneath isn’t perfectly smooth, though, so there are some visible seams and lumps.  I expect this will be somewhat temporary, and will be redone later with tape over smoother glass, or perhaps a thin sheet of mirrored plexi.


Discovered that the right (green) light assembly seems to have a problem with the strobe sync; while the left and tail strobes flash together, the right one drifts in and out of sync.  Swapping left & right, the problem stays with the unit, which indicates a fault with the unit, and not with the wiring.  (Update 6/25: AeroLEDS agrees it sounds like an internal problem, and is sending an advance replacement for the suspected defective one.  Defects happen, that’s expected, and it’s good to see a company handle it this way.)

Attempted to start fitting the tip lenses, and promptly put a big crack in the right one with the bandsaw.  Dang.  New lens on order, and we’ll start over with that.

On to the tip hinges…did all the necessary deburring and countersinking (yawn), and was able to get the hinges riveted to the wings and wingtips, by staying at the airport way too late for a “school night.”


Hours: 9.1 | Posted in Electrical, Endgame, Wingtips | Comments Off

23rd June 2012

Smooth tips

Work occupied most of the day today, but got away for a bit in the evening to check up on yesterday’s epoxy.  As expected, it was cured, so I removed the clecoes and spent some time shaping the wingtip TE’s.  Once satisfied, mixed a small batch of micro and filled the holes where the clecoes had been.

My order from Avery came today, so I have the Perma-grit countersink and sanding block…I was so impressed with the stuff when I borrowed a sanding block that I had to have my own.  Recommended, wish I’d had this thing when I was doing all the fiberglass earlier.  Hopefully I can get most of the rest of the wingtip install knocked out tomorrow after church.

Hours: 1.8 | Posted in Endgame, Wingtips | Comments Off

22nd June 2012

Wingtips again

Stole a day from work and spent it at the airport instead.

Marked and drilled the hinges to the wingtips, using the holes match-drilled yesterday.  Those holes are used to secure the inboard hinge side, and another parallel row was added to secure the outboard hinge side.
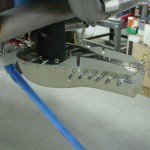
Cut the flange off the wingtips in the areas that have hinge underneath.  The resulting fiberglass strip (which matches the varying thickness of the tip) is then used as a spacer between the inboard hinge and the wing.  Used a straight sanding block to true the edge of the wingtip.  When cutting, I stayed to the inside of the molded joggle, so that the small gap left by the blade kerf is hidden as much as possible under the wing skin.

Fit the hinge halves and spacer strips to the wings, and pinned the tips in place.  Checked adjustment and decided to go ahead and bite the bullet on fixing the TE alignment, so I cut the TE’s open on both tips (which were out of alignment by the same amount, around 3/16″ low).  Moved them where they belonged and drilled 3 holes in the TE, then clecoed together to hold the alignment.

Monkeyed around with the wingtip ribs for awhile; I modified the aft ribs (which close out the part of the tip visible outboard of the aileron) to be shorter so as not to interfere with the hinges or my big foam rib.  After careful adjustment and fitting to ensure the TE and aft end of the tip were well-aligned with the neutral aileron, I drilled the rib to the tip.  This locks the alignment in place.

Trimmed the hinge pins down to a reasonable length; they’ll be trimmed again and bent to provide a method of securing them to the aft rib, but there was tons of excess length.  Now I don’t need to worry about snagging & bending them as I walk around the plane.

All that done, and Allison having brought out my box of fiberglass supplies & epoxy, I mixed up some flox and laid a thick line inside the TE, then re-clecoed everything in its proper place.  Smoothed and scraped the excess that oozed out, and left it to cure overnight.  I’ll pull the clecoes and then fill the cleco holes with more epoxy.

I don’t want to disturb the tips until the epoxy cures, so I worked on other things…adjusted the inboard “ears” on the flaps, to make them sit flush against the bottom fuselage skin, and fooled around with the EFIS for awhile.

Heard Bob Collins (RV-7A in phase 1) making traffic calls in the pattern and stuck my head out in time to catch his takeoff.  (This morning he has a post up about the round-robin evening flight).  A nice night, so I popped the big door open a bit to get some fresh air while sweeping up the hangar.

Hours: 9.4 | Posted in Endgame, Wingtips | Comments Off

21st June 2012

A tip on wings…

Stayed too late at the airport tonight, trimming, shaping, aligning and drilling the left wingtip.  Then went along with a rivet fan spacer to mark & drill the added “in-between” holes.  The left tip’s TE is below the aileron by the same amount as the right tip was, about 1/4″.  Since they agree so well, I rechecked the aileron alignment again…still good, so the tips are low.

Hours: 2.8 | Posted in Endgame, Wingtips | Comments Off

18th June 2012

Tip o’ the wing to ye

Let the wingtip fitting begin.  Sanded down the inside edge of the right tip, along with the foam rib to make it fit.  Once the tip fit properly into the wing, I drilled it to the wing using the prepunched holes in the skin.  I’ll drill more holes between those to secure the hinge eventually.

I have, as seems typical, a mismatch between the trailing edge of the tip and the aileron.  This will be fixed by splitting the TE and reglassing it at the proper angle before locking in place with the inner metal rib that is placed at the aft end of the tip.

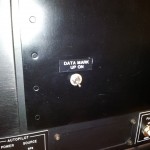
Also installed the stick boots and labelled the data mark switch installed yesterday.


Hours: 2.2 | Posted in Endgame, Wingtips | Comments Off

31st July 2011

Moving day, part the first

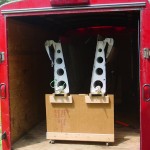
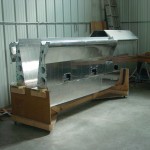
We rented a 12′ trailer after church today (my 10′ is too short) and took the wings to the airport, secured to their cart.  Definitely more space in the shop now, with that missing.  The 11′-something wing cart, seemingly a large piece in the shop, sure looks small in a big hangar.  Allison sees this as a sign the light at the end of the tunnel is approaching, and has visions of her car nestled in the garage this winter.


Back home, time to get the rest of this thing finished so it can go to the hangar too…(someday).

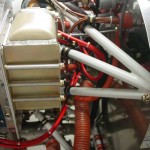
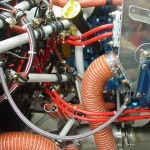
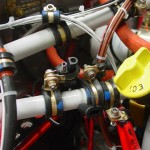
Torqued and sealed many of the FWF hoses; the oil lines and connections at the transducer remain.

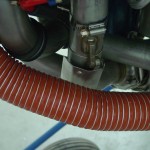
Finished install of the heater SCAT tubing, trimming to length and securing, installed a heat shield on the #2 exhaust pipe where the tubing passes by.

Spent quite awhile sorting out the routing of ignition wires and securing them behind the engine so they’re not rubbing on anything, and have enough slack to account for movement of the engine.  The ignition leads are now complete.

Ovalled an adel clamp and used it as a bracket to hold the battery charger plug near the oil filler, where it can easily be accessed via the oil door.  Trimmed the charger leads shorter and put on new ring terminals; secured the battery cables to the battery.

Cut a new FAB top mounting plate with the fuel servo hole moved as far the to right as it would go; this will help account for the servo’s offset to the left, and give more clearance between the FAB and the cowl.  Fit and drilled the FAB plate to the fiberglass shell, temporary-bolted the mount plate on, then fit that assembly to the engine.  A bunch of iterative fitting & trimming with the bottom cowl ensued to get alignment with the air scoop; I tweaked the front of the top plate, and had to split the fiberglass shell to angle it downward.  That’ll require laying up some glass to bridge the gap.  I drilled the forward part of the box to the plate, to hold it in the correct position.

Hours: 9.5 | Posted in Engine, Plumbing, Wings | Comments Off

19th July 2011

Nutplates & more

Laid up another ply of glass on the back of the empennage tips.  Hopefully that will stiffen it up enough to remove the foam rib and add glass to the inside.  Left to sit and cure overnight…this glasswork looks like it’ll take awhile just because of all the waiting around.

Riveted in the rest of the wing inspection panel nutplates.  All that’s left on the wings for now is to drill, countersink, deburr, and rivet in 52 more nutplates for the root fairings.  Oy.  I’ve dealt well with all the nutplates on the project so far, but this job makes me wish I’d bought a nutplate jig.

Hours: 0.9 | Posted in Skin Panels, Wing & Tail Joins | Comments Off

18th July 2011

Nutty nutplates

Allison tried to escape the heat in the shop tonight (though we finally gave in and got the central air fixed in the house…)  Drilled, deburred and dimpled the nutplate holes for the inspection plates in both wings, and riveted the nutplates on the left wing.

Also put the top & bottom cowls together to see if they still fit together with the inlet ramps glassed in, which they did, rather nicely in fact.

Hours: 1.1 | Posted in Skin Panels | Comments Off