31st December 2008

Priming fun

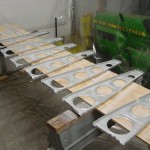
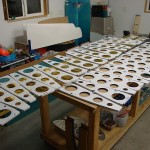
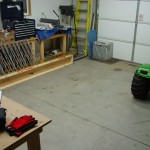
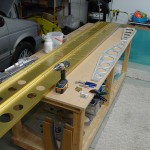
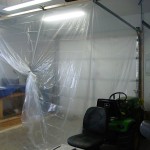
Cleared the priming hurdle today with about 7 hours in the shop (though some of that time wasn’t build-related).  Hung up plastic from the tracks of the big garage door, and a piece on the floor, to create a priming booth about 9′ x 8′.  Set a strip of plywood on a couple sawhorses inside for a priming table, and held the plastic down with some 2×4′s.

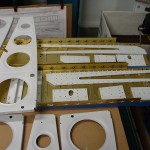
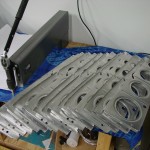
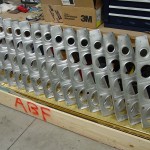
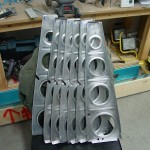
Actually worked pretty well, though a bit slower than priming outside, due to drying times.  Not sure if that’s more due to the lower temps (I run the shop temp at 45-50 when I’m working in there), or the lack of air circulation.  I settled into a routine of doing the first light coat, waiting a bit for it to tack, laying the second, slightly heavier, coat, then opening up the plastic wall and turning on the heater fan (with heat, if the temp was getting low) to dry the pieces, before flipping and spraying the backsides with the same process.  Got all the rear spar parts and main ribs primed (whew!), and deburred the holes in the spars during downtime.  Everything should be cured nicely tomorrow, paving the way for skeleton assembly.

In an earlier post, I wrote that my goal was to have the skeleton complete by the end of this month (a revision from my original goal of Christmas).  Didn’t quite hit that target, but I did come close…ought to have it in the bag this week.  I bought lumber for the wing stands today as well, so after getting those built, it’s on to skins, J-stringers, leading edges, and tanks.  New goal…tanks complete by my birthday (March 1)?  Not sure if that’s realistic or not; Smitty logs about 50 hours for each segment of each wing (prep, skins, tanks; I believe he built his wings separately), plus another 50 each for ailerons & flaps.

Hours: 5.0 | Posted in Spars & Skeleton | Comments Off

30th December 2008

Primer prep

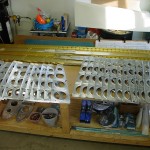
Long session of rib prep…finished drilling, deburring, and etching/scrubbing all the remaining wing ribs for both wings.  Bought some plastic yesterday to hang up for a priming area; with that, and some large cardboard leftover from a fridge box, ought to be able to kludge something up and move on to priming and assembly, assuming the primer will dry in the cool shop temps.  Wing jigs are on the horizon for later this week, so started to shuffle the shop around to see where they’ll fit.  I need to build some shelves and get things off the floor on the east side, as well.

Hours: 4.9 | Posted in Spars & Skeleton | Comments Off

29th December 2008

Fuselage on order

Faxed in the order & deposit for the fuselage kit this afternoon, to take advantage of the current-year pricing.  Current lead time, according to the website, is 8 weeks…with any luck, perhaps I’ll see it around my birthday!  I don’t expect to have the wings finished by that point, but I should have the space to stash it until needed.

Looks like I’m really building an airplane… !!

Posted in Fuselage | Comments Off

29th December 2008

Answer from Van’s

Received a reply from Vans:

These small holes won’t make any significant difference to strength, so just clean them up and move on.

Both holes can be used for pitot/wire etc, but only one needs to be enlarged. The other is already full size.

So I’ll deburr those extra holes as normal, and forget about them.

Posted in Spars & Skeleton | Comments Off

28th December 2008

Skeletons and ribs…oh my!

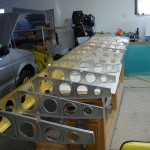
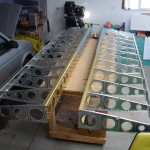
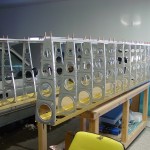
Drew up a proposed list of required wires in the wings, and went on drilling all the ribs for wiring conduit and enlarged tooling holes, after looking at other builders’ sites.  Wrapped up all the ribs, and proceeded to cleco the skeleton together; hey, these are starting to look like wings!

Left Wing Proposed Wiring:

  • Equip List: pitot, AOA, landing light (Duckworks)
  • 7/16″ Hole 1 (pitot hole; to pitot bay only): Pitot
  • 7/16″ Hole 2 (to wingtip; enlarged tooling hole): Strobe pwr
  • 3/4″ Conduit (root to tip): Landing Light pwr, Nav light pwr, AOA upper/lower pressure, pull string

Right Wing Proposed Wiring:

  • Equip List: AP roll servo, wingtip nav antenna, taxi light (Duckworks), OAT probe
  • 7/16″ Hole 1 (pitot hole; to pitot bay only): -open-
  • 7/16″ Hole 2 (to wingtip; enlarged tooling hole): Strobe pwr
  • 3/4″ Conduit (root to tip): Taxi light pwr, Nav light pwr, AP control, Nav ant coax, OAT, pull string

Not sure if the OAT should go in the left or right wing…probably doesn’t matter, so will depend on balancing weight and/or length of wires to EFIS.

Drilled the rib-to-spar holes, both front and rear, and took it all apart again for primer prep.  Primer prep is my least favorite part of building so far…the priming isn’t bad, but the the seemingly endless etching, scrubbing, and rinsing I could do without.  The time savings to go with an unprimed plane probably aren’t significant enough in the grand scheme to be worth not priming, though.  Deburred all the left-wing ribs, then prepped all the rear spar components, and 7 left-wing ribs.

I’ll split up the primer prep by doing all the left wing ribs, then go back and deburr the right wing ribs before etching.  I still need to come up with a scheme for an indoor priming “booth” of some sort; someone on VAF mentioned using a cheap screen gazebo, but I don’t know if a) it’s worth the cash, or b) if I’d be able to find one this time of year!  I might just get some heavy plastic and drape it from the garage door tracks somehow.

Hours: 5.8 | Posted in Spars & Skeleton | Comments Off

27th December 2008

Spars done, and a rib oops

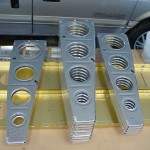
Finished the spar prep by countersinking the tank attach and access plate screw holes, and spot-priming the countersinks.  Also fabricated the new set of tiedown bars, so the new spars are now at the point the old spars were before the mis-bent flanges were discovered.

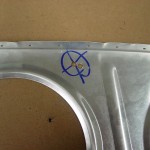
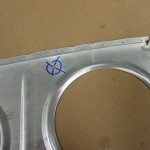
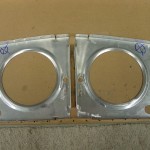
Moving forward, I went ahead and began drilling holes for wing wiring runs, and things took another turn south…this time, all my fault.  Lesson learned: stop while you’re ahead.  I printed off the page from Van’s that advises on where to install the wiring conduit (bottom of the rib, behind the first lightening hole), and proceeded to drill a hole in a rib.  Decided to move it about 1/2″ forward to center it between two skin-rib rivet holes, for ease of bucking later on, and drilled a second hole; not an issue since the first hole would get swallowed in the enlarged 3/4″ hole that’s made for the conduit, right?  Ok, so I proceeded to transfer that hole location to a set of L & R ribs to use as templates for drilling the other ribs…that’s when I saw it–the holes I drilled were on the TOP side of the rib.  D’oh!  Re-drilled the holes on the BOTTOM side of the rib, and all is well…except that I have three ribs with extra holes:

  • (1) W-911-L with (2) extra #12 holes on the top side
  • (1) W-911-L & (1) W-911-R with (1) extra #12 hole on the top side

I’m assuming that the ribs with the extra single hole won’t be an issue, but that the one with the two holes will either need replacement, or reinforcement of some sort.  A new rib is just under $17 from Van’s.  I’ve sent pictures to Van’s for their take on it.  I’ll continue moving forward with the ribs and await their reply…I’d like to get the wiring holes drilled, ribs drilled to spars, and then start priming everything.

Hours: 3.3 | Posted in Spars & Skeleton | Comments Off

23rd December 2008

Spar re-do, nearly re-done

Finished drilling and installing all the spar nutplates; just need to countersink the center screw holes now.  Also need to re-make the tiedown bars, as the ones I had made for the old spars don’t match up–the top & bottom attach holes are perfect, but the center pairs of holes–the ones that are in the web, that have the aileron bellcrank brackets on the back side–are off by about 1/3 diameter.  Not wanting to oblong these holes, as they’re on the spar and attach flight control hardware, I have ordered a pair of tiedown brackets from Cleaveland Tool.  Also ordered more clecos (300 3/32″ and 100 1/8″; Brown Tool had a holiday special thru today), as I intend to build both wings simultaneously, and–especially with the longer wing of the -9–more are helpful.  I think I will have a total of 600 3/32″ and 250 1/8″ now.

Hours: 2.4 | Posted in Spars & Skeleton | Comments Off

20th December 2008

Spar do-over, part one

Now that the shop is cleaned & organized, and the winter concert rush is over, back to work.  Tonight, started the nutplate attach process on the new spars; drilling holes to size, deburring, and priming in advance of attaching nutplates.  Ought to go faster the second time, right?!  I think I will use the Van’s method of countersinking (use the nutplate as a guide), rather than the jig method, this time…I’ve read on other build logs that it’s worked fine with no adverse results, and it *has* to be easier…

Hours: 1.2 | Posted in Spars & Skeleton | Comments Off

20th December 2008

Screw countersink diameters

Post for reference: this is the diameter of the finished countersinks for #6 and #8 screws.  From Brad Oliver via Mike Bullock (post here / also on VAF here):

#8: 0.365″ – 0.375″ (Fuel Tank Screws)
#6: < 0.3125″ (Inspection Panel Screws)

Posted in Spars & Skeleton | Comments Off

11th December 2008

Status Update

It’s been some time since I’ve done any work on the project.  In July we had the storm, and the subsequent months, though I did get a couple days’ work in, were mostly devoted to home repair projects: porch, patio, deck, fascia, roofing, and other miscellaneous things.  Late fall/early winter is always a busy time at work, and there was no exception this year.  Then, the spar problem on top of all that.  So here’s an update…

Spar problem: Solved.  Around the time I sent in my problem pictures to the factory, other builders had done so as well…shortly, Van’s sent a notice to a number of -9(A) builders that some spars were incorrectly bent.  They offered advice on how to attempt re-bending the spars oneself, or to replace the spars at no cost.  I tried some trial bending and wasn’t satisfied with the results, so opted for the replacement spars (I believe most of the other (online) builders I’m aware of with this problem also had their spars replaced).  Van’s advised me when I ordered them that the lead time would be 10-12 weeks due to the production backlog; it was around this time that the production RV-12 was being introduced, as well.  However, I received a fresh set of spars just a couple weeks later, and they even included replacement nutplates, so I won’t have to drill them off the old spars.  Needless to say, I’m quite happy with the way this was handled.  Unfortunately, I haven’t had time to start on the new spar set.

Shop: Warm.  I purchased and installed a 75k BTU propane shop heater, and this week, the new tank (124-gal) was installed, tested, and filled.  Fired the heater up last night and it made quick work of bringing the shop up to temp–from 32 to 49 in under 20 minutes (OAT in the 20′s).  I could also partition the shop area (third bay) from the garage area (doors 1 & 2) with some hanging plastic or other material to confine the heat, which would bring the temp up even faster.  I’m pleased with that performance, and it should allow for winter work to happen — for the project, as well as maintenance of our vehicles.  I’m curious to check in the morning and see how well the building kept it’s heat overnight, whether all that fiberglass insulation paid off or not.

Progress: None.  It’s looking like Jan & Feb will be slower at work (not related to the economy, just a result of the way the academic calendar works), so I’m hoping to have some spare time–as I won’t be working nearly as many evenings–to get back into things.

Goals: In my mind, I’d like to have the wing skeleton together by the end of December, though that might be unrealistic given the number of concerts I have to sing in, record, and edit still this month…Complete wings by my birthday would be super, but highly unlikely; might have to go for Easter, or July 4th.

Current thinking: The “equippage” of the project is, of course, always in flux as new products develop and evolve.  Being a “gadget guy,” though, I can’t help but keep a mental grasp of ‘if I were to finish it with today’s products, what would it have?’.  I’m thinking fuel injection (AFP (preferred) or Silverhawk), set up for autofuel (I’m watching the discussions about ethanol-ready, too: wingroot pumps, alodined tanks, and the like), with Pmag/Emag.  AFS 3500EE in the panel, ready for future 3500EF on right side.  Radio stack hasn’t changed: SL-30, 496 (though the new 696 looks superb, but spendy), 327 transponder, and PSE 3000 intercom; space for future GNS-430W.  Trutrak Digiflight II autopilot–however, AFS is reportedly close to announcing the Advanced Autopilot, which is based on a TT system; that might be the way to go, depending on what the details are.  I’m also thinking screw the canopy rather than glue it, which is a reversal of previous thought, but my mind can still be made up.  :)   No backups in the beginning, as it’ll be VFR-only.  DIY LED nav lights w/conventional strobes.  Of course, all of this may will probably change!

They say building goes faster if you build it first in your head…I’ve done plenty of that in the last several months–it’s time to clean the shop and pick up some tools again!
Posted in General | Comments Off