28th June 2008

Empennage endgame

Minnesota Wing meeting was this afternoon at Crystal Airport; spent a couple hours and talked with several folks from the local area. The weather wasn’t the best, so only a couple fly-ins showed up. 7A builder and RV Hotline editor Bob Collins has a write-up with pictures here…if you look carefully, you can see my arm & leg.

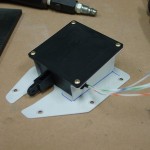
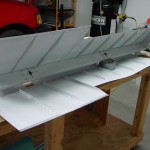
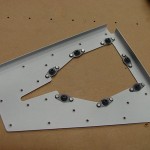
Installed the trim tab motor when I got home, and spent some more time staring at the elevators before disassembling the empennage in preparation for storage. Not entirely sure how I’ll store them yet, but I believe they will go into the attic and either rest in the trusses or lay on some old blankets that I have up stored up there. I thought about hanging on the wall, but that seems like more work, and I would eventually like to put up shelves along the upper walls of the shop. I put the appropriate bolts/washers/nuts (loosely, not tightened into the locking portion) in the brackets on the HS & VS, to avoid the inevitable question “now where did I put those bolts?!” when it comes time to mount them up later.

Also began to poke through the wing kit, removing packing paper and discovering interesting bits like fuel caps, fuel senders, tie-down bars (I’m gonna need to get me a tap for those), wingtip lenses, and nice golden spars. The next session will likely be wing inventory, cleaning up the workspace, and stashing the wing parts. The hardware bag for the wing kit is the size of a Target sack…might need another multi-drawer storage box. The wing components seem very thick (skins, ribs, etc) after being used to the relatively lightweight tail surfaces.

Hours: 0.8 | Posted in Empennage, Wings | Comments Off

27th June 2008

Elevator miscellany

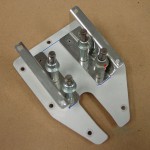
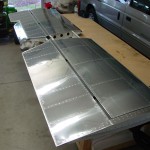
Finishing up random elevator tasks today…mounted, drilled, primed, and riveted the brackets for the trim tab motor, then set it aside for now. Mounted the trim tab and marvelled at the moving part! Pulled all the plastic off the empennage components for storage, and took a crack at hanging the elevators on the horizontal stabilizer.
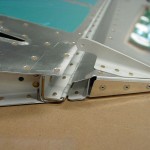
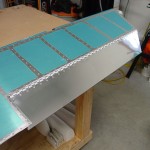
I adjusted the rod-end bearings to their proper length and reamed out the holes in the brackets for the bolts (the powdercoat clogs the holes somewhat). It was here that I discovered an issue…

It seems that when both elevator counterbalance assemblies are clamped “in trail” (aligned with the horizontal stabilizer), the right trailing edge is about a half inch higher than the left. They’re both straight, and the gap is consistent along the whole length. Playing around with a 4′ level, I checked both elevators for flatness and eventually came to the belief that the right elevator is twisted. The result is that either the TE’s match, and the counterbalances are split, or the counterbalances match, and the trailing edges are split.

I did some searching on the various online resources, including VAF and builder logs, and it seems that this problem isn’t unheard of. The opinions on its solution vary widely, however-some state that it’s no problem at all, others say it will cause a rolling moment which will always need opposite aileron to counteract it. Some claim it can be fixed by drilling out some rivets and “massaging” the end rib, others report they built a whole new elevator. RV-9A builder Mike Hoover had a similar problem which he wrote about on his build log (related thread at VAF), and included advice he received from Van’s:

Talked with Scott at Vans about the misaligned TE on the elevators as they are currently mounted on the HS. He suggested three alternatives: 1) leave as is, if any undesirable flight characterists, then use the second alternative. He said this happens frequently to varying degrees and may not be that noticeable in flight. 2) Align the TEs, reposition elevator horn bolt holes as required and accept the downward position of the left elevator counterbalance or the upward position of the right one. 3) Remove the elevators, find where any twist is that is causing the misalignment, [and] work the twist out by using more rivets, which will result in the elevator having pre-loaded stresses.

I believe he had already drilled his elevator control horns when this problem was noticed, which put his counterbalance arms in trail, but left his TE’s split. I would be able to go directly to option #2, which would align the TE’s and split the counterbalances. In any event, I have sent an email to Van’s builder support, and await their response. I suspect it will be some variant of the above, and the problem is not as big as I imagine it to be. From the above linked VAF thread:

I ended up with about 3/8 vans said, you won’t know it during flight, many rv’s have this problem, (we all start on the emp) also he said only you will know it so at the fly in’s or when you go somewhere other might see it, just tie the stick back with the seat belt so they are not aligned and no one will ever know. build on..

OTOH, if I need a new elevator…well, that’s life I suppose.
Hours: 3.0 | Posted in Elevators | Comments Off

26th June 2008

Trim tab done

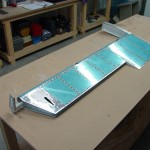
As planned, I was able to rivet, epoxy, and clamp the trim tab this morning. It’s weighted down to the flat table while the epoxy sets. The package claimed 30 minute set, 7 hours to handle, and full cure in 24 hours–which will be about when I next have time to play with it. I also riveted the hinge to the elevator, bent the pin, and drilled the safety wire hole in the rib. Just a few things left to finish the tail…attaching the elevator weights, installing the trim motor, and fiberglass.

I did find a bit of light corrosion starting at the edges of the trim tab when the plastic was removed for riveting, so that will have to be polished off. This is a “known issue” with leaving the plastic on; one of my next steps will be to pull the plastic off all the finished empennage parts, since they’re pretty much done being moved about, and won’t need the scratch protection.

Hours: 1.7 | Posted in Elevators | Comments Off

25th June 2008

Trim tab primed

Primed the trim tab components. The rib locations were masked off so that the adhesive (I will use some epoxy) has a better surface to stick to. From here, it should be a quick job to finish out the tab, and thus, the empennage! (Well, except for the fiberglass…)

The AFS primer/sealer works really nice in weather like this; you can keep moving at a good pace since the light coats dry quickly. (Today: scattered clouds, 86*F, 43% humidity, and a light breeze.) The last priming session wasn’t so much fun, since the humidity was high (90%+) for several weeks, and things were taking forever to dry. I had to touch up a couple spots where fingertips had goofed up the coating. Today, by the time I had sprayed the last pieces, the first pieces were ready for their second coat. I’m quite happy with this stuff.

Hours: 0.4 | Posted in Elevators | Comments Off

25th June 2008

Trim tab

Finished drilling, dimpling, and etching the trim tab components. Ended up dimpling the hinges rather than countersinking–I goofed on the elevator and dimpled the rear spar, instead of countersinking. I tested the dimples with the excess length of the hinge, and didn’t see any problems at all; no deformation of the eyes, and it nested nicely with the other dimples. Only “problem” is that it may require a longer length rivet than the plans call out, but that’s not really a problem since I have a whole case full of rivets.

Also fabricated the foam ribs, a task made easy by taping tracings of the pattern onto the foam block, rough cutting with a hacksaw, then going to the lines with the disk sander. Masked the rib locations inside the skin so everything’s ready for primer. Will try to pick up some epoxy today, so if I can get things primed tonight, tomorrow’s session should make quick work of the assembly.

Hours: 2.4 | Posted in Elevators | Comments Off

24th June 2008

Trailing edges & trim tab

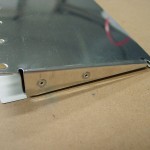
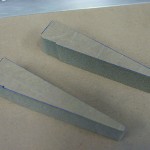
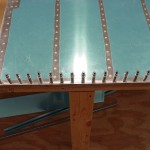
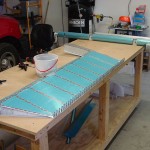
Pulled all the clecoes from the trailing edges & angles…the Proseal has been drying for quite awhile, and all appeared to be straight and solid. Squeezed in rivets partway, then used a cut-off bit of the AEX wedge to shim the squeezer to the proper angle to set the rivets fully. Worked well, and they turned out nicely; there may be a teeny variation from straight here or there, but well within the allowable range, and nothing to worry about. I found that sighting the edges was made a bit frustrating by the blobs of Proseal hanging off–is that a wave in the edge, or is it just a lumpy blob of sealant?

Following dinner, I jumped on the trim tab, which went together pretty quickly. Got the hinge drilled to the tab & trimmed to length, the ends bent up, match drilled the holes, and shaped the control horn. Should be able to prep & get some primer on it tomorrow. Need to pick up some epoxy to bond in the foam riblets.

Hours: 4.0 | Posted in Elevators | Comments Off

20th June 2008

Wings arrive!

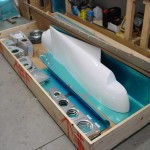
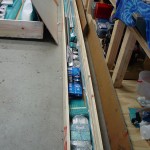
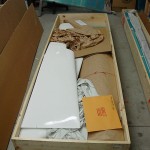
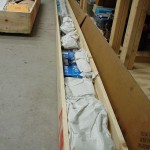
Picked up the wing kit from the ABF terminal in Owatonna today (about 60 miles away). The delivery charge saved was $75.75, plus any extra cost required for a liftgate delivery, if necessary (I didn’t inquire about the cost of that). The total freight was just over $300; a data point for others at this distance. No visible damage whatsoever to the crates, though one of the 1×1 slats was knocked off the top of the crate (visible in picture below), so it appears I got lucky.

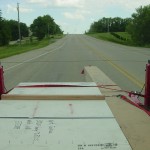
The wing crates haul easily in a full-size pickup bed with the tailgate down. I strapped both crates down, and also strapped the spar crate forward; also elected to avoid the interstate for the trip home. At home, one of the neighbors helped unload the crates-easily accomplished by two men.

Following day: I couldn’t resist taking a peek inside…found the fuel caps, fuel senders, packing list, and other goodies. Tt appears as though there will be a great deal of paper for the recycling when the day comes to unpack…and that will be quite a day. The packing list is 6 pages long. Yikes!

Posted in Wings | Comments Off

17th June 2008

Trailing edges

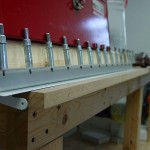
Bought a couple 8′ pieces of aluminum angle from Menards the other day, so I got the trailing edges sealed.  Using the severely expired Proseal (exp. 11/07) might not have been the best idea…I had kept the tube in the fridge since receiving it, and it warmed up just fine, but the mixing head broke off the “dasher rod” when I tried to mix it.  I squeezed it all out onto a piece of cardboard for manual mixing, but it took a very lumpy/ropy consistency when mixed.  It was still quite sticky, so I used it by scraping off the lumps…hopefully it will work.  This validates my decision to NOT order the Proseal for the fuel tanks with the wing kit.  I’m not worried, since Van’s sells expired Proseal at a discount, with a note that it’ll be fine for this sort of application, but not recommended for fuel tanks.

In any event…the empennage trailing edges are clecoed to angle, awaiting the cure of the Proseal before starting to rivet.  I plan to use an angled set in the squeezer to do these, and will experiment on the practice kit first.

Hours: 1.5 | Posted in Elevators, Rudder | Comments Off

10th June 2008

Elevator riveting & trailing edges

Spent the morning & early afternoon in the shop and got quite a bit done. After only one goof-up (I had te re-fabricate the gusset I made yesterday when it slipped while drilling and the hole was too close to the edge of the piece), I was able to finish up the riveting on the left elevator skin, mount the rod ends, and call it good.

I decided that since there was time left in the afternoon, I would start on the trailing edges, so I drilled, dimpled, and countersunk the appropriate pieces for both elevators. (The rudder was done previously.) I need to pick up a couple pieces of angle to use when pro-sealing the edges to keep them straight…I looked into using the tabletop, but it has just a bit of a wave in it. It would probably be okay (less than the 0.1″ noted in the manual), but why not try for perfect?

Hours: 4.5 | Posted in Elevators | Comments Off

9th June 2008

Elevator riveting

Began the riveting of the left elevator tonight, with the stiffeners, spar skeleton, counterbalance assembly, and the trim access plate. For some reason, that trim access hole just seems very impressive. Maybe it’s the nutplates, or maybe it’s knowing that a moving part will go in there. Also fabricated the small gusset which goes between the end rib and the rear spar; somehow I missed that earlier. Brushed on a light coat of primer so it’s ready to go for tomorrow’s session. Left to do are the tricky rivets around the inner part of the counterbalance assembly, and then closing it up.

I did take a moment yesterday to clean (acetone) and re-prime a small section on the skin where the primer was blotchy and came off very easily. When getting ready to prime, I noticed what looked like stains from our funky water, so I used some of the etch to clean them off, followed by acetone…I suspect that it didn’t get all the etch cleaned off. in any event, I wiped off the loose primer with acetone, scrubbed with some scotchbrite, cleaned again with acetone, blew dry with the compressor, and re-primed, and it’s in good shape now. Lesson learned…be more careful rinsing the parts, and be sure to get the etch cleaned off well.

Hours: 5.1 | Posted in Elevators | Comments Off