Random pieces
Hours: 8.2 | Posted in Electrical, Engine, PlumbingLong week with no work on the project; the busy season has begun at the office. Some positive news on the financial picture front this week though, so I at least ordered a bunch of pieces that I’ve been holding off on, for upcoming installation (lights, exhaust, APRS stuff, ELT, oil cooler, etc).
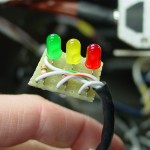
Got a few things done and half-done today; starting off with the wiring for the pitot indicator. I bought my Gretz pitot secondhand, and it didn’t include the indicator board, since the previous owner had installed it in his plane. No problem, it’s just a few LED’s with appropriate resistors, but I hadn’t yet taken the time to measure the voltage, find the right resistors, and build the board. I used a chunk from a leftover piece of prototyping board, trimmed to fit the necessary components. I also put a 4-pin Molex connector on it, for ease of connection (the soldering could happen on the bench, rather than in the plane) and service. A matching connector on the wire behind the panel, and we’re in business. I connected up the pitot for testing, and rolled the wing cart over to plug into the fuselage. Power on, and everything looks good: the lights indicate as they should, the heater cycles, and the tube tip gets hot. While I had the left wing hooked up, I checked the function of the leading edge light and made some minor programming changes in the VP-X (renaming some pins).
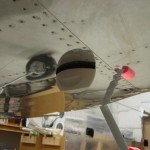
Installed a standard NMO mount and the Antenex Phantom Elite antenna I ordered, which will be for the APRS installation. I also ordered the new MicroTrak RTG FA from Byonics, which should arrive next week. The antenna is mounted halfway between the comm antennas and the transponder antenna. I could have mounted it aft of the transponder antenna instead, but since the VOR/Loc antenna location is at the tail end, I thought it better to keep the APRS more distant, since the APRS and Nav signals are on nearby frequencies, while the transponder is removed by several hundred MHz.
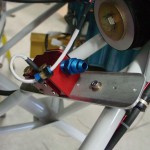
Thanks to some photos helpfully posted on a VAF thread, I decided to figure out the installation of the fuel flow sensor. I fabricated a mounting plate from some scrap .125 bar stock, which attaches to a pair of engine mount tubes via Adel clamps. The sensor mounts to the plate using it’s own 1/4″ mounting holes, for which I of course don’t have the correct length bolt (AN4-17A). I also need to order the steel nipples for the in and out of the sensor; the sensor ports are 1/4″ NPT, rather than the 1/8″ commonly associated with the -4 fluid lines, so that will require the “-4-4″ nipple, which is 1/4″ NPT to -4 flare. I cut off the spade terminals on the sensor wires and fit a 3-pin Molex instead, then ran the harness wires to the sensor location and connected the two. I also installed Adel clamps to strain-relief the wires both at the sensor and at the connector. Since the mounting plate floats in space between the two engine mount tubes, it’ll be possible to wrap the entire assembly in a piece of firesleeve.
With the FF sensor located, I set about measuring for fuel lines, and re-checked all the ones I’d measured previously. I have a list of 8 hoses that need to be made up now. There are two more yet to be measured, for the oil cooler lines, which won’t be evident until the oil cooler arrives and is at least mocked up in place. Plus, the brake lines, but at least those are already known lengths. The steel oil cooler fittings will also need to be ordered.
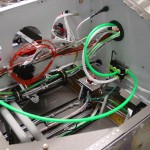
Moving back inside, I experimented with various locations for the pitot/static manifolds. Fabricated a bracket to mount both, one atop the other, and mounted it to the subpanel. I need to pick up some longer #6 screws to mount the manifolds to the bracket, though. Trimmed and inserted the pitot and static lines, and a pair of jumpers for EFIS 1.
Also spent time cleaning the shop, tossing/recycling the large pile of debris that had collected under the plane. Storm season is here, and I need to get at least one vehicle inside when weather threatens (as it is this weekend). I figured out that I can move the fuselage 90 degrees to the right and Allison’s car will tuck nicely under the tail.
Passed 1300 hours in this session.
