16th March 2012

Making hay

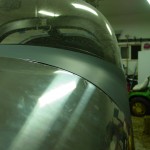
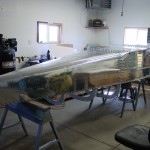
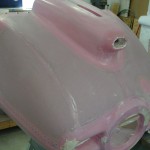
Indeed the sun is shining, the weather is record-setting unseasonable warmth (avg. high today of 51, we hit 79 here, and over 80 at the airport; at 23:30 local, it’s still 65).  Perfect fiberglassing weather, so that’s how I started the day.  Sanded some spots on the inside of the cowling, and laid up a couple plies of reinforcement when the nose-shaping operation had caused it to become a bit too thin.  Also laid up a new flange on the right bottom nose to replace the one that I cut off during fitting.  Added some micro to the leftover epoxy and filled some divots in the surface, along with putting a layer over the vertical hinge rivets on the aft edges.  Should have put one more batch before ending the night, but ran out of time.

Took another crack at re-bleeding the right brake to remove the air in the line (which causes “squishy pedal”), and got it this time.  Left & right pedal feel is equal now, both quite firm.

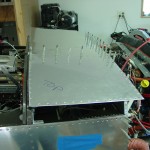
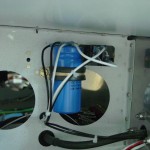
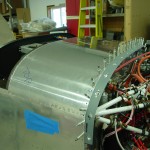
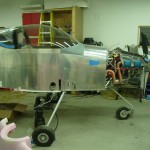
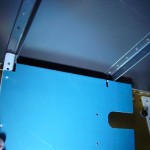
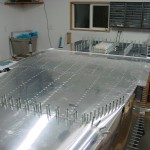
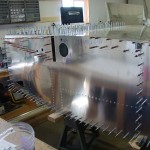
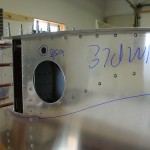
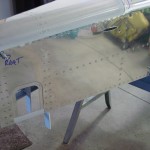
Decided that in the pursuit of progress, and given the generally-finished status of the avionics, wiring, and plumbing, it was time to nail on the forward top skin.  Sealed the forward edge with firewall sealant; I was able to set all but the longeron row + 4 rivets myself.  When Allison came home I conned her into shooting those remaining, while I laid upside down in the cabin to buck.  After that was done–as long as I was down there–I installed the top canopy hinge bolts, and the canopy pin mechanism.  During the solo riveting of the skin, I also secured the standby alternator relay & capacitor (which needed to move out of the way to allow bucking access).  Once the riveting was done from inside, I squeezed the rivets along the firewall, which also fasten the camloc strips.  With those in, I installed the three remaining camlocs.

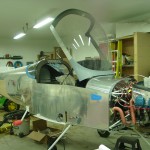
It seemed natural to move next to the canopy, so I trimmed back the seal flange on the subpanel by 1/8″, to allow for an “edge gripper” type seal to be affixed.  We then installed the canopy on the fuselage, with much consternation around getting the hinges aligned with the pins (as the alignment marks I made earlier had been removed from the hinges during some cleanup).  Reaffixed the lift struts, and checked opening & closing operation, which worked fine.  The riveting of the top skin, as it seems to often do, changed the fit of things and created some “air scoops” on the pilot side, though the copilot side looks decent — both sides were alright before riveting.  So, I’ll have to decide whether to drill rivets & try to shim it up, or build that side up with (more) glasswork now, or later.  Since the canopy stops were removed to gain access for riveting the top skin, I reinstalled those, though they still need a little adjustment before locking them down.

Put in the pilot seat temporarily to sit in the plane and check fit & function of the lap belts, and operation of the canopy, brakes, and panel floodlights.

Hours: 9.0 | Posted in Canopy & Frame, Cowling & Baffles, Forward Fuselage, Gear & Fairings | Comments Off
8th January 2011

Firewall sealing

Spent the morning at the Minnesota Wing meeting, talking and looking at a local RV-7 that was recently finished, which provided some good inspiration to move ahead on the FWF stuff; also had the change to talk to folks about some open questions: mufflers and heater boxes, seat heat switch location and wire routing, transition training, and so on.  Notes to self: the Torx screws on tips and hex-heads for interior panels look nice; heated seat wiring can be run out underneath the flap motor housing, and the cushion cables are long enough to reach; relays can go in the flap housing with switches on the crossbar (though they are hard to reach in flight, it cuts down on wiring run through the center section).

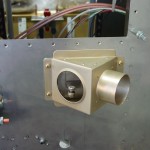
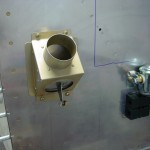
Back in the shop this afternoon, my goal was to get most of the firewall components installed and ready to hang the engine tomorrow.  Number one on the list was the heater boxes.  I chose to mount one in the center, feeding into the stock diffuser box; the second one is placed on the passenger side, far outboard.  I oriented that one with the outlet (which dumps the heated air when the valve is closed) pointing down, thinking that it would provide better airflow to the lower cowl exit.  This meant that the box had to be up the firewall some amount to allow room for the control cable to exit below it, so it ended up next to the battery.  Hopefully I don’t regret this, but I’ve been pondering it for several weeks and it was time to make a decision and get on with it.  I think in this location, it would be easy to add a flange on the cabin side if desired later, to direct the air from that vent to an eyeball or glareshield vent.  Everyone I talked to who has the muffler exhaust, or has flown a plane with it, is pleased with it and says that there is more than enough heat output, which will be a good thing.

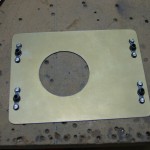
I used a 2″ hole saw (buying the kit of quality hole saws was a good move, as I’ve had zero difficulty cutting the stainless) with the drill motor slowed down (regulator set ~35psi) to make the holes, and used the doubler for a template to drill the mounting holes.  I decided to use #8 screws rather than the #6 called for in the plans, mostly because I had truss-head #8 screws, and only countersunk #6 screws.  And, rather than using nuts on the backside, I put nutplates on the doubler to allow for easier one-man installation and future service.  These are the triangular heat boxes from Robbins Wings, which have a stainless steel hinge and flapper, with an aluminum box.  The theory being that if there was a fire, the box might melt away, but the flapper, being stainless, would remain to cover the 2″ hole in the firewall.  This is a variation on the all-stainless box, and seems good to me.  They include the doublers, and are set up for control cables on the engine side.

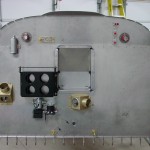
With the heat boxes in place, the next order of business was to install the firewall recess.  Besides removing the top skin, this meant mixing up the firewall sealant, Flamemaster CS 1900.  It is a two-part concoction, similar to Proseal, but part A is a very stiff paste and part B a thin liquid; it is difficult to mix, and remains very thick after mixing.  The data sheet indicated that it could be thinned for application, including brushing, by use of ketone solvents.  A little research told me that acetone is a basic ketone solvent (which saved me a trip to the store for MEK), and it took a lot of acetone to get it to a workable consistency.  Put it in a freezer bag for application, same as I did with the Proseal on the fuel tanks.  After wiping all the parts down with solvent as instructed, I ran a bead between the recess and the firewall and clecoed it in place.  I let that begin to set up while I sealed and installed both wiring pass-thrus, and sealed around the brake reservoir penetration.  Then I went back and riveted the recess in place, and sealed around the edges and in the seams and corners, filling the holes at the corners with a blob of sealant.  Cleaned up the mess and called it good.  Once the recess was in and the sealant had tacked, I bolted and torqued the battery box and heater boxes.  No pictures of the sealing process, because it’s hard to use the camera when your hands are covered in black goop.  The copius acetone thinning didn’t seem to affect it’s ability to cure, and it skins over fairly rapidly after dispensing.

Once the sealing was complete and cleaned up, I installed and clamped the outer firesleeve on the wiring passthrus, as it needs to be in place before the wires are run, and I didn’t want to forget it later and have to take all the wires out to install it.  (Like flaring tube without a B-nut, or soldering a connector without the backshell — not that I’ve ever done either of those…)

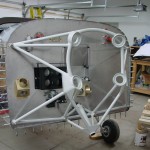
Engine mount is next…had to fit and remove a couple times to work on the nose gear bolt clearance, and I ended up putting a little “dent” in the firewall behind the gear leg to shift it aft and provide clearance for the bolt & nut.  I’ve read that this is not uncommon.  I also had to file a bit more off of the lower fuel pump nutplate to clear the lower mount tube, and I filled both nutplates with firewall sealant, since I’m not using them (this pump location is used only for carbureted engines; I wasn’t sure whether I would have carb or FI when I built the firewall, so I put the doubler & nutplates in).  As of now, the engine mount is bolted up, but not yet torqued, as I expect to need to remove it (along with the engine) one more time to drill and install all the cable and plumbing penetrations, once I figure out where they need to go.

Hours: 4.9 | Posted in Engine, Forward Fuselage | Comments Off
2nd April 2010

Again, fuselage riveting

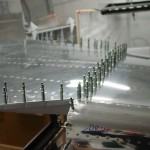
Two steps forward, .8 steps back…  Allison came out tonight and helped with riveting — we did both fore & aft rows at the center section bulkhead, and the outboard floor stiffeners.  About 5 minutes after we finished the floor stiffeners, I came to the realization (through a convoluted thought process) that the left and right outboard floor stiffeners had been transposed when clecoed in.  (I must have mismarked them after etching and priming.)  Essentially, this meant that the vertical leg of the angle was toward the outside of the fuselage, instead of the centerline.  Looking ahead in the plans, I could see no problems this would cause, except for two things: first, the panels which hide the fuel & brake line runs would need to be altered, to move the notch for the vertical leg of the stiffener angles outboard about 1″; and second, any carpet underlayment foam would have to be cut to non-standard dimensions…not a big deal, but something to remember when ordering interior stuff, since the foam often comes with the carpets.

Floor stiffeners...outboard left/right are reversed Cover plate does not fit with stiffeners reversed Riveting progress

After some internal debate, I decided that I would just drill the things out, swap them, and be done with it.  50 rivets to drill out, all of which went fine without any problems.  We’ll re-set these in tomorrow’s batch.

Hours: 2.1 | Posted in Forward Fuselage | Comments Off
26th March 2010

Still more fuselage riveting

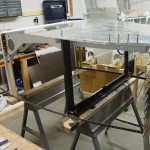
With Allison helping tonight, wrapped up the remaining right skin rivets, and did all the left skin rivets.  Bottom side left to go.

Hours: 1.9 | Posted in Forward Fuselage | Comments Off
22nd March 2010

Even more fuselage riveting

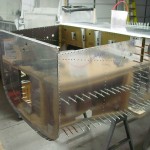
Riveted most of the right side skin with Allison.

Hours: 2.1 | Posted in Forward Fuselage | Comments Off
20th March 2010

Fuselage assembly & riveting

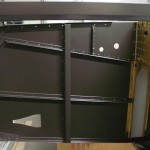
Progress is being made on the fuselage riveting…I first set the two remaining rivets on the inboard floor stiffeners, then clecoed in the armrests and baggage side wall ribs.  The lower longerons were bolted to the firewall weldments; torqued, sealed, and the bottom floor skin clecoed in place, followed by the outboard floor stiffeners.

Lower longeron-firewall bolts Inside fuslage at 904 looking aft Fuselage ready to rivet

With all the components now clecoed together, there’s nothing left to do but rivet!  Working from a stepstool as a seat, I was able to reach about 2/3rds of the way up the side walls, and completed everything I could reach back to the 705 bulkhead, along with all the longerons and bulkheads aft of the 706.  I should be able to get most of the baggage walls and 705/706 bulkhead-skin rivets in a similar manner.  I was also able to reach about half the rivets joining the side skin to the outboard seat ribs, by reaching through the aileron pushrod holes.

Forward fuselage riveting progress Seat rib area progress Tailcone riveting complete

Hours: 5.1 | Posted in Center Fuselage, Forward Fuselage | Comments Off
19th March 2010

Fuselage riveting

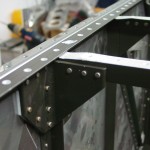
Finished up a couple odds ‘n’ ends, and started the fuselage riveting tonight.  I had read that the rivet immediately above the rear spar bars can interfere with the rear spar stub on the wing, so I dimpled that location for a flush rivet.  Also pre-riveted the center section doublers to the side skins as called for (though the plans call out 5 and 6 rivets, I believe they mean 6 and 7; Smitty came to the same conclusion.)  Riveted the angled side ribs to the skin on all rivets that aren’t shared with the side skin; this required temporarily removing the bolt from the rear spar to gain access to the rivet tail.

Riveting doublers to side skins

With those preparatory steps out of the way, it was time to marry the tailcone and center fuselage for the final time.  Once the double row of holes on the bottom was clecoed, I added the longerons and clecoed up to the 904 bulkhead, then added the side skins and clecoed those in place.  Firewall is added next–the angles clips and side stiffeners must be riveted to the firewall at this point if not already done, as access is limited once the side skins go on.

Tailcone and center fuselage ready for final marriage Tailcone and center fuselage bottom skins joined Adding longerons to fuselage

After the firewall was in place, I added all the structural pieces between the 904 and the firewall.  Squeezed the accessible rivets on the inboard floor stiffeners in preparation for adding the forward bottom skin.  Shortly after that, I squeezed my left pinkie finger, so it was time to call it a night.  The aftmost rivets on the floor stiffeners will need to be set with the gun, as they’re tucked too far under a flange to get at with the squeezer.

Side skins and firewall in place Forward fuselage structure clecoed in Floor stiffener riveted to firewall

Hours: 3.4 | Posted in Center Fuselage, Forward Fuselage | Comments Off
8th March 2010

Interior paint

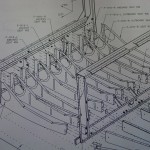
Sprayed interior color on most of the batch of parts — the side skins and longerons remain.  I will pick up a quart can of the paint to do the side skins, as they would be rather tedious to do with a rattle can…

Hours: 2.5 | Posted in Forward Fuselage | Comments Off
7th March 2010

Ready, set, prime

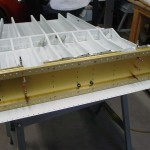
Etched the skins and longerons, then shot primer on all the parts.  Interior paint later this week, and with any luck, final assembly can begin on the weekend.

Hours: 6.0 | Posted in Forward Fuselage | Comments Off
6th March 2010

Primer prep, and a goof caught

Etched all the fuselage components that are done to date, except for the side and forward bottom skins, and the main longerons.  Those are big enough that they really need to be done outside (the etch solution eats the concrete floor, and they’re too big to fit in the big plastic tray I use for etching parts); we’ll see if the weather is good enough tomorrow to get it done.  Should be able to get the priming done this week.

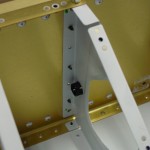
After tiring of etching, I thought I’d look at the install of the crotch strap brackets.  This is where I discovered a dormant screw-up that I was previously unaware of.  Turns out that when I initially fit the seat ribs to the center section, I got the inboard pair of F-916 ribs reversed.  That is, the inboard F-916-L goes on the right side, and vice versa.  Unlike some other parts of the plane, it’s completely possible to reverse these with no ill effects–the seat pans, bottom skin, and everything else all fit perfectly, so nothing screamed “wrong!”  Until I held the crotch strap brackets in place, when it became very evident what had happened.  The space between the ribs that are spanned by the bracket is about 3/4 of an inch too wide.  Since the center section isn’t yet attached to the tailcone, access to drill out and re-rivet these ribs isn’t a problem, so I drilled both out and put them in the correct orientation.  Easy enough, except for one thing: the 3/16″ holes that were match-drilled from the main spar, where AN3 bolts are inserted, are not in alignment with the line of rivets that runs down the forward flange of the ribs, but rather offset by a small amount.  This means that when the already-drilled ribs were flipped into the correct orientation, those 3/16″ holes are out of alignment by about 1/2-diameter, which would result in ovalled holes if drilled.  I’ve sent an email off to Van’s asking their advice–my guess is that they’ll say it’s fine, put in the bolt and move on, since that rib is also held in by a bunch of rivets.  But better to ask…if the ribs need replacing, it should be easy to do that, too…for $17.73 apiece, plus shipping.  Sigh.  I feel like I’ve made several stupid mistakes lately.

Seat rib installation drawing Moving ribs in center section Relocated rib in center section Misaligned hole on ribs after placing in correct location

(The ribs in question are the third in from each side on the drawing — the inboard “F-916-L/R outboard seat rib”.  Marked by the clecos on the second photo.)

Hours: 4.9 | Posted in Center Fuselage, Forward Fuselage | Comments Off