26th July 2012

Pulling up the pants

Airport-hopped for another 3 hours of transition training this morning, including a climb to 9500MSL…even on a rather hazy day, what a view; 184kts (~212 mph) groundspeed was impressive, too.  Flying a panel with a traffic system really highlights the fact that there is a lot of traffic out there that we never see — even when we know it’s there, since it’s on the display, and even when it’s relatively nearby.  And autopilot…made cruise flight and descent planning a whirl.  I’ve managed to put the wheels on the ground a couple dozen times now at a bunch of different airports.  A bunch of stalls (power-off and power-on…that deck angle is impressive) and airwork as well.  6 hours left on the requirement.

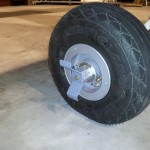
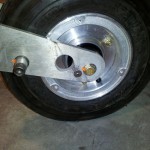
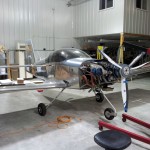
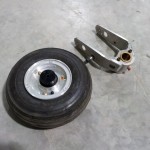
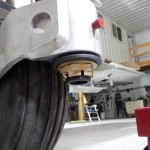
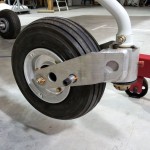
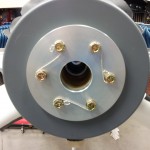
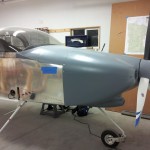
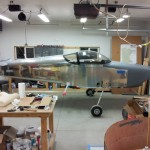
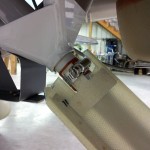
Back on the ground, the push to complete wheelpants & leg fairings continued.  I got the wheelpants both mounted up, nutplates installed on the inboard bracket, and just using locknuts for now on the outers (miniature nutplates on order).  Safetied the outer bracket bolt, and found one wheel cotter pin that hadn’t been bent.  Drilled access holes for tire inflation & pressure check, and plugged with stainless hole plugs.

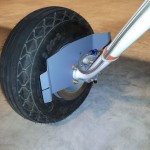
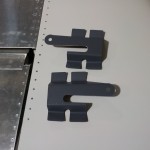
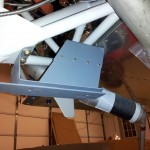
Fabricated metal T’s out of .025, to reinforce the tabs at the top of the gearleg fairings, and installed those before installing the leg fairings.  Also removed the nose leg fairing again to cut slots for a hose clamp, install the metal tab T’s, and reinstall.  The upper clamp should prevent the leg from vibrating around; the plans leave it floating free to rub on things, though it’s pretty solid as it was.  The nose leg is easy to align with string, so I did that and buttoned up the nose gear again.  The mains still need to be aligned, but are otherwise done for now (until intersection fairings show up).

I decided that I’ll move the fire extinguisher between the seats, aft of the roll trim lever, for increased legroom, and to position it away from the probable location of any fire.  I’ll secure the bracket to the tunnel cover between the seats; I need to find some spacers, though, to raise it up, since my extinguisher bumps into the roll trim knob when all the way down flush on the cover.

Located the seatback adjuster brackets and hinges, and installed the hinges to the back of the seats.  I’ll paint the brackets to match the interior colors.

Talked to the shop on the field after lunch, and though they weren’t thrilled about it, they did agree to try and find time to do a transponder check, and weigh the plane — if they have time — on Monday morning.  They want to do it in their hangar, not mine, which means of course, that after I drain the fuel out, I get to pull it over there with the towbar…fun.  If they don’t have time for the weighing, it’ll be double the fun, since I’ll get to pull it over there & back twice.

Once we have a weight, I’ll be able to submit the inspection paperwork and get the ball rolling.  We’re close, and I’m looking forward to having it in the air.

Hours: 6.8 | Posted in Endgame, Gear & Fairings | Comments Off
25th July 2012

Cover those legs

Apologies for the previous two days’ posts…I’ve been working on the plane alongside transition training this week, and my mind is trying to absorb all that, and not recalling the precise details of all the build stuff.  Today, we flew for 3.3 more hours (in two blocks), and hammered out 15 landings across 4 different airports.

Before flying this morning, I had time to countersink, deburr, and rivet the hinge into the nose leg fairing.  After we finished for the day, I tried hard to get the rest of the pants & fairings done — didn’t succeed, but it’s close.  Still waiting on intersection fairings, so I’ll either fly without, or find a different source.  I did — after a trip out to buy hoseclamps — get a bunch done, though:

  • Fit, installed, and aligned the nose leg fairing.
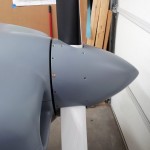
  • Reinstalled the nose pant cap…this essentially finishes the nose gear work.
  • Countersunk, deburred, and riveted the hinges to the main leg fairings.
  • Trimmed and retrimmed the man leg fairings for fit and brake like clearance.
  • Added an extra brake line securing point to the bottom of the leg, to keep the hose from rubbing the fairing as it exits to make its turn aft to the caliper.
  • Laid up two plies of glass inside the tabs at the top of the leg fairing.  This’ll be trimmed again later, and filed/heated to fit around the leg.  Set aside to cure overnight.
  • Pulled the R main wheelpant and countersunk the attach screw holes, installed the split line nutplates…this one is ready for installation.
  • Looked at installing nutplates on the brackets, and found that two regular one-leg nutplates (as I’d been planning) won’t fit on the outer bracket side-by-side.  I’ll need to order a handful of the mini one-leggers, if I can figure out the part number…also, more #6 tinnerman washers, as I’ve run out.

Back home to do chores, rest & recover…more training at 7:30 am tomorrow.

Milestone: crossed 1900 hours of work on the project tonight.

Hours: 5.5 | Posted in Endgame, Gear & Fairings | Comments Off
24th July 2012

More pants

Bled the R brake system and tested…no leaks yet.

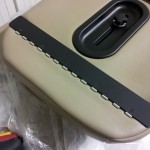
Installed the seat pans with a few screws, and dropped in the pilot seat.

Worked on the nose pant more, countersinking for the attach screws and adding nutplates.  Fit it back to the fork and finalized the size of the towbar holes.  Added an air access hole for servicing the tire, after finding the spot on the pant via laser.  Fully seated the towbar and marked it with yellow tape, as a witness line to full engagement.  This should eliminate guessing as to whether it actually went all the way onto the pins.

Spent the rest of the session working on the leg fairings.  Tracing the plan, cutting to size, finding the no-twist state, taping it secure, marking & drilling the hinges.

Hours: 7.0 | Posted in Endgame, Gear & Fairings | Comments Off
23rd July 2012

Glass pants

Removed the peel ply, reclecoed the pants, and final drilled wheel pant attach holes to #27 for a #6 screw.

Lots of on-off-on-off to get the tire gap on the nosewheel pant right, and to trim the hole in the top so it doesn’t hit the leg when the wheel turns.

Hours: 6.0 | Posted in Endgame, Gear & Fairings | Comments Off
22nd July 2012

Prickly pants

Most of the day was spent working on wheelpants, but before that, I temporarily attached the underwing inspection covers with screws — more prep for weighing.  This also necessitated drilling out and replacing one nutplate that had no threads.

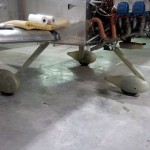
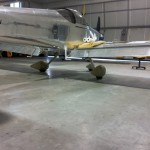
Set up the strings and lasers to align the wheelpants, and worked through the right one first.  With the process understood and completed once, the left pant went significantly faster, as it’s basically just the reverse of the right.  I opened up the tire gap to a finger’s width all around.


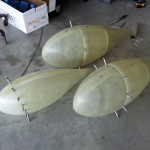
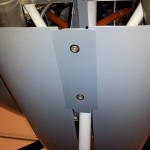
The front wheelpant was a different trick, and I did eventually get it satisfactorily drilled.  The instructions have you putting on and removing the aft pant by sliding it over the brackets…because the front of the pant is tapered down (unlike the mains, where the split line is at the widest point), you have to stretch it out to fit it over the brackets.  This went fine the first several times, but eventually, I stretched it and a big vertical tear zipped open in the left side.  So, after finishing the fitting of the pant and nose cap, and making sure it was able to pivot with freedom, I pulled all the pants and did some glass work.  Patched the nose pant back together with glass tape and epoxy, and added some buildups on the inside of the main pants, to fill gaps between the pant and the brackets.

I need to bring a larger step drill to finish the towbar holes (3/4″ isn’t big enough for the bar to enter through).  Then, all the nutplate work has to be done on the pants and brackets.  After that, leg fairings…  No word on an ETA of the intersection fairings yet.  I did some internet digging and the data indicates that the pants and leg fairings make up for most of the speed increase (10-15 kts), with the intersection fairings contributing just a couple kts of that.  I’ll weigh with the wrong fairings taped in place, since the replacements should weigh about the same; any difference ought to be negligible.

And, I still need to bleed the right brake.  I would have done it today but it always seems to make a mess; I want to pick up a foil pan to catch the drips under the caliper so I don’t make a big mess of the hangar floor.

Hours: 7.4 | Posted in Endgame, Gear & Fairings | Comments Off
7th July 2012

Pants & more

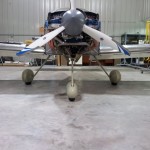
In the afternoon, I was in the home shop: deburred and primed the wing root fairings, along with all the brackets for the wheelpants.  Located and packed up more things I would need at the hangar to work on the wheelpants.

Evening brought a trip to the hangar.  Installed the rubber seal on the wing root fairings.  Managed to get the main gear wheelpant brackets installed.  Drilled & cut the slots in the nosegear pant brackets, but need to bring a larger hex wrench to remove the towbar bolts, as they are what hold the brackets on.  Countersunk and installed a flush hex bolt for the nosewheel axle retainer.


Removed the seats and floor panels to be ready for a preinspection tomorrow.

Hours: 5.8 | Posted in Endgame, Gear & Fairings | Comments Off
4th July 2012

It moves, too.

Had the chance to go flying with my hangarmate this morning in his -9A, and despite the thick haze, got a good demonstration of the plane’s performance and abilities.  He has 20 more ponies under the cowl than I, plus a constant-speed prop, so we’ll see how mine compares.  In the hands of a good pilot, the thing really shines.  As in Mike’s plane which I flew earlier this spring, the stall is amazingly docile, and handling is smooth & precise (knowing only the pully-and-yoke system in the C150 where there was always plenty of control slop to go around, it’s probably not difficult to impress me in that regard…)  He has cut his sticks down shorter, so that when holding the grip, you’re able to rest your hand/arm on your leg.  This was quite comfortable, and the control forces were perfectly fine.  (Mine are longer, which was intentional; I decided when working on them to leave them essentially full-length, and cut them down later if desired.)

After the flight, we fired up my engine again and taxied over to the compass rose.  On the way, he did the break-in of the brake linings for me, since I’d never seen it done before.  Plenty to learn…  We stepped through the magnetometer calibration routine on the EFIS, and it came out within a couple degrees.  Rob Hickman posted in the AFS support forum that the tolerance of the magnetometer is ±4°, so we’re good to go with that.  I taxied back to the hangar and it tracked heading as expected along the way (easy to check since the airport is laid out on cardinal headings…)  Many thanks to Jim for doing the grunt work of towing the plane around in a circle in the 90+ heat while I called out directions from the screen.

I also remembered (third time’s the charm) to turn the alternator on for the taxi back, and was able to see that charging current did register, along with a solid 14.5 volts, so it looks like the alternator, shunt, and connections are all ok.  I’ll also mention here how handy it is to pull the data logs on an SD card to take home and browse through, to see what I did or didn’t notice in the moment.  Mike Behnke (RV-9A) wrote a handy Excel tool to import the logfiles, parse them, and automatically generate data graphs and KML files.  Of note: the log and config files don’t do well in a Windows text editor, due to the AFS being a *nix-based system (the line breaks are essentially non-existent for reasons I won’t get into) — but they’re easy to read and edit in Linux, with your favorite editor.

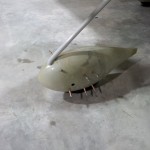
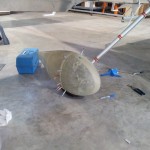
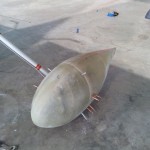
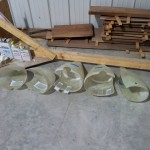
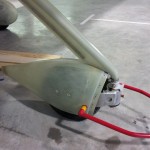
Stood around comparing notes on various things for awhile, and eventually I got down to work on the wheelpants.  I was able to get all three of the pants to the “pregnant tuna” stage, with the mating edges of the pant halves sanded square, and drilled together.  I need to put together some parts to make a jacking mechanism for the main gear, as I need to pull the wheels in order to install the pant brackets.

Unpacked the intersection fairings I bought a year or so ago, and discovered that they appear to be shaped for the tailwheel model gear, so I was either shipped the wrong set or had a misunderstanding (my order confirmation email does say 6A,7A,9A, though…)  Ordered a new set and sent a note about the wrong ones, but since it’s been so long, I expect I’ll end up just posting them for sale to someone who can use these.

Bob Collins (RV-7A) dropped in again for a short visit to share notes & paperwork on the airworthiness packet for the MIDO & DAR.  Borrowing those to compare against will be helpful as I put together the necessary forms and info for that process; thanks to Bob for sharing and stopping over in the heat.

Speaking of the heat…long pants were not the best thing to wear today, but I have a habit of holding fibergalss parts on my lap to sand them, which makes covered skin essential.  After an hour or so of that, though, I’d about had it, and packed up into the air conditioned truck to go deal with the grocery list of parts & pieces I need.  Tomorrow might be a night at home in the shop, deburring and priming the bracketry.

I also believe I have a solution to retain the wingtip hinge pins, that I’ll build.

Hours: 2.5 | Posted in Endgame, Gear & Fairings | Comments Off
28th June 2012

That’s how we roll

The replacement nav/strobe assembly arrived, along with the replacement wingtip lens.  My hangarmate fixed my up with an engine hoist and sling for raising the nose to work on the nosegear.  So, time for a night at the hangar.

Trimmed the leads on the new nav/strobe, and crimped on Molex pins.  Tested it out for awhile, and it stays in sync with the others, so — problem solved.  Removed the old unit from the wingtip and installed the new one.  The faulty one will be on its way back to AeroLEDs tomorrow morning for an autopsy.  While I had it off, I grabbed a photo of the mounting bracket installed.

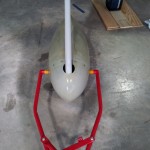
Easily raised the nose with a sling around the prop spacer, hooked to the engine hoist.  I removed and disassembled the nosewheel and fork, cleaned the axle shaft/bearing seal mating surfaces, and installed the axle according to the directions (tighten the ring until the bearings don’t rotate with the wheel), then tightened the screw on the preload-setting ring.  Set that aside for a bit, while I attended to the fork assembly.

Cleaned & greased the bushings in the fork, along with the spindle.  Slid the fork on and installed the washer stack and big nut, then tightened it down with the giant (3/4″ drive) socket/ratchet, until I had the desired figure on the fish scale.  My cheapo fish scale I bought isn’t perhaps the pinnacle of professional measuring devices, but it got the job done.  On the advice of those who have gone before, I set the breakout force high (26lbs), so it has room to drop as the parts wear in during initial use.  Once I had that set, I drilled the 1/8″ hole across the spindle, removed the nut to deburr, and reinstalled the whole stackup with cotter pin.

Reinstalled the nosewheel to the fork, torqued and marked everything, and we’re done.


Hours: 2.2 | Posted in Electrical, Endgame, Gear & Fairings | Comments Off
8th May 2012

List punchin’

With the towing company on the schedule for tomorrow morning, I wanted to see how many of the little things left on the pre-airport punch list I could get done.  A pretty successful, if short, session, I think…

Riveted and installed the lower cowl support bracket that was fabricated on the weekend.

Torqued and safety-wired the propeller.  Temporarily reinstalled spinner with three screws (this won’t be final installed until the engine is ready to be run; inspectors will want to see the prop bolts.)

Re-checked the alternator belt tension, which is fine with a breakout force of around 130-140 in/lb on the beam torque wrench.  (The desired spec is 11-12 ft/lb, aka 132-144 in/lb).

Tightened up the nosewheel axle bolt temporarily; we’ll revisit all the gear hardware at the airport again.

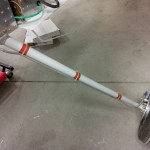
Cut the temporary zipties off the gear legs, and replaced them with new ones after placing a wrap of orange silicone fusion tape around the leg under each tie location.

Cleaned up a wavy spot in the aft edge of the canopy on the RH side, straightening it out along a marked tape line.  This gives an even gap ~1/8″+ all the way around the canopy split, which should be wide enough to prevent expansion in the heat causing the canopy to stick shut, based on what I’ve read.

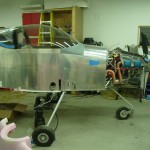
Swept the shop, moved some things around, and pulled the plane in front of the garage door, so it’s ready to roll out tomorrow.  Taped down things that could rattle in the wind while moving.  Vacuumed the various debris out of the cabin.  Took a fistful of photos.

After 1751.5 shop hours, ~5.5 years after project start, she’s going to the hangar.

Hours: 2.4 | Posted in Canopy & Frame, Cowling & Baffles, Engine, Gear & Fairings | Comments Off
16th March 2012

Making hay

Indeed the sun is shining, the weather is record-setting unseasonable warmth (avg. high today of 51, we hit 79 here, and over 80 at the airport; at 23:30 local, it’s still 65).  Perfect fiberglassing weather, so that’s how I started the day.  Sanded some spots on the inside of the cowling, and laid up a couple plies of reinforcement when the nose-shaping operation had caused it to become a bit too thin.  Also laid up a new flange on the right bottom nose to replace the one that I cut off during fitting.  Added some micro to the leftover epoxy and filled some divots in the surface, along with putting a layer over the vertical hinge rivets on the aft edges.  Should have put one more batch before ending the night, but ran out of time.
Took another crack at re-bleeding the right brake to remove the air in the line (which causes “squishy pedal”), and got it this time.  Left & right pedal feel is equal now, both quite firm.

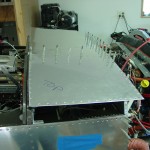
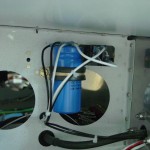
Decided that in the pursuit of progress, and given the generally-finished status of the avionics, wiring, and plumbing, it was time to nail on the forward top skin.  Sealed the forward edge with firewall sealant; I was able to set all but the longeron row + 4 rivets myself.  When Allison came home I conned her into shooting those remaining, while I laid upside down in the cabin to buck.  After that was done–as long as I was down there–I installed the top canopy hinge bolts, and the canopy pin mechanism.  During the solo riveting of the skin, I also secured the standby alternator relay & capacitor (which needed to move out of the way to allow bucking access).  Once the riveting was done from inside, I squeezed the rivets along the firewall, which also fasten the camloc strips.  With those in, I installed the three remaining camlocs.

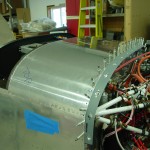
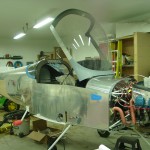
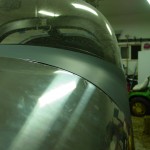
It seemed natural to move next to the canopy, so I trimmed back the seal flange on the subpanel by 1/8″, to allow for an “edge gripper” type seal to be affixed.  We then installed the canopy on the fuselage, with much consternation around getting the hinges aligned with the pins (as the alignment marks I made earlier had been removed from the hinges during some cleanup).  Reaffixed the lift struts, and checked opening & closing operation, which worked fine.  The riveting of the top skin, as it seems to often do, changed the fit of things and created some “air scoops” on the pilot side, though the copilot side looks decent — both sides were alright before riveting.  So, I’ll have to decide whether to drill rivets & try to shim it up, or build that side up with (more) glasswork now, or later.  Since the canopy stops were removed to gain access for riveting the top skin, I reinstalled those, though they still need a little adjustment before locking them down.

Put in the pilot seat temporarily to sit in the plane and check fit & function of the lap belts, and operation of the canopy, brakes, and panel floodlights.

Hours: 9.0 | Posted in Canopy & Frame, Cowling & Baffles, Forward Fuselage, Gear & Fairings | Comments Off