8th May 2012

List punchin’

With the towing company on the schedule for tomorrow morning, I wanted to see how many of the little things left on the pre-airport punch list I could get done.  A pretty successful, if short, session, I think…

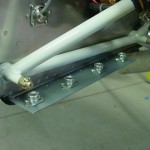
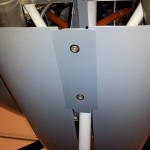
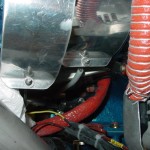
Riveted and installed the lower cowl support bracket that was fabricated on the weekend.

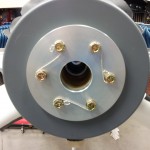
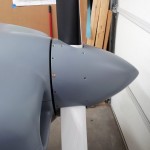
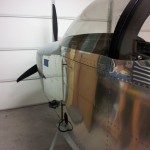
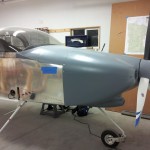
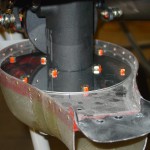
Torqued and safety-wired the propeller.  Temporarily reinstalled spinner with three screws (this won’t be final installed until the engine is ready to be run; inspectors will want to see the prop bolts.)

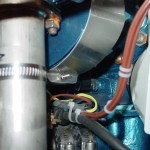
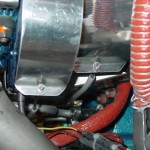
Re-checked the alternator belt tension, which is fine with a breakout force of around 130-140 in/lb on the beam torque wrench.  (The desired spec is 11-12 ft/lb, aka 132-144 in/lb).

Tightened up the nosewheel axle bolt temporarily; we’ll revisit all the gear hardware at the airport again.

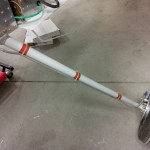
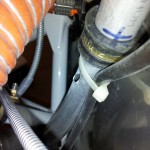
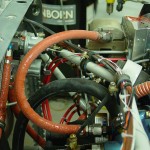
Cut the temporary zipties off the gear legs, and replaced them with new ones after placing a wrap of orange silicone fusion tape around the leg under each tie location.

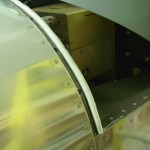
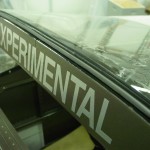
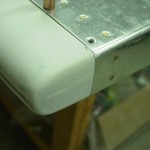
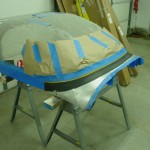
Cleaned up a wavy spot in the aft edge of the canopy on the RH side, straightening it out along a marked tape line.  This gives an even gap ~1/8″+ all the way around the canopy split, which should be wide enough to prevent expansion in the heat causing the canopy to stick shut, based on what I’ve read.

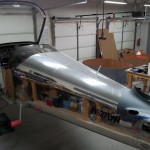
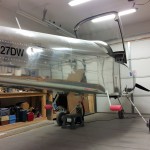
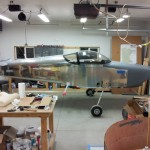
Swept the shop, moved some things around, and pulled the plane in front of the garage door, so it’s ready to roll out tomorrow.  Taped down things that could rattle in the wind while moving.  Vacuumed the various debris out of the cabin.  Took a fistful of photos.

After 1751.5 shop hours, ~5.5 years after project start, she’s going to the hangar.

Hours: 2.4 | Posted in Canopy & Frame, Cowling & Baffles, Engine, Gear & Fairings | Comments Off

4th May 2012

FWF loose ends

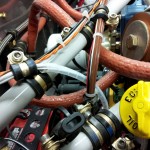
Drilled a 3/16″ hole in the breather tube and bent it upwards with a punch, as recommended by the Lycoming SB to create a “whistle slot”, the function of which is to relieve crankcase pressure in the event that the breather outlet should ice over in cold temperatures.  The common RV FWF layout (like mine) has the end of the breather tube over the exhaust, which should prevent that from happening anyway, but it’s the belt & suspenders approach.

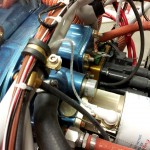
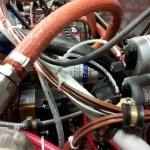
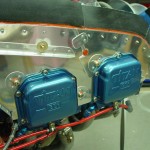
Added some spiral wrap around the oil temp, oil pressure, and fuel pressure sensor wires, to offer them more protection and support.  Larger wrap was added to the bundles of wires leading to the Pmags, for protection & support.

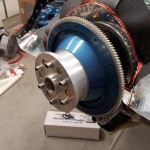
Flywheel set in place with alternator belt, and prop spacer loosely secured to it with three bolts.  I want to be pretty sure I’m ready for this step before putting the bolts in for real with Loctite, so I’ll sleep on it tonight.  Of course, while fitting it, I managed to knock the spacer on the concrete floor (aargh!  yes, bad words were used…), causing dings on two opposite sides.  I had to file the resultant bumps down flat, so the front & back surfaces were once again a level plane to seat against the flywheel & prop, and put some primer over the filed spots for protection.

If I can arrange a flatbed truck, and align it with time off work, she might move to the hangar middle of the week.

Hours: 2.0 | Posted in Engine | Comments Off

7th April 2012

Fill the gaps

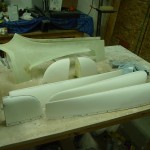
Started the day with another layer of epoxy on the cowling halves.  Should be ready for sanding on Monday.

Covered critical parts with plastic and washed the engine with Dawn and lots of water, to remove the fiberglass dust left behind from all the sanding over the last months.  Dried with the air hose, towels, paper towels, and plugging in the engine heater.  It really starts to get warm quite rapidly.

Trimmed & smoothed the front baffle, and cut some pieces of airseal, then drilled and punched holes.  I won’t do the final attach of that until I have a chance to re-fit the cowls to check for proper clearances & airseal contact.  Red RTV’d the perimeter of the baffles all around the engine, and filled various holes at corners & such.

Touched up a couple dings in the engine mount powdercoat with the powdercoat-colored paint.

Hours: 6.0 | Posted in Cowling & Baffles, Engine | Comments Off

6th April 2012

A’cowling we will go

Sanded the rear edge split lines of the cowling to provide an even 1/16″ gap to allow for paint.  Sanded the gearleg cutout to center the leg, by widening it to one side & straightening the lines.

Rolled on a layer of slightly thinned epoxy, then later in the day, a squeegeed second layer.  It’ll get another layer in the morning, then allowed to fully cure before sanding.

Spent a bunch of time wrestling with adel clamps in the process of installing a metal piece for the last 16″ or so of the breather tube.  The end of the tube is cut to align against the left exhaust pipe.

Hours: 5.0 | Posted in Cowling & Baffles, Engine | Comments Off

21st March 2012

Fiberglassy

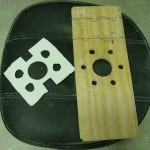
Sanded and shaped the micro filler added to the cowl in the last session.  Refit the cowl to the plane and made up a “tool” to sand the nose to a consistent gap behind the spinner: a piece of plywood drilled with the prop hole pattern, and some cardboard shims to adjust the spacing.  By bolting this up in place of the prop/spinner, I could set the space between the plywood and the cowl nose.  Adjusting the spacers so that my sanding block (long piece of 1×3 with abrasive glued to one side) would slip between the board and the cowl, and sanding until it moved freely, worked quite well.  It turned out that a couple areas of the nose needed more filler, so the cowl was removed again and more micro applied.  More sanding to ensue on the weekend…

Decided to quit reinventing the canopy seal wheel, at least for now (since they’re easy to keep fussing with over the long term)…located & installed the factory canopy seals.  The white P-profile foam one in the front, which looks like it will work, and the teardrop-profile one at the canopy bow.  This one is made of a more slippery rubber, rather than the foam of the one I had tried earlier; that fact allows the canopy to close with much greater ease–the foam rubber one was “grippy” on the plexi as it closed.  I installed this with taller part of the teardrop facing forward, so a valley is formed between the seal and the rear window plexi; the hope being that this will provide a channel to direct any water that enters the gap down to the sides.

More work on the list:

  • Installed metal locknuts on the baffle tension rods.
  • Torqued & marked the “squeeze bolt” on the fuel servo-airbox ring.
  • Cleaned the airbox, fully assembled with bolts.  Torqued & marked all the airbox bolts.
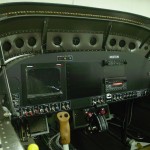
  • With the canopy seal sorted for now, reinstalled the EFIS and tested.

Hours: 6.5 | Posted in Canopy & Frame, Cowling & Baffles, Engine | Comments Off

17th March 2012

Punching the list

Another warm day (but this time breezy and hazy as well).  Trying to cross things off the list…

First on the agenda: loaded up the empennage and moved it to the hangar, where it will wait with the wings until final assembly.

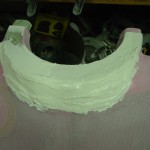
Next, set up the day’s fiberglass job.  Added a couple plies to the nose flange layup from yesterday, to give it more stiffness.  Closed off the inboard ends of the cooling inlet ramps with a 2-ply layup.  Added flox to a couple spots and deep voids.  Again today, I meant to get two rounds done, so one could cure overnight, but ran out of day.

Spent awhile fussing with canopy seals.  The edge-gripper bulb seal I wanted to use on the front seems a bit too thick, as it’s interfering with the closing of the canopy — the latch requires immense force to actuate.  So, that was removed for now.  I added the same bulb seal to the side rails, and that also cause latch trouble, so I ended up slicing the bulb in half for about 60% of the length of the side rails.  It looks ragged when open, but seals fine when closed.  This is easy to replace later — I’m searching for a smaller bulb, but the 3/8″ is the smallest I’ve found so far.  I may have to explore using foam strips or something.  Also ran into trouble with the rear rollbar seal, again, difficult to close & latch.  Will explore more seals; it seems this is a spot everyone struggles to make work.

On to the “little stuff:”

  • Slipped some clear tubing over a couple fluid lines in the tunnel to prevent any possible chafing from wire bundles (clearance is fine, but vibration does things…)
  • Installed the fuel selector & torqued all the fluid fittings in the center tunnel.
  • Installed the fuel pump and torqued those fittings.
  • Installed the metal plug in the hole that provides access to the nose leg bolt.  Sealed up with a good layer of firewall sealant on both sides.
  • Installed the bolts on the RH lap belt, having received my order of hardware from Spruce.
  • Finished off the firewall wiring passthrus per instructions, since wiring is complete.
  • Torqued the forward bearing on the aft elevator pushrod.
  • Checked that all bolts on the flight controls were torqued, and torqued them where they were not.
  • Swept the shop and put away tools, brake bleeding stuff, and so on.

Hours: 8.0 | Posted in Cabin & Interior, Canopy & Frame, Cowling & Baffles, Engine, Plumbing, Wing & Tail Joins | Comments Off

11th March 2012

Bits ‘n’ pieces

Several list items in this weekend’s work session.

Having received the 1/4″ threaded drill I needed, drilled & deburred the crotch strap mounting holes.  Installed the crotch straps.  Drilled 1/4″ attach holes in the lap and shoulder belt attach points, and mounted those (RH lap belt temporary, as I ran out of the correct length AN4 bolts).

Final-installed the baffle screws with lockwashers.  Replaced temporary nuts with metal locknuts on baffle mounting brackets.  Fabricated and temporary-installed the baffle tension rods (need #6 metal locknuts), with nylon tube over the middle parts; they don’t contact anything as is, but should something shift, the nylon will prevent wear until the next inspection/oil change/etc.

Applied packing tape to the forward spinner bulkhead, laid a bead of flox on the inside of the spinner at the contact point, and clecoed it in place.  There was a moment of concern when the spinner didn’t want to release from the tape after curing for a few hours–I wanted to let the flox set up to hold proper shape before removing the spinner.  After pushing, prodding, tapping, and finally whacking it on an angle (it took quite a few good double-fisted whacks…that’s a strong piece of fiberglass…), one section popped loose and I was able to work it free.  Trimmed the squeezed-out flox off with a knife, to save weight and keep the spinner as balanced as possible, since this is part of the rotating mass.

Hours: 8.3 | Posted in Cabin & Interior, Cowling & Baffles, Engine | Comments Off

23rd February 2012

Sanding & minor miscellany

Sanded the empennage tips to smooth the micro filler I added earlier this week.  Also the empennage fairing, which looks decent, though I’m sure there are some ppinholes I’ve still missed.  Fit the rudder top back to the rudder, in order to sand the big glob of micro I put on the nose of that tip; the side corners of the tip were not even with the rudder skin, aand they now are.  Now I’ll need to fill the air bubble holes in that area, but that should be easy enough.  Hopefully will spray primer on some of this stuff over the weekend.

Moving to the engine, I was able to knock a couple minor things off the list.  Added a safety clip to the oil drain valve, that would prevent it from coming open unintentionally.  Also, removed the upper oil cooler line, changed the 45* fitting on the engine to a straight, and reclocked the 45* fitting on the oil cooler.  Then replaced the removed line with a longer one, to add a bit more flex, and ensure that the minimum bend radius of the hose is met.  Thanks to Tom at TS Flightlines, who turned around the order for this line in one day (and previously made all the other engine hoses to my specs).

Milestone: 1600 hours in this session.  We’ve now reached the low-end of my estimated total hours range.

Hours: 2.2 | Posted in Engine, Wing & Tail Joins | Comments Off

18th February 2012

A flight, and fiberglass

Began the day with some excitement; nearby -9A (and now -10) builder Mike Behnke was gracious enough to bring his plane down to Red Wing this morning so I could have my first RV flight — a great one!  The day was warm, calm, and relatively clear, and Mike’s plane looks and flies great.  My only experience being in 150/152/172 types, the stick-and-pushrod controls were a new thing, and a joy to fly; no slop in the control system, and just a bit of pressure required for control.  We did some turns, stalls, a bit of sightseeing, and Mike demonstrated an autopilot-coupled GPS approach.  Also got to see the AFS screens in flight, as his panel is practically identical to mine (both equipment and layout).  We also chatted about fiberglass, transition training, inspections, first flights, and so on.  Many thanks to Mike for the opportunity!  It’s another inspiration to work through the endgame of my project.

On my way out of the airport, I stopped by the hangar and pulled the fuel caps from the wings (and taped over the filler holes), as I’m considering sending them in to be engraved with the required markings, rather than using a sticker.

Into the shop after lunch, I spent several hours sanding the micro filler on the canopy fairing.  It turned out pretty well, and I think I’m going to try and move ahead with it.  To that end, I squeegeed on some straight epoxy to seal the micro and fill pinholes.  I’ll add another layer or two, then sand and see where it sits.

I used the excess epoxy to seal the inside of the emp fairing.  I’m hoping to get the rest of the emp tips ready to spray this week, then spray a whole batch of glass one night.  Once the tips are done, the emp parts will move to the hangar.

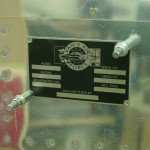
Drilled the dataplate to the fuselage — I’ll send this in for engraving with the fuel caps.  Also located some 3/32 pop rivets to attach it. Since I don’t know when the inspection will be, I’m just going to put 2012 in the date box; this field isn’t even required.

Then I took a look at the top hose from oil cooler to engine; I think the bend radius on this hose is too tight, and I’ll need to order a longer hose, change the fitting on the engine, and reclock the fitting on the oil cooler, to allow a more sweeping bend in the hose.  It’ll be more in the way of filter changes, but don’t want to take any chances with an oil hose collapsing.

Added a silicone boot to the oil temp sensor wire; more for vibration support of the wire than for short-circuit protection.

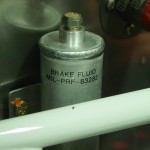
Stuck a label on the brake reservoir, indicating what the thing is, and the spec of the fluid it’s filled with.

Traced the spinner diameter and used some geometry to trisect it, in preparation for making the prop cutouts.  Still need to figure how I’ll determine the shape of the cut, not owning one of those curve-finder pin apparatus.

Hours: 5.1 | Posted in Canopy & Frame, Engine, Wing & Tail Joins | Comments Off

4th February 2012

Punch

Didn’t get part of Friday off from work as I’d hoped, but today I proceeded with the weekend plan of highlighting a bunch of items on the punch list, and knocking them off…

Mixed up a batch of firewall sealant (don’t smell that stuff…wow) and sealed the perimeter of the firewall sides and bottom, and a fillet in the lower corners.  The top curve will get done later when the top skin is put on.  Let that tack up, then clecoed & riveted the sides and bottom, along with the shims, hinges, and camloc strips.  By moving the exhaust stacks and using a variety of yokes, I was able to easily squeeze every rivet but the centerline bottom rivet, which was unsqueezable with any yoke from any angle.  That hole now sports a pulled rivet.  Once the camloc strips were on, the camloc receptacles were added.  Done.
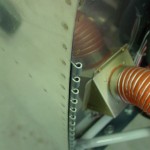
With the lower edge of the firewall complete, I added the metal portion of the fuel pump vent line.  Done.
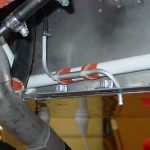
The metal fairing strips that run underneath the HS were next; drilled and tapped the appropriate holes in the aft longerons, drilled the strips, and test fit.  To see how the fit was, I added the HS back on for a moment, and marked the trims that needed to be made.  After several iterations, I had the 1/32 to 1/16″ gap called for in the plans, so the strips were primed.  Still need to countersink the strips, but Almost Done.
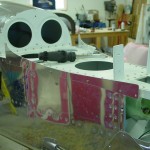
Removed the canopy strut attach blocks and primed/painted them.  While they were drying, I removed the blue tape that has been covering the canopy decks; underneath, I found (as I suspected) that some of the adhesive had become gummy, so that’ll have to be washed up.  Later, reinstalled the strut pivots, and reinstalled the assembly to the canopy decks.  Done.
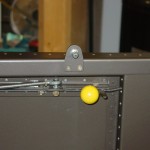
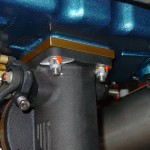
Big job of the night: redo the intake studs in the engine sump so the nuts have enough threads protruding.  This required moving the exhaust stacks (again) and partial disassembly of the entire fuel servo/control cable works — not an easy task due to the limited room to swing a wrench; several of the bolts can only be turned one flat (1/6 turn) at a time.  Eventually, though, it was off, the studs removed, holes cleaned, and reinstalled studs to the correct depth.  Not much was really needed, only 1/8″ or so on each one.  Some of them ended up being a little longer than necessary, but there’s plenty of thread and the nuts are not bottomed, so all is well.  You don’t want to bottom the stud out in the blind hole, as it will stress the threads and can cause them to fracture.  I used a torque wrench to verify that the driving torque requirement was met, and installed with red loctite per the AFP manual.  Much reassembly later, we’re back in business, and the nagging “that’s not right yet” of those studs is gone.  Verified stop-to-stop movement of throttle and mixture.  Done.
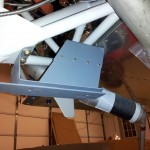
Enlarged the drain holes on the fuselage to #19 based on talk that the #30 hole isn’t big enough, and (especially if any gunk is present) the surface tension of water will prevent it from draining.  Also added a drain hole at the lowest point of the fuselage (which is under the seats, and not at a bulkhead), and one under the fuel pump area.

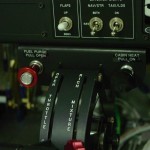
Placarded the alternate static valve installed the other day, and remade the fuel purge and center cabin heat placards with white on black, which looks nicer on the black panel.  Also made black on clear labels for the extra PTT buttons on the fwd canopy decks, and for the pilot’s stick functions (PTT, Trim Up/Dn, and AP CWS)…I expect those will fall off over time and use, but my understanding is that it’s better to have everything labelled to the point of excess at inspection time.
Hours: 11.4 | Posted in Cowling & Baffles, Engine, Wing & Tail Joins | Comments Off