17th March 2012

Punching the list

Another warm day (but this time breezy and hazy as well).  Trying to cross things off the list…

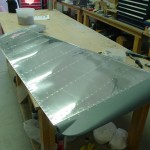
First on the agenda: loaded up the empennage and moved it to the hangar, where it will wait with the wings until final assembly.

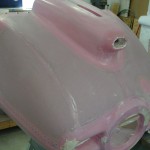
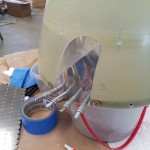
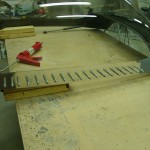
Next, set up the day’s fiberglass job.  Added a couple plies to the nose flange layup from yesterday, to give it more stiffness.  Closed off the inboard ends of the cooling inlet ramps with a 2-ply layup.  Added flox to a couple spots and deep voids.  Again today, I meant to get two rounds done, so one could cure overnight, but ran out of day.

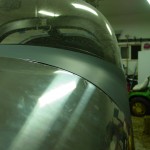
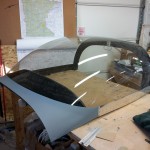
Spent awhile fussing with canopy seals.  The edge-gripper bulb seal I wanted to use on the front seems a bit too thick, as it’s interfering with the closing of the canopy — the latch requires immense force to actuate.  So, that was removed for now.  I added the same bulb seal to the side rails, and that also cause latch trouble, so I ended up slicing the bulb in half for about 60% of the length of the side rails.  It looks ragged when open, but seals fine when closed.  This is easy to replace later — I’m searching for a smaller bulb, but the 3/8″ is the smallest I’ve found so far.  I may have to explore using foam strips or something.  Also ran into trouble with the rear rollbar seal, again, difficult to close & latch.  Will explore more seals; it seems this is a spot everyone struggles to make work.

On to the “little stuff:”

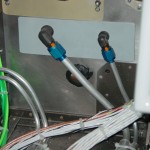
  • Slipped some clear tubing over a couple fluid lines in the tunnel to prevent any possible chafing from wire bundles (clearance is fine, but vibration does things…)
  • Installed the fuel selector & torqued all the fluid fittings in the center tunnel.
  • Installed the fuel pump and torqued those fittings.
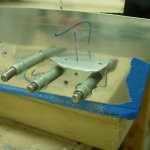
  • Installed the metal plug in the hole that provides access to the nose leg bolt.  Sealed up with a good layer of firewall sealant on both sides.
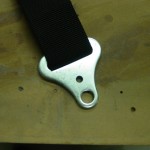
  • Installed the bolts on the RH lap belt, having received my order of hardware from Spruce.
  • Finished off the firewall wiring passthrus per instructions, since wiring is complete.
  • Torqued the forward bearing on the aft elevator pushrod.
  • Checked that all bolts on the flight controls were torqued, and torqued them where they were not.
  • Swept the shop and put away tools, brake bleeding stuff, and so on.

Hours: 8.0 | Posted in Cabin & Interior, Canopy & Frame, Cowling & Baffles, Engine, Plumbing, Wing & Tail Joins | Comments Off
16th March 2012

Making hay

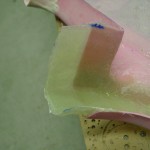
Indeed the sun is shining, the weather is record-setting unseasonable warmth (avg. high today of 51, we hit 79 here, and over 80 at the airport; at 23:30 local, it’s still 65).  Perfect fiberglassing weather, so that’s how I started the day.  Sanded some spots on the inside of the cowling, and laid up a couple plies of reinforcement when the nose-shaping operation had caused it to become a bit too thin.  Also laid up a new flange on the right bottom nose to replace the one that I cut off during fitting.  Added some micro to the leftover epoxy and filled some divots in the surface, along with putting a layer over the vertical hinge rivets on the aft edges.  Should have put one more batch before ending the night, but ran out of time.

Took another crack at re-bleeding the right brake to remove the air in the line (which causes “squishy pedal”), and got it this time.  Left & right pedal feel is equal now, both quite firm.

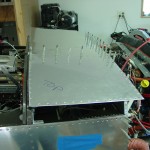
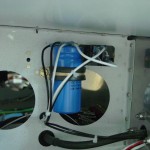
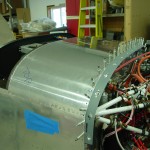
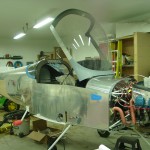
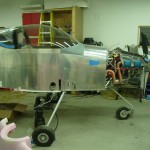
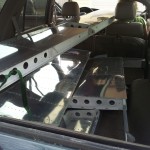
Decided that in the pursuit of progress, and given the generally-finished status of the avionics, wiring, and plumbing, it was time to nail on the forward top skin.  Sealed the forward edge with firewall sealant; I was able to set all but the longeron row + 4 rivets myself.  When Allison came home I conned her into shooting those remaining, while I laid upside down in the cabin to buck.  After that was done–as long as I was down there–I installed the top canopy hinge bolts, and the canopy pin mechanism.  During the solo riveting of the skin, I also secured the standby alternator relay & capacitor (which needed to move out of the way to allow bucking access).  Once the riveting was done from inside, I squeezed the rivets along the firewall, which also fasten the camloc strips.  With those in, I installed the three remaining camlocs.

It seemed natural to move next to the canopy, so I trimmed back the seal flange on the subpanel by 1/8″, to allow for an “edge gripper” type seal to be affixed.  We then installed the canopy on the fuselage, with much consternation around getting the hinges aligned with the pins (as the alignment marks I made earlier had been removed from the hinges during some cleanup).  Reaffixed the lift struts, and checked opening & closing operation, which worked fine.  The riveting of the top skin, as it seems to often do, changed the fit of things and created some “air scoops” on the pilot side, though the copilot side looks decent — both sides were alright before riveting.  So, I’ll have to decide whether to drill rivets & try to shim it up, or build that side up with (more) glasswork now, or later.  Since the canopy stops were removed to gain access for riveting the top skin, I reinstalled those, though they still need a little adjustment before locking them down.

Put in the pilot seat temporarily to sit in the plane and check fit & function of the lap belts, and operation of the canopy, brakes, and panel floodlights.

Hours: 9.0 | Posted in Canopy & Frame, Cowling & Baffles, Forward Fuselage, Gear & Fairings | Comments Off

14th March 2012

Spin it

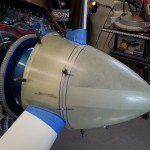
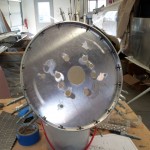
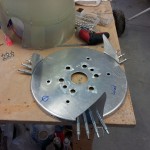
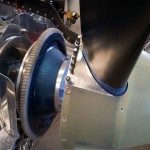
Trying to finish up the spinner/prop install.  Re-fit the spinner to the bulkheads, measured marked and drilled the holes which attach to the forward bulkhead — forgot what I was doing and made a 9-hole pattern instead of the prescribed six.  It’s good and sturdy now.  Final drilled all the spinner-bulkhead holes for #8 screws, and countersunk for tinnerman washers.  Removed the assembly from the plane and drilled/deburred/countersunk and riveted the 24 nutplates.

Screwed the spinner to the aft bulkhead on the bench, made a rough template for the gap fillers, then marked and cut three of them from .063.  Fit the plates to the holes and drilled for 4 rivets each per plans.  Then, reinstalled the bulkheads, prop, and spinner, and made another rough template to trim the gap fillers to the contour of the prop.  One at a time, mark/shape/file/refit/repeat to get the gaps and contour correct for each blade position.  (They’re not all identical due to variations in the spinner’s blade cutouts.)  As the day’s final task, cut and bend three tabs out of .063 stock, which will later be affixed to the back of each gap filler, and drilled to the spinner to provide a place to secure the filler to the fiberglass with a screw.

Had hoped to get a start on some of the cowling glasswork today, but duty called.  I’m trying to take 3 more days from work over the next two weeks to knock some of this out, but it’s getting to the busy season and many evenings are lost to one workplace or another.  It may yet be feasible to fly before summer, but it’s looking more doubtful each passing day.

Hours: 5.5 | Posted in Cowling & Baffles | Comments Off

12th March 2012

Tapped out

Finding no easy (read: cheap & fast) way to procure a 4-40 tap needed to clean micro out of the taillight attach nuts, I decided to have a go at it with a screw.  Which worked fine.  The empennage is officially ready to move the the airport.

Hours: 0.2 | Posted in Wing & Tail Joins | Comments Off

11th March 2012

Bits ‘n’ pieces

Several list items in this weekend’s work session.

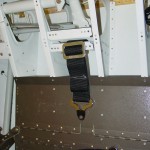
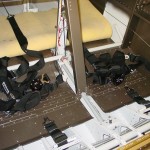
Having received the 1/4″ threaded drill I needed, drilled & deburred the crotch strap mounting holes.  Installed the crotch straps.  Drilled 1/4″ attach holes in the lap and shoulder belt attach points, and mounted those (RH lap belt temporary, as I ran out of the correct length AN4 bolts).

Final-installed the baffle screws with lockwashers.  Replaced temporary nuts with metal locknuts on baffle mounting brackets.  Fabricated and temporary-installed the baffle tension rods (need #6 metal locknuts), with nylon tube over the middle parts; they don’t contact anything as is, but should something shift, the nylon will prevent wear until the next inspection/oil change/etc.

Applied packing tape to the forward spinner bulkhead, laid a bead of flox on the inside of the spinner at the contact point, and clecoed it in place.  There was a moment of concern when the spinner didn’t want to release from the tape after curing for a few hours–I wanted to let the flox set up to hold proper shape before removing the spinner.  After pushing, prodding, tapping, and finally whacking it on an angle (it took quite a few good double-fisted whacks…that’s a strong piece of fiberglass…), one section popped loose and I was able to work it free.  Trimmed the squeezed-out flox off with a knife, to save weight and keep the spinner as balanced as possible, since this is part of the rotating mass.

Hours: 8.3 | Posted in Cabin & Interior, Cowling & Baffles, Engine | Comments Off

6th March 2012

Spinning around

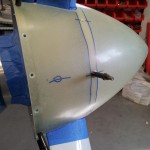
More work on fitting the spinner; finished the blade cutouts to an even 3/32″ width from the blade.  Set up a ladder to hold a fine-point sharpie while rotating the prop & spinner to ensure that the spinner was centered, then marked a line around the circumference at the rear bulkhead.  Using tape and a rivet fan, spaced 5 holes between each prop blade and drilled  #40.  These will later be enlarged to final size.  Clecoed the spinner in place and checked centering again, before removing and installing the forward spinner bulkhead.  This also requires trimming to clear the blades, and final-sizing the bolt holes to the required 7/16.”  The initial fitting of the spinner is done; the next step will be to add a bead of flox around the inside at the station of the forward bulkhead, to take up any remaining gap and minimize screw stress & vibration.

Cut the nosegear log slot 3″ longer in the lower cowl, to make it possible to clear the 3-blade prop.  I may extend it another inch still.

Sanded down the micro that I’d applied to the voids in the lower cowl nose, and marked lines on the top cowl where I’ll lay up some glass to close the inboard ends of the inlet ramps, to prevent cooling air from being dumped to the lower cowl without doing any cooling work.

No work for the next couple nights due to other commitments…

Hours: 3.0 | Posted in Cowling & Baffles | Comments Off

5th March 2012

Canopy & spinner

Finished the canopy skirts by stripping off the excess Sikaflex that oozed out of the joint and riveting the skirts in place.  All rivets were easily squeezed except five, which were bucked.  One of the nice things about Sikaflex versus something like Proseal is that, while it sticks with vigor to any properly primed surface, it doesn’t stick to things not coated with Sika primer; so it’s easy to not worry about the ooze-out, and once it has cured, just scrape or rub it off.  Cleaned all the dust off the canopy frame & underside.

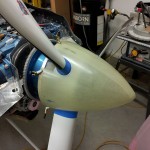
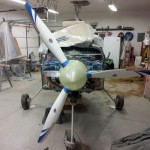
Pulled out the prop and various related pieces — spinner, bulkheads, spacer, crush plate — and set to work making the blade cutouts in the spinner.  Measuring, making cardboard templates, and cutting, then shaping with a file, followed by lots of iterative fitting and filing, was the order of the day.  Got it to the point where it fits, though the cutouts will need to be cleaned up for a consistent gap width.

Hours: 4.0 | Posted in Canopy & Frame, Cowling & Baffles | Comments Off

4th March 2012

Moving on from tips

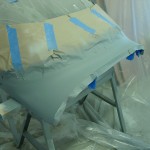
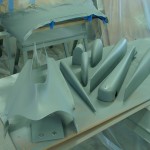
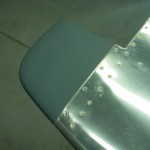
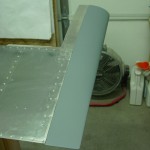
With the first batch of fiberglass parts done, today saw the attachment of all the empennage tips to their respective stabilizers and control surfaces.  The emp fairing was set aside for the day the tail is installed at the airport, and the spray booth collapsed until the next round.  The only remaining item for the emp is that the taillight screw holes on the rudder need to be tapped to remove some excess micro that got in them.  After that, the emp parts will make their way to the airport at some point, to wait with the wings for the Big Move of the fuselage.

While working on the left elevator, also final-installed the trim pushrod and cotter pins.

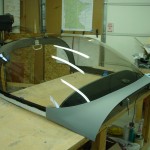
The plastic covering on the canopy was the original as shipped in the finish kit, and had become quite tattered, along with being covered in dust and overspray of all sorts — I removed it, and will cover the canopy with layers of saran wrap to keep it pretty in the interim.  Today, cleaned, prepped, and attached the canopy side skirt pieces to the canopy frame.  Currently, they’re clecoed in place to let the bead of Sika cure, then I’ll add the rivets.  Also fabricated the exterior canopy lift handle (pilot’s side only, thanks) and drilled to the frame.  The canopy is very static-y when cleaning with a microfiber cloth, which means it didn’t stay clean for long, but every dust particle in the shop was attracted to it.


Re-bled the right brakes again, but still have a soft right brake pedal compared to the left.  I see no leaks, even under pressure, where air might be entering, so I can only blame the bleeder tank somehow.  Sort of disheartening, as the original system fill was rock-solid on both sides…too easy.  But the leaks at the pedals had to be fixed.  I wonder if draining the whole right side and refilling would provide better results.  I also wonder about the design of the bleeder valve, and whether air can’t find a path to enter there.

Decided to look at the installation of the crotch straps.  Pulled the seat pans and found that it would work well to simply drill a new hole in the crotch strap bracket, up from the giant factory hole.  I marked them in situ, and drilled both to 1/4″.  The geometry of this area requires an angle drill, but my largest bit is 5/16, so I will need to procure a 1/4″ threaded bit to complete the installation.

While messing around in the fuse with seatbelts, I happened to notice that four bolts were never put in the center section — whoops!  These are the bolts that go through the inboard tubing support brackets, just outside the fuel selector, top & bottom on both sides.  Obviously, I installed those bolts.

Hours: 7.2 | Posted in Center Fuselage, Gear & Fairings, Wing & Tail Joins | Comments Off
3rd March 2012

Topcoat fairings // brakes

Two sessions today.  In the afternoon, sanded the K36 smooth — that stuff sands very easy — and sprayed a topcoat of DPLF epoxy primer, per the advice of folks at VAF, who say it is more resistant to oil, etc.

In the evening, came back to respray one elevator tip, whose finish was marred when the plastic sheet that makes up the paint booth perimeter fell on it while drying.  Argh, and it doesn’t look quite as good as the other, but good enough to last until the plane is painted for real…just trying to make sure the glass is protected and looks decent here.

Also tightened one more leaking NPT elbow on the passenger’s left brake, and re-bled the left brake system.  Replaced the broken right brake bleeder screw, and re-bled that side, but there was a continual stream of tiny bubbles in the fluid and the right brake is definitely softer than the left.  I think pumping up the bleeder tank put bubbles in the fluid when the level in the tank got low, so I filled it back up and pumped it up.  I’ll leave it set overnight to allow the bubbles to settle out, and re-bleed again tomorrow; hopefully that’ll fix it.

Hours: 5.0 | Posted in Gear & Fairings, Wing & Tail Joins | Comments Off
2nd March 2012

Pinholes

Mixed a dollop of Superfil and worked it into the few remaining pinholes before work.
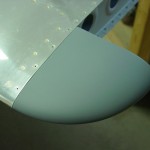
Response to my question on VAF about topcoating the K36 (or not) until paint leans in the direction of spraying a final coat of DPLF, which will provide more protection from oil, etc.  It’s also a nicer color…

Hours: 0.2 | Posted in Wing & Tail Joins | Comments Off