30th
December
2009
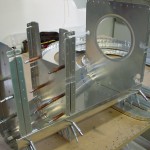
Bought a third sawhorse to match the two I already had, saving me from buying a whole set of three. Upon confirming that it was the same height, how could I resist setting the bottom tailcone skin on it and clecoing in a couple bulkheads?
Hours: 0.4 | Posted in Aft Fuselage |
29th
December
2009
Finished final assembly on the bulkheads by riveting the area around the pitch bellcrank on the baggage bulkhead, and bolting the seatbelt anchors in place. I did realize, looking around the web later on last night, that I riveted the reinforcing angle to the F-728 channel prematurely — when the manual said “leave the 728 channel clecoed for now,” I took that to mean that the 728 assembly was to be clecoed to the bulkhead until later. This is indeed the case, but they also want you to leave the angle off; looking forward in the manual, this appears to be for better access to buck some rivets, though I’m not entirely sure. Since this piece isn’t permanently riveted in place for some time yet, I can always pull it and drill out the couple dozen rivets holding it together.
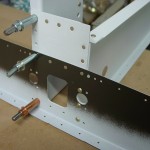
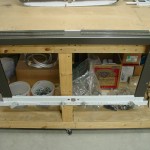
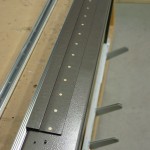
I do rather like the warm dark brown of the interior paint…just cheap Rustoleum Hammered, Dark Bronze color. I was originally intending something lighter, but this was available, priced right, and Allison chose the color from the various options. It’ll definitely guide upholstery color choices, and perhaps even affect exterior paint color, but that’s all fine. I’ve seen pictures of both light and dark interiors. I like the way the rivets look against the dark paint as well, which is why I’m going to the effort to paint the pieces before assembly.
Cut the J-stringers to length, and trimmed the ends to fit the bulkheads…this area is a bit confusing, since the plans show an aft trim detail, but no forward detail…the manual says “trim ends.” Holding things together as they’ll eventually go, it’s clear that the forward ends need to be trimmed as well. (Smitty’s site concurs.) A cutoff wheel in the Dremel makes quick work of the cuts here, and a quick debur of the trimmed ends leaves us ready to begin assembly of the tailcone. (Ok, there is one more middling task–to draw a centerline on each of the J-stringers.)
Hours: 2.1 | Posted in Aft Fuselage |
28th
December
2009
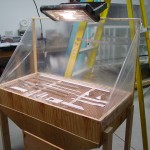
After an afternoon of etching (thankfully, the parts are generally small enough to be rinsed in the kitchen sink; winter priming the skins might pose a bit of a problem…), I put the newly-constructed priming table to the test. It does seem to have worked quite well, with no paint on the cars, floor, etc. The furnace filter, on the other hand, was quite covered in paint, fulfilling it’s intended role. The drying of the primer, a problem during last winter’s wing rib priming, was greatly aided by clamping a two-tube quartz infrared heater to a ladder to suspend it over the table; this kept things moving at a decent pace, and also provided some extra light from the built-in halogen worklight.
Using some photos from Mike Behnke’s log, I determined which parts would be visible from the cabin interior–those received the Rustoleum hammered brown paint over the primer. This was basically the sides and top of the 705 bulkhead, and the forward side of the 706 “baggage” bulkhead.
Once the priming was finished, I cleaned out the gun and had some dinner, followed by a bit more work–it’s hard to resist assembling some parts. I riveted together all the aft bulkheads, and most of the 705 and 706 bulkheads, which need just a few more parts attached, before calling it a night.
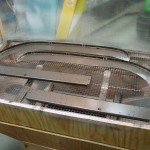
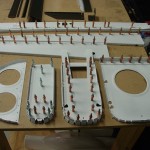
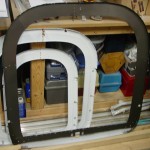
(Pointless note: beginning with the entry of 11/29, I’m experimenting with the fullsize pictures being at a larger resolution, 1280×960, than they were before…this saves me the step of having to resize them all before uploading, as my camera takes them at this size)
Hours: 9.3 | Posted in Bulkheads |
27th
December
2009
After building the priming table and cleaning up the shop, I needed to get the longerons out of the way to make space for priming…why not bend them too? I had to move the vise to the main workbench, but the bending of the longerons went fairly easily using the “Orndorff method.” The only glitch was that there is some minor scratching of the angles, despite having padded the vise jaws with 2 layers of rubber drawer liner, plus masking tape–so that’ll have to be smoothed out. Fitted the canopy decks to the longerons at the appropriate place, and drilled them together before setting them out of the way…at least as out-of-the-way as you can get 15′ pieces of angle with odd bends in them.
Hours: 3.0 | Posted in Aft Fuselage |
5th
December
2009
Finished deburring the rest of the bulkhead components, and cut the tapers into the bars for the 711 bulkhead…yes, 40 inches of taper with a hacksaw. Not having the ability (space- or time-wise) to prime these parts soon, I rather continued by clecoing the aftmost bulkheads together and fitting them to the tailcone skin. Or rather, fitting the tailcone skin to the bulkheads. This is a notorious place that needs a bunch of trial-and-error fitting, so I spent some time assembling and disassembling, adjusting the bends of the tailcone skin until things were fitting well. Also pulled the blue plastic off the tailcone skins.
Flipped to the next page in the manual and saw the next big task–longeron bending. Nothing to do but pull them out, so I did. Clamped them together and marked the measurements, then wrapped up for the day. I need to get a bagful of small C-clamps, in preparation for the “Orndorff method” of longeron bending, and also figure out the business people talk about with marking the longerons every inch. Located and removed plastic from the canopy side decks, which are used to set the longeron bends.
Hours: 4.2 | Posted in Bulkheads |
29th
November
2009
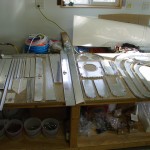
Began the process of disassembling and deburring all the bulkheads in preparation for etch & primer. There are plenty of tabs and notches to deburr with small files, but the scotchbrite wheel still works well for the accessible edges. It’s a time-consuming process that results in a big pile of parts, all of which will still need to be scuffed with the etch solution, rinsed, dried, and then primed; some will also get sprayed with the interior color paint. I got through all the easy parts (translate as “straight things with no little tabs”) and all the one-piece aft bulkheads, leaving the parts of three bulkheads, plus the bars from the 711 bulkhead (which still need to be tapered) for next time.
Before priming can happen, I need to build a booth of some sort in the shop to contain the overspray, and figure out how to taper those bars. I managed the shorter tapers from the rear spar bars with a hacksaw and disc sander, but these tapers are 4″ longer. Also need to pick up some new sanding discs, as the abrasive is about 80% gone from the one I have now.
The current pie-in-the-sky goal would be to have the tailcone done by the beginning of February, but we’ll see how partical that turns out to be. The next few weeks are insanely busy at multiple jobs, and the holidays are always nuts, too, with travel and other obligations. Perhaps life will lighten up a bit in January.
Hours: 4.4 | Posted in Bulkheads |
28th
November
2009
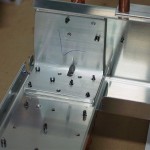
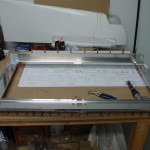
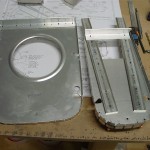
Home again after the turkey day trip to to visit with Allison’s family… More work on bulkheads tonight; I think I have all the fabrication of bulkhead parts completed, except for tapering the vertical bars on the 711 bulkhead. Drilled the heavy angles to the 705, and drilled/filed the slots for the canopy latch fingers. Also went back through each bulkhead and did the necessary countersinking, and any drilling that was missed earlier. Once those bars get tapered, it’ll be time to take all of these apart for deburring. Lots of little flanges and tabs to deal with…yick.
Hours: 2.8 | Posted in Bulkheads |
23rd
November
2009
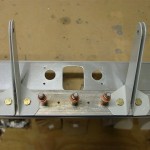
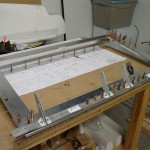
Tonight, match-drilled the remaining holes in the 705 bulkhead, and re-fabricated the replacement parts that arrived today–the seatbelt anchors and rear spar doublers. (While looking over some other builder’s sites, I realized I had drilled an extra hole in the doubler bars; there is one rivet that goes through the bottom bar, but not the doubler, where the doubler is angling away from the bar. Since this is part of what holds the wings on, and I needed to order replacement seatbelt anchors anyway, I added new bars to the order.)
After clamping and drilling the new doubler bars, I cut the tapers on both (much easier with the new hacksaw blades) and smoothed the edges. Finished fabricating the large angles that go under the 705 bulkhead for the canopy latch arms. And, drilled and clecoed the angles to the channels that support the elevator bellcrank.

Hours: 3.4 | Posted in Bulkheads |
22nd
November
2009
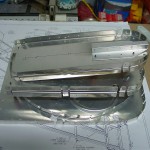
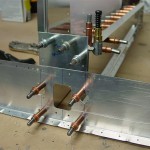
Working aft on the bulkheads, spend time fluting, match-drilling, and fabricating bulkhead components. Marked and drilled all the holes for rudder cable and wiring bushings, cut and filed the areas to be trimmed from the 711 bulkheads, dimpled the flush rivet holes on the aftmost bulkhead. Cut the angles that reinforce the elevator bellcrank area and drilled the lower one to the channel.
Hours: 3.3 | Posted in Bulkheads |
20th
November
2009
Drilled the snap bushing holes in the 705 bulkhead. Then attempted to fabricate the hefty angles that reinforce the top of that bulkhead (providing a solid point for the canopy latch to anchor), but saw the need for a new hacksaw blade after a short while… Pulled out the rest of the bulkhead parts all the way to the tail, and fiddled with them for awhile, fluting and clecoing, getting the picture of how they need to go together. Rough cut the center cutout from the 712′s, then marked & cut the aft tiedown bar before wrapping up.
Hours: 1.8 | Posted in Bulkheads |


