Fun with glass
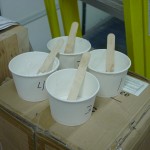
Hours: 8.6 | Posted in Wing & Tail JoinsA bundle more of fiberglass work today, including my first real dive into mixing up epoxy with additives, and using it for more than sticking a ziptie base to something. By the end of the day, I had used four small batches for various things, and had the discarded cups to prove it (I kept the excess in the cups and set them aside so I’ll be able to verify that the batch cured correctly, without any mixing errors/etc, and to observe how, and how quickly, the different mixtures set up):
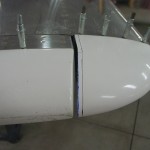
First on the list was to take the necessary steps toward finishing up the empennage tips. I used a 1/2″ wide steel rule as a spacer to mark a line on the HS/VS tips, that distance from the edge of the counterbalances. Then, I drew a parallel line 1/4″ back, and cut/filed/sanded to that line, for an even 1/4″ gap. I suppose this gap could be tighter, but a wider gap leaves less chance of fouling a control surface should something go awry or debris enter in…and, it could always be tightened back up with, you guessed it, more fiberglass work later.
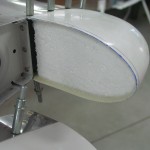
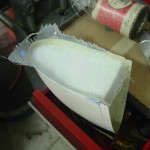
With the gap and shape established, I re-fit the tips to the stabilizers, and formed ribs out of some styrofoam saved from the fuselage shipment; these ribs were inserted into the tips and will serve to hold the shape of the tip during the next steps. I mixed up epoxy with some flox to a peanut-butter thickness, and formed a small fillet to the rib, to hold it in place. Herein is the downside to fiberglassing (besides the mess): once it’s in place, it takes several hours to cure to a point where it’s workable. So, on to other things while it does that.
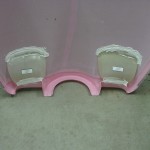
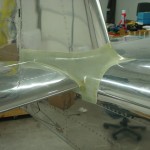
Meanwhile, I wanted to get the “elephant ear” cooling ramps on the upper cowling, so I can continue trimming of the baffles. I found a position where they fit well with the contour of the cowl, and drilled two #40 holes for keeper clecoes in the inlet flange, to hold the forward edge of the ramps while the epoxy set. Mixed up another round of the flox paste, and stuck them on (after sanding to roughen them up, air-blowing the dust off, and a solvent wipe). Again, sit to cure…on to other things. Later, once it had set up a bit, I came back, pulled the clecoes, and slathered on an epoxy-micro-cabosil mix at each end of the ramps, to start in creating a smooth transition surface. It’s trowelled on for now, then the micro mix (which supposedly sands really easy) will be sanded down to smooth it out. It’ll probably require a second application, too. But for now, good enough. Left to cure overnight.
Back to the HS/VS tips; by now the flox fillet cured up well enough that they could be removed from the empennage and they retained their shape. I cut some pieces of bid cloth and wet them out with straight epoxy in a plastic sandwich, and applied them to the aft side of the tips, covering the foam rib. I set those aside to cure overnight; the idea is to remove the foam rib, then lay up additional plies of glass on the inside for stiffness. I may need another ply of glass on the outside before the rib can be removed, I’m not sure — we’ll see how stiff it is tomorrow. Once the inside plies of glass are added, the remaining void on the back will be filled with micro, and the whole operation sanded down to make a nice smooth tip closure, then primed.
In between waiting for epoxy to cure, I also: cut the slots in the fuselage side tank support brackets, primed them, and bolted them to the fuselage. Drilled a drain hole in the rudder bottom. Deburred the wingroot holes for the gap fairing screws. Drilled and hole-deburred the wing inspection plates. Finished bending the ends on a cotter pin on the engine mount that I’d missed doing that for earlier. Found the scribe line on the empennage fairing and rough trimmed to it — made the fairing fit much better, it actually looks usable now. Drilled holes in the corners of the dataplate.
There’s a bunch of nutplates that need to go on the wings (root fairings and inspection plates), then they’re essentially ready to move to the airport — I could also do the tip light wiring before the move, too, but that’s not a big job (cut to length, add connectors, add local ground wire).
