2nd
January
2009
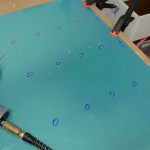
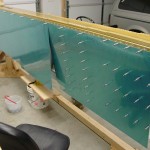
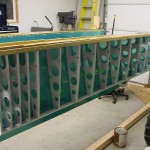
Started the skinning process by clecoing a fishing line to the spar, pulled tightly to show proper alignment of the row of rivet holes. I used a temporary bottle-jack-on-drywall-mud-pail system to raise the sag out, as I forgot to pick up anything to make a more permanent center stand with.
The first step to skinning the wings is to drill the wing walk doublers to the top skins on the bench. The instructions have you drill just three holes per rib, and then drill the rest on the wing. Labelled the parts as they were drilled for left/right and orientation, then proceeded to cleco those pieces to the left skeleton. The structure, which is rather wiggly with just the spars & ribs, really stiffens up with the skins attached. Attached the outboard skins as well, then moved the jack assembly to the right wing and attached the skins there as well before calling it a night.
Passed 200 hours today.
Hours: 1.7 | Posted in Skin Panels |
2nd
January
2009
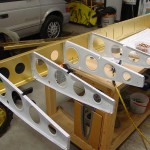
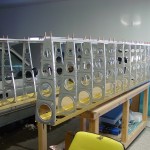
Completed the riveting of the wing skeletons by attaching the right rear spar to the ribs, and the forward rib tabs to the main spar…easy. I also took a trip to the store for some plywood to reinforce the wing jig, and built that. Ended up making a second trip, too, as I underestimated the amount of threaded rod I’d need to rig up the angles at each side. The threaded rod with nuts at each end allows for an easy adjustment of level.
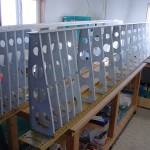
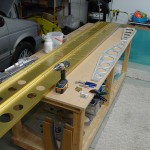
Building up the jig went easily, if not necessarily quickly. I followed the general lead of Smitty, who details the dimensions and such he used in his build log. I built two jigs, so that both wings can be built at the same time. They’re also freestanding, rather than the plans type which have a post running from floor to ceiling; this was essential for me as I need to be able to get the overhead door open, and the posts would interfere. It’s basically 4′ legs, 5′ uprights, and 139″ on the beam, with reinforcing sheet panels (I used some cheap 1/4″ chipboard), angle braces on the uprights, and lots of screws. The arms are made from leftover steel angle bracing from the overhead doors I removed from the shed that we tore down to make way for the new garage…proof that saving everything has its merits! Hung the skeletons on the jigs.
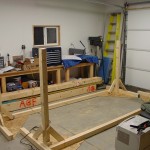
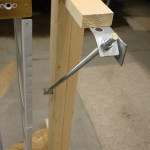
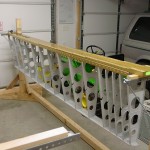
Fixed the heater, as well. The check-valve device turned out to not be the culprit, as the problem continued after I took it out of the line. Pulled the access panel off again and took a good look inside. I saw signs of arcing on the side of the spark igniter arm (two metal rods that stick in through the burner box to create the spark in the jet of gas for ignition). That tipped me off to the trouble; turns out the igniter had a smaller gap to the nearby burner than it did to its own ground rod, which was causing the spark to jump to the burner, rather than the igniter gap–which put it largely outside the gas jet. I removed the igniter assembly and bent the two rods away from the burner a bit, then reinstalled. Perfection. It lights off every time now that the spark is happening in the gas jet, rather than jumping to the metal of the burner.
Hours: 5.0 | Posted in Spars & Skeleton |
1st
January
2009
Started out with a pile of primed parts and spars. Lesson one: remove any blue tape used for masking as soon as possible…I covered the gaps of the upper and lower flanges with tape to keep metal chips from the countersinking from falling in, and ended up spending a fair bit of time removing it, and the adhesive goo it left behind. (Yes, this was the blue, easy-removal “painters” tape.) A heat gun helped more of the adhesive come off with the tape, and acetone cleaned up the rest.
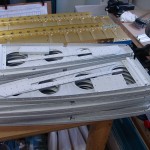
Riveted the rear spar components together to form complete spars; careful attention required here to avoid filling any holes needed for other pieces later on. A close look at the plans in the area of the outboard aileron hinges revealed a previously overlooked detail; that the outboard rib is attached to the rear spar with flush rivets, so the aileron bracket can fit over those rivets. Dimpled the outboard rib, rear spar, and spar doubler on each wing.
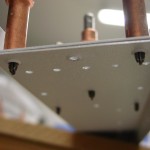
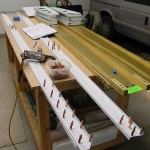
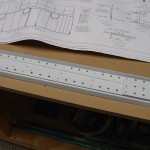
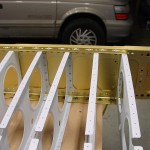
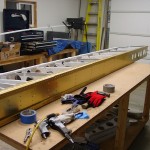
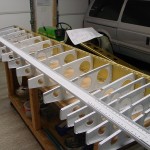
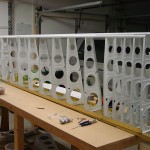
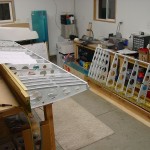
Clamped the left main spar to the bench and attached the ribs one at a time from the outboard end inward, which worked well. Once those were in place, I riveted the front tabs of the ribs which are beneath the fuel tanks to the countersunk holes in the spar. (There’s no specific mention of this in the instructions, but it’s clear from the plans what needs to be done here…whether this was the best time to do it will be decided later.) Clecoed the rear spar to the ribs, and riveted that on–all those rivets are squeezable, which is nice. The right wing has nicer rivets, as I changed the way I was using the rivet gun by lowering the pressure at the compressor regulator, and opening the restrictor on the gun fully. This seemed to provide a more even series of hits than a higher pressure dialed down at the restrictor. (The theory is that because the restrictor controls flow, not pressure, the first hits of the gun are at full line pressure–since the pressure has time to equalize across the restrictor orifice–with subsequent hits at a lower power due to the restricted flow.) Finished the right main spar-to-rib rivets, but still need to squeeze the rib tabs and rear spar attach.
Also getting a little frustrated by the heater…works great when it fires, but it fires very randomly, with many failed ignitions. I’ve checked input pressure and manifold pressure with a simple U-tube manometer, and both look OK. I’m wondering if the saftety check-valve gizmo installed in the line (it came with the CSST that I used to go from the valve to the inlet connection; it’s supposed to close in the event of a breakage of the flex line) is causing a problem. I might remove that from the line and see what happens, and will also double-check the spark ignitor, but it appears to function correctly.
Hours: 7.5 | Posted in Spars & Skeleton |
31st
December
2008
Cleared the priming hurdle today with about 7 hours in the shop (though some of that time wasn’t build-related). Hung up plastic from the tracks of the big garage door, and a piece on the floor, to create a priming booth about 9′ x 8′. Set a strip of plywood on a couple sawhorses inside for a priming table, and held the plastic down with some 2×4′s.
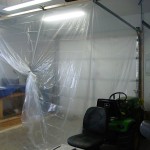
Actually worked pretty well, though a bit slower than priming outside, due to drying times. Not sure if that’s more due to the lower temps (I run the shop temp at 45-50 when I’m working in there), or the lack of air circulation. I settled into a routine of doing the first light coat, waiting a bit for it to tack, laying the second, slightly heavier, coat, then opening up the plastic wall and turning on the heater fan (with heat, if the temp was getting low) to dry the pieces, before flipping and spraying the backsides with the same process. Got all the rear spar parts and main ribs primed (whew!), and deburred the holes in the spars during downtime. Everything should be cured nicely tomorrow, paving the way for skeleton assembly.
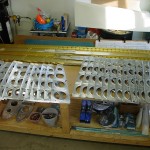
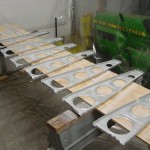
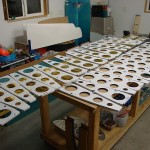
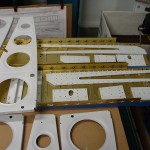
In an earlier post, I wrote that my goal was to have the skeleton complete by the end of this month (a revision from my original goal of Christmas). Didn’t quite hit that target, but I did come close…ought to have it in the bag this week. I bought lumber for the wing stands today as well, so after getting those built, it’s on to skins, J-stringers, leading edges, and tanks. New goal…tanks complete by my birthday (March 1)? Not sure if that’s realistic or not; Smitty logs about 50 hours for each segment of each wing (prep, skins, tanks; I believe he built his wings separately), plus another 50 each for ailerons & flaps.
Hours: 5.0 | Posted in Spars & Skeleton |
30th
December
2008
Long session of rib prep…finished drilling, deburring, and etching/scrubbing all the remaining wing ribs for both wings. Bought some plastic yesterday to hang up for a priming area; with that, and some large cardboard leftover from a fridge box, ought to be able to kludge something up and move on to priming and assembly, assuming the primer will dry in the cool shop temps. Wing jigs are on the horizon for later this week, so started to shuffle the shop around to see where they’ll fit. I need to build some shelves and get things off the floor on the east side, as well.
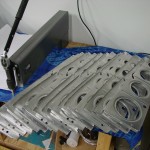
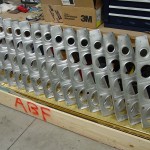
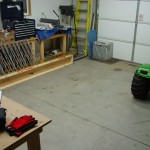
Hours: 4.9 | Posted in Spars & Skeleton |
29th
December
2008
Received a reply from Vans:
These small holes won’t make any significant difference to strength, so just clean them up and move on.
Both holes can be used for pitot/wire etc, but only one needs to be enlarged. The other is already full size.
So I’ll deburr those extra holes as normal, and forget about them.
Posted in Spars & Skeleton |
28th
December
2008
Drew up a proposed list of required wires in the wings, and went on drilling all the ribs for wiring conduit and enlarged tooling holes, after looking at other builders’ sites. Wrapped up all the ribs, and proceeded to cleco the skeleton together; hey, these are starting to look like wings!
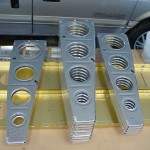
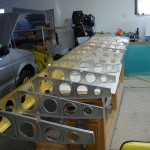
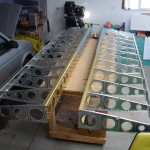
Left Wing Proposed Wiring:
- Equip List: pitot, AOA, landing light (Duckworks)
- 7/16″ Hole 1 (pitot hole; to pitot bay only): Pitot
- 7/16″ Hole 2 (to wingtip; enlarged tooling hole): Strobe pwr
- 3/4″ Conduit (root to tip): Landing Light pwr, Nav light pwr, AOA upper/lower pressure, pull string
Right Wing Proposed Wiring:
- Equip List: AP roll servo, wingtip nav antenna, taxi light (Duckworks), OAT probe
- 7/16″ Hole 1 (pitot hole; to pitot bay only): -open-
- 7/16″ Hole 2 (to wingtip; enlarged tooling hole): Strobe pwr
- 3/4″ Conduit (root to tip): Taxi light pwr, Nav light pwr, AP control, Nav ant coax, OAT, pull string
Not sure if the OAT should go in the left or right wing…probably doesn’t matter, so will depend on balancing weight and/or length of wires to EFIS.
Drilled the rib-to-spar holes, both front and rear, and took it all apart again for primer prep. Primer prep is my least favorite part of building so far…the priming isn’t bad, but the the seemingly endless etching, scrubbing, and rinsing I could do without. The time savings to go with an unprimed plane probably aren’t significant enough in the grand scheme to be worth not priming, though. Deburred all the left-wing ribs, then prepped all the rear spar components, and 7 left-wing ribs.
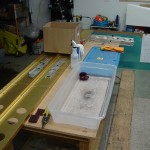
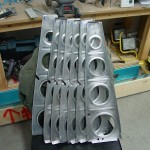
I’ll split up the primer prep by doing all the left wing ribs, then go back and deburr the right wing ribs before etching. I still need to come up with a scheme for an indoor priming “booth” of some sort; someone on VAF mentioned using a cheap screen gazebo, but I don’t know if a) it’s worth the cash, or b) if I’d be able to find one this time of year! I might just get some heavy plastic and drape it from the garage door tracks somehow.
Hours: 5.8 | Posted in Spars & Skeleton |
27th
December
2008
Finished the spar prep by countersinking the tank attach and access plate screw holes, and spot-priming the countersinks. Also fabricated the new set of tiedown bars, so the new spars are now at the point the old spars were before the mis-bent flanges were discovered.
Moving forward, I went ahead and began drilling holes for wing wiring runs, and things took another turn south…this time, all my fault. Lesson learned: stop while you’re ahead. I printed off the page from Van’s that advises on where to install the wiring conduit (bottom of the rib, behind the first lightening hole), and proceeded to drill a hole in a rib. Decided to move it about 1/2″ forward to center it between two skin-rib rivet holes, for ease of bucking later on, and drilled a second hole; not an issue since the first hole would get swallowed in the enlarged 3/4″ hole that’s made for the conduit, right? Ok, so I proceeded to transfer that hole location to a set of L & R ribs to use as templates for drilling the other ribs…that’s when I saw it–the holes I drilled were on the TOP side of the rib. D’oh! Re-drilled the holes on the BOTTOM side of the rib, and all is well…except that I have three ribs with extra holes:
- (1) W-911-L with (2) extra #12 holes on the top side
- (1) W-911-L & (1) W-911-R with (1) extra #12 hole on the top side
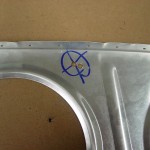
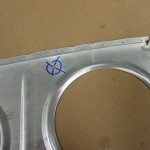
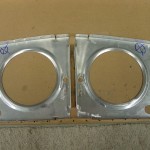
I’m assuming that the ribs with the extra single hole won’t be an issue, but that the one with the two holes will either need replacement, or reinforcement of some sort. A new rib is just under $17 from Van’s. I’ve sent pictures to Van’s for their take on it. I’ll continue moving forward with the ribs and await their reply…I’d like to get the wiring holes drilled, ribs drilled to spars, and then start priming everything.
Hours: 3.3 | Posted in Spars & Skeleton |
23rd
December
2008
Finished drilling and installing all the spar nutplates; just need to countersink the center screw holes now. Also need to re-make the tiedown bars, as the ones I had made for the old spars don’t match up–the top & bottom attach holes are perfect, but the center pairs of holes–the ones that are in the web, that have the aileron bellcrank brackets on the back side–are off by about 1/3 diameter. Not wanting to oblong these holes, as they’re on the spar and attach flight control hardware, I have ordered a pair of tiedown brackets from Cleaveland Tool. Also ordered more clecos (300 3/32″ and 100 1/8″; Brown Tool had a holiday special thru today), as I intend to build both wings simultaneously, and–especially with the longer wing of the -9–more are helpful. I think I will have a total of 600 3/32″ and 250 1/8″ now.
Hours: 2.4 | Posted in Spars & Skeleton |
20th
December
2008
Now that the shop is cleaned & organized, and the winter concert rush is over, back to work. Tonight, started the nutplate attach process on the new spars; drilling holes to size, deburring, and priming in advance of attaching nutplates. Ought to go faster the second time, right?! I think I will use the Van’s method of countersinking (use the nutplate as a guide), rather than the jig method, this time…I’ve read on other build logs that it’s worked fine with no adverse results, and it *has* to be easier…
Hours: 1.2 | Posted in Spars & Skeleton |


