5th August 2011

Fiberglass, mostly

More work on the fiberglass stuff…

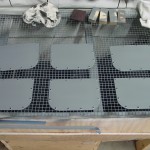
  • Trimmed yesterday’s layup on the FAB; spread some flox/epoxy into the gap, and added another ply of glass on the inside.
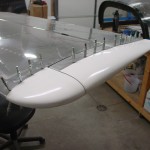
  • Scraped and sanded the epoxy runs off the HS/VS tips; the epoxy isn’t fully cured yet so will wait until later to sand, when it’s harder.
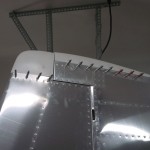
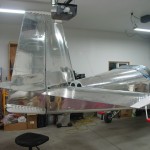
  • Did a little cleanup on the empennage fairing, scraping off the unidentified brown goo splotches from the factory.
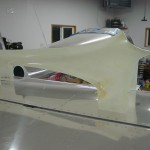
  • Tacked the foam block into the cowling snout.


And a bit of non-fiberglass stuff for sanity…

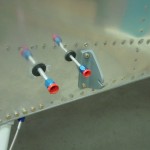
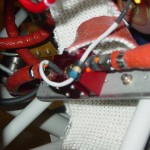
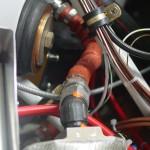
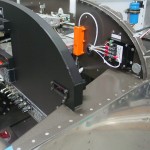
  • Torqued & sealed the fuel hoses at the flow transducer; FWF fuel system now complete.
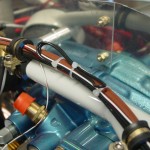
  • Torqued & sealed the oil cooler lines; oil system now complete.
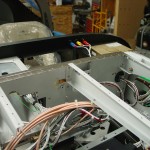
  • Deburred & dimpled the flanges of everything subpanel & forward…moving toward riveting the top skin.  Also had to remove the canopy pin mechanism, which will be fun to reinstall from under the panel while laying upside down…
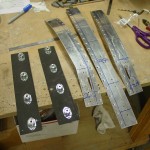
  • Removed the camloc strips, deburred and dimpled the attach holes.
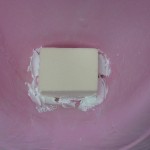
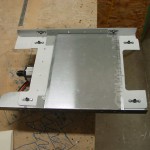
  • Cut a sheet of .020 and bent an angle into the edges, then fit it to the bottom of the fuel pump mounting plate.  Since this piece has a bunch of nutplates on the bottom of it, and many tubes & wires run beneath it, I decided that having a sheet in there would be a good idea to prevent any possible chafing (there is clearance between the plate and the bundles, but just in case, vibration and all that…).  This looks like it will do the job nicely.  It’s tacked to the mounting plate with a blob of Goop at each corner, and one in the center.


Doing some evening reading and working up a list for tomorrow, when I’ll again ignore all the other work that needs to be done to spend the day in the shop.

Hours: 3.4 | Posted in Cowling & Baffles, Engine, Wing & Tail Joins | Comments Off

4th August 2011

Fiberglass up and wait

Long week of work at work, and haven’t really had/taken time to work on the plane.  Looks like flying this weekend will be a bust due to the schedule at the FBO.  Off to the shop tonight to make some way on a bit of fiberglass work; this gets annoying because you can only do so much before you have to put it down and let it sit until the epoxy is cured.

  • Laid up 2 plies of glass at 45* to each other on the FAB split.  I’ll let this cure, then add more glass to the inside of the box.
  • Brushed on a coat of epoxy over the shaped/sanded micro on the elevator & rudder tips.
  • Sanded on the upper cowl inlet ramps until my arm wore out, smoothing the micro that was applied earlier.
  • Added a small layup of a couple plies of fabric on the inside of the emp fairing, the top aft side where it is torn (came out of the box that way).
  • Filed a bevel on the inside of the air intake snout, the first step of creating the duct that routes the air into the FAB.
  • Cut the supplied foam block from the FAB kit in half and glued the two halves together, in prep for fitting it to the cowl snout and FAB.
  • Went back to the shop later in the evening and put down another coat of epoxy on the elevator/rudder tips.

Hours: 2.1 | Posted in Canopy & Frame, Wing & Tail Joins | Comments Off

24th July 2011

Working the list

Started out by giving more attention to the HS/VS tips (the elevator/rudder tips don’t require so much work, and I’m glad for it).  Sanded the filler layer of micro I added yesterday, and got things looking relatively decent.  Spent some time reading on what the process is from here; it looks like there should be an epoxy sealcoat or three over the microed area, then a primer, and possibly another primer after that.  I’m reading much of what DanH has written over at VAF, and have found the specs for the PPG coatings used by many of the folks; have to see if there is a local supplier, or if it’ll be a mail-order operation.  DPLF is the basic primer, and K36 is the high-build primer/surfacer.  The finishing steps, as I understand them, are to brush or roll 3 layers of straight epoxy, then sand, shoot DPLF, sand/fill if necessary, then a light coat of DPLF and a coat or two of K36.  I don’t know if the K36 step is needed at this point, or if that’s something that’ll happen at paint prep time.  After sanding them up, I added a fillet of flox to the inside of each tip, to strengthen up the joint at the back.  Hopefully these will be done soon…

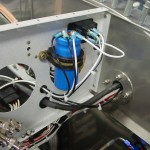
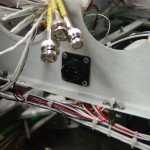
Next I tackled the pre-installation for the SD-8 backup alternator/dynamo.  I’ve installed the relay and capacitor, but haven’t bought the regulator or dynamo to save the $500 for the moment.  This is purely a backup device, so I don’t need it to get flying, but want to add it eventually.  I drew up a full-size paper mockup of the regulator so I could locate nutplates to secure it, and installed those.  Then, I installed all the wiring, and ran the lines which run to the regulator to a CPC connector mounted below where the regulator will go.  When I get the regulator, I’ll put a mating CPC on it, and it’ll be a simple matter of bolt in and plug in.  Also ran a loop of wire FWF and secured the excess length to the wire bundle along the upper engine mount tube, where it’ll stay until the installation of the dynamo.


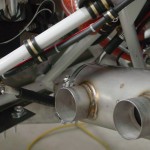
Started on the installation of exhaust mounts.  Tightening down the bolts on the ball joints to the specified 2-threads caused them to become rather tight, so I may need one length longer bolts there — not sure how tight or loose it’s supposed to be, but the install guide does say that it’s important they be able to flex, and recommends lubricating them regularly.  Got the right side hangers fit, and the left side marked and cut, before quitting time.

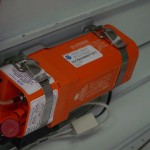
And, stuck the biennial registration sticker on the ELT.

Hours: 5.4 | Posted in Electrical, Engine, Wing & Tail Joins | Comments Off

23rd July 2011

Flavor of the day: nutty for nutplates

Sanded down the filler that was added to the empennage tips, checked fit, and put on another thin layer of micro to fill the voids opened up by the sanding.

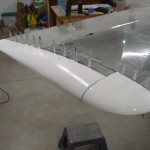
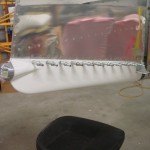
Still working on getting the wings to the point of being ready to move to the airport.  Installed all the nutplates (52) for the wing root fairings, after making a poor man’s nutplate jig (insert a screw partway into the nutplate, then cut the head off) for both the two-leg and one-leg nutplates.  Had to dig a bit to come up with the one-leg dimpled nutplates for the 4 locations that require them.  Nothing difficult, just lots of repetitive little stuff.  There is one nutplate hole on each lower leading edge that’s impossible to dimple with the dimple dies because the tank support bracket is right behind it — I found that it worked to install the nutplate, then use a screw with a tinnerman washer to form the dimple.


Also deburred, dimpled, and primed the wing inspection plates, and poked at the empennage fairing a bit more, to think about the next steps in fitting it.

Hours: 6.7 | Posted in Wing & Tail Joins | Comments Off

20th July 2011

Emp tips

Trimmed and sanded the edges of the glass layups on the HS/VS tips, then mixed up a batch of micro and slathered it on the inside.  Once it’s cured, I’ll remove the foam rib and finish the inside layups.

Hours: 0.6 | Posted in Wing & Tail Joins | Comments Off

19th July 2011

Nutplates & more

Laid up another ply of glass on the back of the empennage tips.  Hopefully that will stiffen it up enough to remove the foam rib and add glass to the inside.  Left to sit and cure overnight…this glasswork looks like it’ll take awhile just because of all the waiting around.

Riveted in the rest of the wing inspection panel nutplates.  All that’s left on the wings for now is to drill, countersink, deburr, and rivet in 52 more nutplates for the root fairings.  Oy.  I’ve dealt well with all the nutplates on the project so far, but this job makes me wish I’d bought a nutplate jig.

Hours: 0.9 | Posted in Skin Panels, Wing & Tail Joins | Comments Off

17th July 2011

Fun with glass

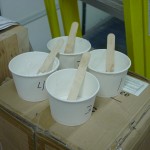
A bundle more of fiberglass work today, including my first real dive into mixing up epoxy with additives, and using it for more than sticking a ziptie base to something.  By the end of the day, I had used four small batches for various things, and had the discarded cups to prove it (I kept the excess in the cups and set them aside so I’ll be able to verify that the batch cured correctly, without any mixing errors/etc, and to observe how, and how quickly, the different mixtures set up):
First on the list was to take the necessary steps toward finishing up the empennage tips.  I used a 1/2″ wide steel rule as a spacer to mark a line on the HS/VS tips, that distance from the edge of the counterbalances.  Then, I drew a parallel line 1/4″ back, and cut/filed/sanded to that line, for an even 1/4″ gap.  I suppose this gap could be tighter, but a wider gap leaves less chance of fouling a control surface should something go awry or debris enter in…and, it could always be tightened back up with, you guessed it, more fiberglass work later.
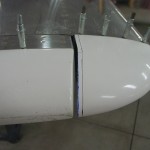
With the gap and shape established, I re-fit the tips to the stabilizers, and formed ribs out of some styrofoam saved from the fuselage shipment; these ribs were inserted into the tips and will serve to hold the shape of the tip during the next steps.  I mixed up epoxy with some flox to a peanut-butter thickness, and formed a small fillet to the rib, to hold it in place.  Herein is the downside to fiberglassing (besides the mess): once it’s in place, it takes several hours to cure to a point where it’s workable.  So, on to other things while it does that.
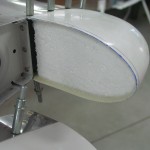
Meanwhile, I wanted to get the “elephant ear” cooling ramps on the upper cowling, so I can continue trimming of the baffles.  I found a position where they fit well with the contour of the cowl, and drilled two #40 holes for keeper clecoes in the inlet flange, to hold the forward edge of the ramps while the epoxy set.  Mixed up another round of the flox paste, and stuck them on (after sanding to roughen them up, air-blowing the dust off, and a solvent wipe).  Again, sit to cure…on to other things.  Later, once it had set up a bit, I came back, pulled the clecoes, and slathered on an epoxy-micro-cabosil mix at each end of the ramps, to start in creating a smooth transition surface.  It’s trowelled on for now, then the micro mix (which supposedly sands really easy) will be sanded down to smooth it out.  It’ll probably require a second application, too.  But for now, good enough.  Left to cure overnight.
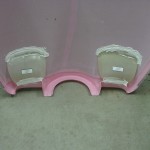
Back to the HS/VS tips; by now the flox fillet cured up well enough that they could be removed from the empennage and they retained their shape.  I cut some pieces of bid cloth and wet them out with straight epoxy in a plastic sandwich, and applied them to the aft side of the tips, covering the foam rib.   I set those aside to cure overnight; the idea is to remove the foam rib, then lay up additional plies of glass on the inside for stiffness.  I may need another ply of glass on the outside before the rib can be removed, I’m not sure — we’ll see how stiff it is tomorrow.  Once the inside plies of glass are added, the remaining void on the back will be filled with micro, and the whole operation sanded down to make a nice smooth tip closure, then primed.
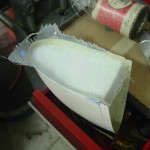
In between waiting for epoxy to cure, I also: cut the slots in the fuselage side tank support brackets, primed them, and bolted them to the fuselage.  Drilled a drain hole in the rudder bottom.  Deburred the wingroot holes for the gap fairing screws.  Drilled and hole-deburred the wing inspection plates. Finished bending the ends on a cotter pin on the engine mount that I’d missed doing that for earlier.  Found the scribe line on the empennage fairing and rough trimmed to it — made the fairing fit much better, it actually looks usable now.  Drilled holes in the corners of the dataplate.
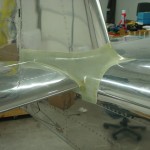
There’s a bunch of nutplates that need to go on the wings (root fairings and inspection plates), then they’re essentially ready to move to the airport — I could also do the tip light wiring before the move, too, but that’s not a big job (cut to length, add connectors, add local ground wire).
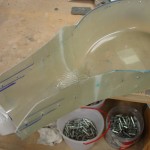
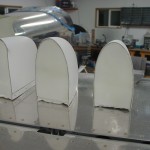
Hours: 8.6 | Posted in Wing & Tail Joins | Comments Off

16th July 2011

A few tips…

ELT batteries came in the mail this morning, so the first item on the list was installing them.  The lithium batteries are good for 10 years, according to the ELT manual, but the expiration date on the batteries is March 2020, so I’ll enter that as the replacement date.  With the batteries in and everything back together, I armed the ELT and pushed the button to initiate the self-test.  One beep came from the audio alert, which is supposed to indicate that the system has passed all its checks and is good to go.  Disarmed the unit.  Also, reached up into the tail and tightened down the nut on the ELT antenna.

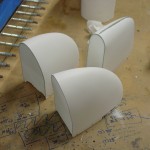
Spent the rest of the day working on the empennage.  Lots of fitting, trimming, filing, and sanding of fiberglass tips.  The vibrating saw I bought for the canopy work also works very nicely on fiberglass, so I’m using that to do the rough trims, then following up with a flat file, a triangular file, a half-round file, and a 2′ 1×3 with sandpaper glued to it.  (Drywall corner bead adhesive works really well to stick sandpaper to a board.)  And, the heat gun to warm up a couple recalcitrant parts so they could be shaped.  Finished basic fitting of all the empennage tips, though there’s still plenty to do.  The VS tip needs to have some height added to it to match the rudder, and the left elevator tip has a dip molded into it that will probably need filler.  Plus, there’s the closeouts of the VS and HS tips with foam/fiberglass/micro/shaping them to match the control surfaces with acceptable gaps.

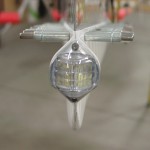
The rudder bottom was the most time-consuming, since it needed lots of trimming to fit around the rudder horn.  I initially trimmed to the scribe lines, and they were close, but not quite.  I have a bit much of a gap under one side rudder horn (oh well), and the other side needed to be sanded down at a taper quite a ways more before the centerline of the tip was in line with the trailing edge.  Once it was fit, I proceeded to fit the aft nav/strobe, using rivnuts to mount it.  Wired it up, adding the local ground called out in the new version of the recommended wiring diagram, and flipped the switch.  Worked well, though the nav light draws so little current that the VP-X’s no-current fault indicator kept tripping it offline, so I disabled that for the nav light circuit.  The strobe draws enough current that it keeps the strobe circuit from faulting; once the other 2 nav lights are connected, I can try re-enabling it on that circuit.

Hours: 7.8 | Posted in Electrical, Wing & Tail Joins | Comments Off

13th July 2011

Odds without ends

From the “I don’t really feel like going out to the shop but I need to do something to keep moving” file…

Removed the -14 adel clamps from the main vertical wiring trunk, and installed -15 clamps, which are large enough to contain the few wires that wouldn’t fit in the smaller ones that had been originally installed.

Terminated the boost pump power & ground into a 2-pin molex connector to mate with the one I had previously installed on the pump leads.  Test fit and tested that the pump powered up.

Wiped off the rest of the fiberglass tips for the empennage, and traced the initial trim lines with a black sharpie.

Hours: 1.1 | Posted in Electrical, Wing & Tail Joins | Comments Off

11th July 2011

Couple little things

Installed the RJ-11 connectors on the ELT remote cable, and plugged it in on both ends.  The batteries I ordered shipped today, so when those arrive, a test will be possible to verify that it’s working correctly, then the ELT can be deemed fully installed.

Made up a couple 2″ test links for the rudder pedal-cable connection out of scrap alum, to test that length before committing to cutting the steel pieces.  Seems to be alright, one thing I noticed is that at full travel, the swaged end of the cable hits the first snap bushing behind the pedals.  Not sure what that’s about, or if it’s normal, but the thing setting that location is the length of cable from the rudder horn.

Hours: 1.2 | Posted in Electrical, Wing & Tail Joins | Comments Off