21st May 2011

Cowling

Spent a bit of time fussing with the control cables again.  I didn’t come up with a bracket solution that satisfied me, because the too-short mixture cable would need it’s bracket a couple inches closer to the firewall than the throttle.  The extender wouldn’t solve that, just make it reach the lever.  So, I guess I’ll order a longer custom cable, wait for it, and get it in right; then sell the short one to someone who can use it.  Also, more aluminum angle to redo the bracketry.

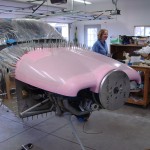
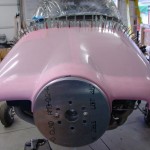
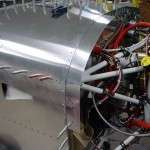
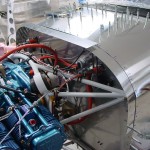
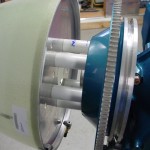
Cut the side hinges and hinge shims that will hold the lower cowling, and drilled them to the firewall.  Marked and cut the slot in the cowling for the gear leg.  Cleaned up the fiberglass on the backside of the nose flanges and refit the cowls together.  Clecoed the top cowl back on the plane, then put the bottom cowl on via the two clecoes in the nose, and a cargo strap under the rear portion.  The fuselage end seems like it will fit decently, but the nose doesn’t hold alignment with the spinner backplate — the gap at the top right side is 1/4″, and the lower left is 1/2″.  This might close up a bit with the rest of the fitting, but it looks like a load of filler will be required.  (Apparently this is not uncommon.)

Hours: 4.5 | Posted in Canopy & Frame, Engine | Comments Off

19th May 2011

Controlling

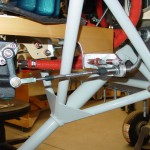
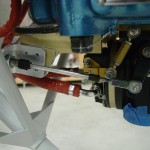
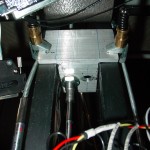
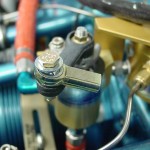
Spent a bunch of time working on engine controls today.  Figured out and fabricated brackets for the throttle and mixture controls, and temporarily installed, along with the cables, to test fit and function.  Trimmed the AFP brackets to match and provide clearance from the engine mounts.  Had to adjust the angle of the mixture arm, and use the shorter hole on the throttle arm, for the cable throws to work out with the throttle quadrant.  Extra holes for more throw also had to be put in the quadrant levers, a common item.  The throttle lever doesn’t have as long of a throw as I’d like (1/4-3/8 each end remaining), but it’s perfectly workable.  Couldn’t hook up the mixture at the quadrant end, as the cable is just a bit too short…aargh.  Will have to order one of the threaded extenders from Spruce, way cheaper than a new custom cable.

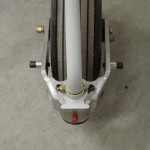
Put a rod end on the purge valve…still need to engineer that bracketry and FW passthru.  Also swapped out the bolts in the nosegear fork for longer ones with spacers, which give a better grip for the towbar to hook on to.

Hours: 6.0 | Posted in Engine | Comments Off

15th May 2011

Putzing around

You know you haven’t done much work on the plane when the “remember me” on the build log has expired and you have to go find your password.  Busy times at work, church, and freelancing.  Should be done in another 4 weeks, then summer can begin.

Worked on fitting the cowling halves together for a bit tonight.  Cleaned up the flanges around the center hole, and got them fitting decent.  Drilled a #30 hole in either side to maintain alignment; will be filled later.  Need to do some reading up on cutting the gear leg notch, and the filler plates that go in said notch.

Hours: 1.0 | Posted in Cowling & Baffles | Comments Off

8th May 2011

Top cowling

Made up a long sanding block with a 2′ length of 1×3, and a piece of sanding paper cut in half lengthwise.  A little drywall bead adhesive spray, and presto.  Worked on the fit of the top cowl with a bunch of on-off cycles.  I found that I needed to trim back the camloc strips at the lower sides, because they were hitting the thicker honeycomb-core portion of the canopy.  With everything fitting correctly, and the canopy shimmed at the front with chunks of an old Mouser catalog, I carefully drilled the holes to #30 along the camloc strip, starting in the center and working down.  It seems to have gone alright, the positioning looks fine, even after the catalog was removed.  I intentionally left as little gap at the rear as possible, and it’s a bit uneven in spots, so ‘ll have to carefully sand it to the recommended 1/16″ paint gap.  It’s surprising, actually, how solid the cowling is when it’s clecoed on all around.

Hours: 3.0 | Posted in Cowling & Baffles | Comments Off

7th May 2011

Cowling & FWF

A bit of FWF work: installed adel clamps for the oil and manifold pressure lines, and looked at possible clamping locations for the fuel line to the spider.

Finished the preliminary work on the camloc strips for the upper cowling: trimming to length, completed drilling to the firewall, transferred the layout lines for the camlocs, and drilled for the camlocs with the first template (3x #30 holes).  Clecoed the strips back on, and set the upper canopy in place.  Marked a rough trim line that just clears the clecos, and cut with the oscillating saw.  More fitting will be required, of course.

Stopped by the airport while out and about today and picked up a possible lead on a hangar space.

Hours: 4.0 | Posted in Cowling & Baffles | Comments Off

30th April 2011

Cowling strips

Spent a bit of time messing with the cable throws on the throttle and mixture, then moved on to the beginning of the cowling tasks. For some reason, I’d been dreading making up these camloc strips, but it wasn’t that bad. I took off the top skin and used the forward edge of it as a template to get the necessary curve. I’ll have three pieces: one pretty straight section in the top center, then one additional section on each side to run to the bottom of the top cowl. The pieces have a hockey-stick shape when laid flat, but they fit nicely to the curve of the firewall, and the angle is correct for the slanted portion at the top. Turned out well, so I drilled the side segments in place. Ran out of time to drill the top center piece, but it’s ready. Worked on measuring off the layout for the camlocs, to see where the divisions of the strips could be without interfering, and marked the strips for cutting.  At the spacing I ended up with (3 14/32″), I’ll have 16 fasteners on the top cowl.

Hours: 2.3 | Posted in Cowling & Baffles | Comments Off

28th April 2011

Exhausted

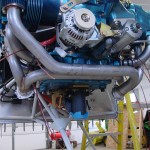
The Vetterman crossover exhaust (with mufflers) arrived this morning.  After unpacking, I took it out to test-fit.  The flanges fit right up, and it looks like there will be sufficient clearance from all the hoses, wires, and such.  It’s not really bolted on yet, just held in place with a few bolts.  Not sure if it’s best to fit the cowling with or without it on, and it will need to come off to be drilled for the EGT probes, anyway.

Messed around with the control cables for the throttle and mixture, temporarily attaching them to the fuel servo.  There is a long distance from the end of the cable to the fixture nuts, so I’ll need to move both of the control brackets one more hole aft before creating the brackets to hold the cables.  Drilled out the mounting hole for the purge cable and fit that to the panel; that one still needs to have the FW eyeball installed (as does the alternate air cable, when that’s ready…)

Pulled out the cowling again and started looking at how to fit it.  I have a 2×2 sheet of .063, which will probably make the camloc strips, but it’ll need to be done in 3 pieces as the dimension to span is around 53″.

The verdict on the AFS/VP-X amps & volts is that it’s not currently supported to source the gage reading from the VP-X datastream.  Hopefully they’ll consider adding this in a future software update; it seems a bit silly to have a current shunt (and associated cables and connectors) when the data is already there.  For now, I disabled display of the ammeter.

Hours: 1.5 | Posted in Engine | Comments Off

27th April 2011

It must be the weather

It was interesting to me that two things appeared in the last couple days that found me where I’m at: an article in EAA’s homebuilding e-newsletter, and parts of a thread on VAF, both around with what the article named “Project Paralysis.”  It must be the weather–for most of the month, it’s been gray, gloomy, raining/snowing, and cold (running 10+ degrees below average; we had snow yesterday for a bit).  March was exciting, and I put in far more hours than expected (nearly 80), but April has been a downer.  Only 25 hours, and the motivation to head to the shop in the evenings hasn’t really been there.  Work is heading into the busy spring season, which will last the next 5+ weeks, but I don’t think it carries the sole blame for the lack of energy.  Must be the weather…here’s hoping the snow stops soon.  On the bright side, I’ve spent some good time with Allison talking/dreaming/scheming about plans for the summer and beyond.

This week, though, has been looking up.  Lots of boxes arriving, the UPS man has been here every morning.  Engine hoses, control cables, and my AFS screen are here, and the Vetterman exhaust should be in tomorrow.  I’ve been reading up on fitting the cowl (among others, a good thread by Brantel on fitting the pink cowl, and a new one on baffles, plus DanH’s highly informative and well-illustrated fiberglass tips), which seems like a logical next step.  I need to pick up or dig up some PVC pipe to use as a stand-in for the prop spacer, and fit the camloc strips first.

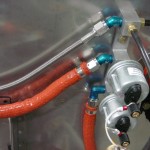
The task list for tonight was simple, and easy to motivate with new and exciting parts: test-fit the hoses, and fire up the EFIS.  All the engine hoses seem to fit well (though the oil cooler is not yet installed, so those can’t be fit yet).  I got these from Tom at TS Flightlines, who was easy to work with and fast getting them out.
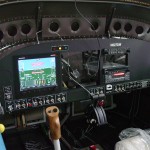
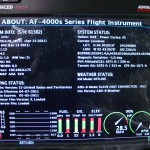
The EFIS screen (AFS 4500-EE), having already wired all the harnesses during the panel install, slid right into the tray and powered up.  Spent some time going through the menus, configuring serial ports and such.  Two oddities I noticed (1. the master warn light never illuminated when it should, but did when the screen was powered off, and 2. the screen always powered on when the master was turned on, even though the avionics bus wasn’t on), turned out to be related, and a simple fix: I had inadvertantly inserted the pin for the master warn light into the wrong hole, which caused it to be hooked up to the backup power input.  It was getting power on that backup input when the master went on (since the annunciator power is always on), and booting up (and illuminating the light).  Once primary power was applied, it stopped using that backup input, and the light went out.  Moving it to the correct pin solved both problems.

Allison came out and I put her seat in, and we sat in the plane looking at the panel.  Tested that the audio out of the AFS works, and it talks to everything hooked to it: VP-X control, transponder gets altitude, a finger in the CO detector pops up a readout of O2 saturation and heartrate, and it sees data from the GPS.  I posted a message on the AFS forum about the volt and amps gages…I had been under the impression they would take their readings from the VP-X datafeed, but that doesn’t seem to be the case, or at least I can’t find it in the menus.  The voltmeter is using the internal sensor of the AFS (not a big deal, it matches the VP-X within 0.1 volt, but of course reads 0 when the avionics master is off), and the ammeter just reads 0, since I didn’t install the shunt (since I thought it would come from the VP-X).  Both values are displayed on the VP status page, but it would be nice to have them as gages in the display, and be able to alert on them.
Hours: 2.0 | Posted in Electrical, Engine | Comments Off

23rd April 2011

Contortionist

Did a couple more odds and ends that needed doing, including some fun contortions to work in the baggage and tailcone areas:

  • Installed the DB-9 connector for the autopilot pitch servo
  • Installed new nutserts to secure the seat heater relays in their new positions
  • Torque seal on the fuel flow transducer bolts
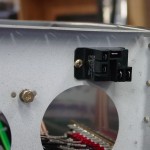
  • Installed nutplates for the aux alternator relay and capacitor
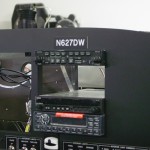
  • Placed the N-number placard on the panel

Also refit the canopy and forward top skin in order to look at a few things up there:

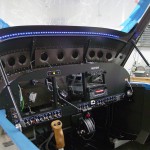
  • Attached wire to and nstalled the strip of LED’s that will be the panel floodlights.  Temporarily connected to the switch to test; still need to run those wires for real and put a connector behind the panel.
  • Checked again for clearance between the outer top corner of the EFIS and the panel reinforcement; looks like it should be fine, as planned.
  • Checked for catching of the canopy skin when opening; looks ok after filing off a bit more from the forward edge.
  • Found where the canopy frame is rubbing on the side seal support angles (which weren’t yet installed when the canopy was previously fit).  Those will need to be filed down for clearance.

Hours: 4.3 | Posted in Canopy & Frame, Electrical | 1 Comment

16th April 2011

Putzing around

Spent most of the shop time tonight just standing, staring at the project, trying to divine the way forward.  Did manage to accomplish a few things:

Installed the fittings on the fuel flow sensor, and installed the fuel flow sensor to the mounting plate with 1/4″ bolts and torqued.  (Note to self: put torque seal on fittings)

Located a spot to mount the relay and capacitor for the SD-8 backup alternator…of course, the adel clamp necessary to mount the cap appears to be a -22, which is the one even size I don’t have on hand.

Moved the seat heater relays forward in the tunnel, and rerouted the wiring harnesses.  This change was necessary because I discovered after putting the seat cushions in, that the wire from the seat bottom wasn’t long enough to allow for the movement that happens when the seatback is tipped forward (such as loading baggage), without unplugging it.  So, I brought the relays forward as far as practicable, which let more wire stick out of the tunnel.  I still need to re-do the mounting of the relays; they’re ziptied to the tie base that was previously holding the cables, but I’m not satisfied with that, since this is in close proximity to a flight control (elevator pushrod).  I’ll probably put in another rivnut as I did in the earlier location–could also pop-rivet them down, but relays are mechanical and will fail, requiring removal for service.

Hours: 2.1 | Posted in Electrical | Comments Off