11th June 2012

Wing mounting complete

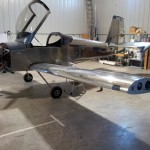
One more major checkbox is checked tonight…the wing join is complete after a couple hours at the hangar.

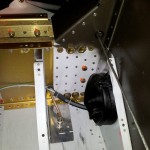
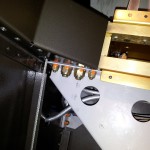
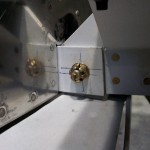
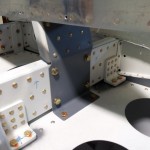
Unbolted and removed the fuselage side tank attach brackets, then drilled the tank side for the stubby nutplates called out (after hunting them down, of which there are only two).  Spot primed and riveted the nutplates on, then reinstalled the fuselage side brackets, installed the -4 bolts as described in the plans (not fully torqued, only until the washer is held fast), and safety wired them.  That completes the installation of all the wing join bolts.

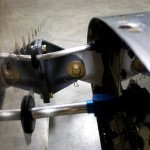
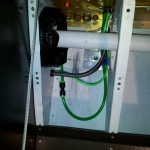
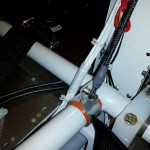
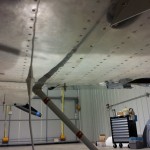
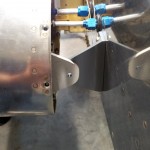
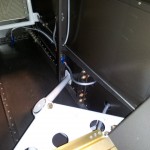
Brought supplies to the airport, so I was also able to trim the pitot lines in the belly, and join them with a push-connect union.  While I was in there, I also added some spiral wrap to the headset cable bundle, where it passes near the flap actuator.  Not alot of motion here, but this should prevent the possibility of any chafing.

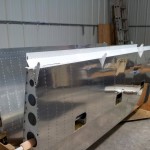
I’m considering not using nutplates for the wingtip attach, and instead doing something that’s been used by several people before me, and well-documented — affixing the tips with hinges, in the style of the cowling.  It’s supposedly 1) less tedious than doing the 80-some nutplates, 2) looks smoother, since there’s no obvious fastener line/no pillowing between screws, and 3) easier to install & remove for maintenance or whatever (a small issue since the tips are rarely if ever removed in service).  I understand how they’ve done it, and it seems straightforward, the only thing that concerns me is how to account for the kerf removed when trimming the fiberglass piece out.  Still researching.

Hours: 1.9 | Posted in Endgame, Wing & Tail Joins | Comments Off

10th June 2012

Putting it together

Final assembly continues.  Finished off the wing bolts — all the -4′s for each wing, and the rear spar bolts.  Also installed the screws along the belly skin-to-wing joints.  Vacuumed the crud out of the seat pan area, and reinstalled the comm antennas.  Trimmed & connected the AOA pressure lines.  I need to grab the pitot union connector from home to hook that up.

Found my latest mistake, though: I was supposed to install a nutplate on the tank attach bracket before mounting the wings.  Oops.  The brackets in question are well-attached to the fuel tank, but I should be able to remove their mates from either side of the fuselage for access, drill and rivet the nutplates, then reinstall the fuselage brackets and we’re back in business.  Less than an hour, I’d estimate.  (I would have done this today, but didn’t think of it until now…in my mind, I needed to email Van’s to see if a different bolt arrangement would work here.)

Massaged the RH fuel feed line to adjust its position in relation to the tank nipple.  Removed the vent line stubs from both sides and replaced them with new, longer versions.  Tightened and marked feed & vent lines on both sides.  Adjusted the tension bolt on the fuel caps.  Installed ring terminals on the fuel level sender wires, and connected them to the senders.  The fuel system is now complete.

One by one, removed the four bolts holding the VS to the HS forward spar, and added a washer under the bolt head.  This in response to consensus on a recent VAF thread after someone found a crack propagating from one of these slotted holes.  The washer’s purpose is to provide a larger bearing area for the clamping force of the bolt.  Retorqued & marked.

Loosely connected the aileron pushrods to the bellcranks and control column, and inserted the smaller pushrods from the rear of the wings.  Pinned the ailerons in place and fooled around with pushrod positioning, stops, surface throw, etc.  It’s nearly right as is, but I want to bring a round file and Dremel sanding drum and “customize” the pushrod holes a wee bit more, to make it just right.  I also need to rivet on the aileron stops, which are only clecoed right now.  Once that’s done, the ailerons can be installed and we can move on to flaps.

Hours: 7.5 | Posted in Endgame, Plumbing, Wing & Tail Joins | Comments Off

9th June 2012

Wings are on, for good

Out to the airport for a few hours on a nice day today; Allison came along for the ride so I put her to work, helping attach the wings.  I could have waited a few more days, but at some point, it’s time to “fish or cut bait,” as they say — so we did it.  I scrounged up some sawhorses from the back of the hangar, and padded them with foam; I think these sawhorses must have been previously used for this task, as one was cut shorter than the other, approximating the dihedral of the wing.

Sawhorses in place, we lifted the right wing from the cradle, set it up on the sawhorses, greased the spar stub, and slid it into place.  With me inside the plane inserting the bolts and adjusting the inboard end, and Allison at the far end of the wing moving or wiggling it in whatever direction I requested, the whole process was relatively painless.  With a collection of mallets, hammers, and wood blocks, all eight bolts went in without hassle, after being greased to assist insertion.  I read through a bunch of build logs this morning and took notes to make sure I wasn’t overlooking anything, and all the washers & etc ended up in the right places.

Regroup, resupply, and repeat for the left wing, then drop the rear spar bolts in for support, so I could use the wing walk for getting in & out of the cabin (which was repeatedly required).  With both wings pinned in place, the smart level agreed that both wings had equal dihedral and angle of attack (as they should; the wings were mounted previously and carefully measured & drilled).

Now for the fun part — placing & tightening the nuts on the bolts, especially the bottom ones, where access is superbly poor due to the position of the main gear weldments.  Luckily, I came prepared…  I found that my hangarmate had a set of special open-end wrenches with heads at a more severe angle, similar to this (Snap On apparently calls this a 4-Way Angle Head; MAC Tools just calls it an Angle Head; I’d never seen one before):

(The head on the right is the one that’s used on the bolts here.)  There were two sets, and the ones I ended up using had a slightly thinner body on either side of the head, which made a difference, as it was far easier to remove the wrench once the tightening was complete, on the bottom outboard -7 nut.  Anyway, these wrenches made the hassle of accessing the nut a non-issue.  [I will try and remember to look at the actual brand of wrench I used and post it here for reference.]

The angle head wrench wasn’t the entire solution to the problem though — after a few long minutes of turning the first bottom bolt with a ratchet, two clicks at a time, I decided there had to be a better way.  And there was — I took my air ratchet and set it up with the necessary adapters & extensions to use a 6-point socket; I wasn’t sure the air ratchet would have enough power to drive the big bolts, but it did.  With the angle head wrench on the nut, and the air ratchet on the bolt, it was simple and easy to snug the bolts down.  Reverse for the top, and drive the nut while holding the bolt head (NB: unlike the smaller fasteners we’re usually using on the plane, the bolt head and nut are different sizes here!)

Once I’d snugged down the large bolts/nuts for each side, I used a torque wrench to finish tightening them down; it required about a turn on each, which wasn’t bad at all.  Though it was perfect for these -7′s, I won’t let the air ratchet go all the way on the -4 bolts, as it may overtorque them — better to stop early and hand-tighten the last couple turns to the required value.  Torque seal applied, and we’re done with the large bolts.
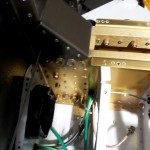
With those in, the wings are secure, and it was time to make some notes and head for dinner and home.  I should be able to get back out tomorrow and install the rest of the nuts & bolts.
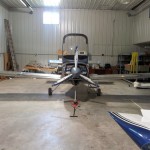
The main fuel lines will be fine, but the short pieces of tube that comprise the first piece of vent line coming off each tank will need to be replaced, as they’re around 1/2″ short on both sides.  Obviously we trimmed them a bit too far.  Easy enough, if annoying, as long as I remember to take the tube stock and tools to the airport.
Hours: 4.0 | Posted in Endgame, Wing & Tail Joins | Comments Off

6th June 2012

Check, check, check

Dispatched several items from the punch list today…

  • Installed nutplates & test fit the forward lower cowl closure plate.
  • Crawled into the tailcone with a vacuum and cleaned out all the construction debris, cut off zipties, and other junk that had accumulated back there.
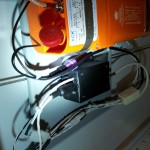
  • Wrapped electrical tape around the mini-DIN connectors feeding power and GPS to the ELT.  Personally, I dislike the mini-DIN connector (there are so many other, better choices), but it’s what the manufacturer chose, so we’re stuck with it here.  Hopefully the tape will prevent the connector from disconnecting.
  • The APRS tracker also has a mini-DIN (ugh), but even worse–where the ELT has both halves inline, the tracker has one chassis mount side, which prevents taping the two together.  So, I put a glob of Goop adhesive at the joint between connector shell & chassis, which should hold it together.  The preload on the cable tends to hold the connector in, so hopefully this will secure it.  Thankfully, if this comes undone, it’s an annoyance, rather than a critical failure.
  • Removed the springs from the roll trim assembly, which disconnects the roll trim from the control system.  This done at the suggestion of the pilot who will do my first flight, the theory being that it makes any heavy-wing or out-of-rig situations easier to notice and diagnose.
  • Found one spot missing a ziptie under the panel, so added it while laying upside down on the cabin floor.
  • Uncovered the wings and wiped off the shop grime and bug poop.
  • Removed the flaps & ailerons from both wings, and unbolted the wings from the cart, in prep for mounting the to the fuselage.


Hours: 3.3 | Posted in Cowling & Baffles, Endgame | Comments Off