11th July 2012

The List

Worked on a couple things from the big list tonight, as I had to stop by the hangar to pick up some tools anyway.

Bolted up the backup airspeed indicator to the spare hole on the panel.  I’ll need to order some longer screws, since the case flange is quite thick.  Drilled holes in the subpanel for the pitot and static lines, and installed snap bushings.  Crawled under the panel and connected the lines to the manifolds that are installed back there, then to the instrument.  A quick-and-dirty blow test on the pitot tube seems to indicate it’s all working fine, and the analog gauge and the EFIS agree.

Stuck a foam strip to the subpanel, that the canopy frame will squeeze when it closes…another attempt to keep out as much water as possible, and/or divert it to the sides if it does enter.

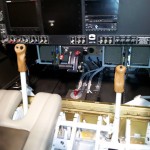
Cut 3″ off the end of the passenger stick, drilled a new hole for the retainer clip, and removed the powdercoat so it will slip into the socket.  I want to do the same thing on the pilot side, if I can figure out how to get the grip off; that glue is stuck good.  Passenger side was quite easy, since the stick is removable.

Hours: 2.8 | Posted in Endgame | Comments Off

8th July 2012

Pre-inspection inspection

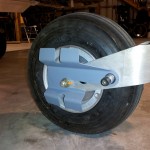
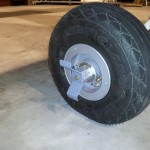
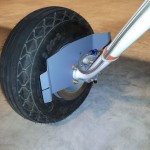
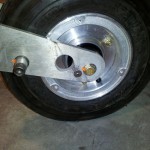
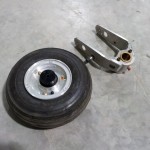
Brought the proper size hex wrench (5/16″ for future reference) to the hangar, so I was able to remove the towbar bolts and attach the nosewheel pant brackets to the nosegear fork.

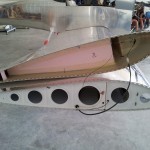
Also fabricated and installed the retainers for the wingtip attach hinges.  I had earlier installed a nutplate on the centerline of the aft tip closeout rib, so I added an 1/8″ hole above and below that nutplate.  Bent the ends of the hinges at a 90* angle, and cut them off to a reasonable length.  The bent ends go in the holes, and then I made up a coverplate from .063″ stock, which attaches with a screw to the nutplate.  The coverplate holds the hinge pins into their holes.

Tom Berge, who is known in the area as one of “the guys” to have give your plane a serious inspection before it flies — and who also will be the test pilot on my plane’s first flights, and my transition training instructor — stopped by this afternoon to check it over, offer advice and observations, and answer several of my questions.

Overall, he found things were good, but I did come away with a lengthy list of things to check, fix, improve, or keep an eye on.  Most of them are small items, but a few notables:

  • Insert a piece of foam to the gap in the spar where it joins the center section, to block drafts; this seems to be where most of the air gets in that is known for cooling between one’s legs.  This was on my list, I just have to procure some foam.  Also recommended to RTV the smaller gaps at top & bottom of the spar for the same reason.
  • Shorten the sticks, the stock length is too long.  I left them stock length, not knowing any differently, but I believe this now after riding in Jim’s 9A the other day…his are short and the hand position is quite a bit more comfortable than mine.  All I need to sort out is how the heck I’m going to remove the grips…I put them on with a single small vertical bead of adhesive, thinking that I may need to remove them for exactly this reason, but they are very well attached now.
  • Found that I have weeping on the pilot side brake master cyls (again).  Must have started after the taxis we did the other day, since the brakes were really used for the first time.  I’ll have to get some different sealant on hand, since EZ-turn clearly isn’t getting the job done.  Then re-bleed the brakes again…oh, joy.
  • Biggest issue — apparently the cylinders that my engine has require a special modification to the stock baffles because of the tapered fins.  It’s a curved blocking plate that is riveted to the inboard side of the inner baffle strip on the bottom of the engine, that prevents air from spilling out where the strip doesn’t make full contact with the cylinder.  They’re fabricated from plans that ECI has at the end of a technical document on their website.  And yes, all the baffles need to be removed to install them.  Ugh — I am not looking forward to that.  I’m sorely tempted to fill the gap with RTV, and install the plates the first time the baffles need to come off for some other reason.  (Apparently this same thing happened to another local builder too; he filled with RTV and hasn’t had any problems because of it.)

Bunch of other stuff to fix and consider, but I’ll avoid retyping the entire list here for sanity.

After Tom left, I knocked a couple things off the “new” punch list…

  • Removed tach drive cap and added loctite to the threads, then reinstalled.
  • Added a few ziptie bases on the aft side of the center section, where a couple wires were rubbing or close to it.
  • Bent the ends of the oil door hinge to secure it from vibrating out.
  • Checked the sidetone adjustment on the SL-40.  Tom recommended 75 from the default he thought was 138.  Mine is set to a default of 0, which the manual says is “slaved to the volume control.”  I’ll fuss with it when I roll the plane out someday to do a radio check, and see how it works in this mode.

Hours: 5.0 | Posted in Endgame | Comments Off

7th July 2012

Pants & more

In the afternoon, I was in the home shop: deburred and primed the wing root fairings, along with all the brackets for the wheelpants.  Located and packed up more things I would need at the hangar to work on the wheelpants.

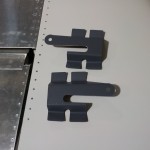
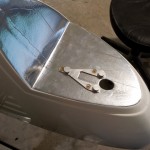
Evening brought a trip to the hangar.  Installed the rubber seal on the wing root fairings.  Managed to get the main gear wheelpant brackets installed.  Drilled & cut the slots in the nosegear pant brackets, but need to bring a larger hex wrench to remove the towbar bolts, as they are what hold the brackets on.  Countersunk and installed a flush hex bolt for the nosewheel axle retainer.


Removed the seats and floor panels to be ready for a preinspection tomorrow.

Hours: 5.8 | Posted in Endgame, Gear & Fairings | Comments Off

4th July 2012

It moves, too.

Had the chance to go flying with my hangarmate this morning in his -9A, and despite the thick haze, got a good demonstration of the plane’s performance and abilities.  He has 20 more ponies under the cowl than I, plus a constant-speed prop, so we’ll see how mine compares.  In the hands of a good pilot, the thing really shines.  As in Mike’s plane which I flew earlier this spring, the stall is amazingly docile, and handling is smooth & precise (knowing only the pully-and-yoke system in the C150 where there was always plenty of control slop to go around, it’s probably not difficult to impress me in that regard…)  He has cut his sticks down shorter, so that when holding the grip, you’re able to rest your hand/arm on your leg.  This was quite comfortable, and the control forces were perfectly fine.  (Mine are longer, which was intentional; I decided when working on them to leave them essentially full-length, and cut them down later if desired.)

After the flight, we fired up my engine again and taxied over to the compass rose.  On the way, he did the break-in of the brake linings for me, since I’d never seen it done before.  Plenty to learn…  We stepped through the magnetometer calibration routine on the EFIS, and it came out within a couple degrees.  Rob Hickman posted in the AFS support forum that the tolerance of the magnetometer is ±4°, so we’re good to go with that.  I taxied back to the hangar and it tracked heading as expected along the way (easy to check since the airport is laid out on cardinal headings…)  Many thanks to Jim for doing the grunt work of towing the plane around in a circle in the 90+ heat while I called out directions from the screen.

I also remembered (third time’s the charm) to turn the alternator on for the taxi back, and was able to see that charging current did register, along with a solid 14.5 volts, so it looks like the alternator, shunt, and connections are all ok.  I’ll also mention here how handy it is to pull the data logs on an SD card to take home and browse through, to see what I did or didn’t notice in the moment.  Mike Behnke (RV-9A) wrote a handy Excel tool to import the logfiles, parse them, and automatically generate data graphs and KML files.  Of note: the log and config files don’t do well in a Windows text editor, due to the AFS being a *nix-based system (the line breaks are essentially non-existent for reasons I won’t get into) — but they’re easy to read and edit in Linux, with your favorite editor.

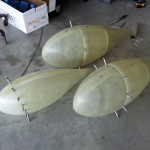
Stood around comparing notes on various things for awhile, and eventually I got down to work on the wheelpants.  I was able to get all three of the pants to the “pregnant tuna” stage, with the mating edges of the pant halves sanded square, and drilled together.  I need to put together some parts to make a jacking mechanism for the main gear, as I need to pull the wheels in order to install the pant brackets.

Unpacked the intersection fairings I bought a year or so ago, and discovered that they appear to be shaped for the tailwheel model gear, so I was either shipped the wrong set or had a misunderstanding (my order confirmation email does say 6A,7A,9A, though…)  Ordered a new set and sent a note about the wrong ones, but since it’s been so long, I expect I’ll end up just posting them for sale to someone who can use these.

Bob Collins (RV-7A) dropped in again for a short visit to share notes & paperwork on the airworthiness packet for the MIDO & DAR.  Borrowing those to compare against will be helpful as I put together the necessary forms and info for that process; thanks to Bob for sharing and stopping over in the heat.

Speaking of the heat…long pants were not the best thing to wear today, but I have a habit of holding fibergalss parts on my lap to sand them, which makes covered skin essential.  After an hour or so of that, though, I’d about had it, and packed up into the air conditioned truck to go deal with the grocery list of parts & pieces I need.  Tomorrow might be a night at home in the shop, deburring and priming the bracketry.

I also believe I have a solution to retain the wingtip hinge pins, that I’ll build.

Hours: 2.5 | Posted in Endgame, Gear & Fairings | Comments Off

3rd July 2012

It lives!

Not much going at work, so amidst the crazy heat, I took the day to play at the airport.  Turned out to be a big day for the project, in a low-key way.

Stopped off at the hangar after a meeting, and took care of a couple items: mounting the wingtips since the glass tape from yesterday had cured, connecting the wingtip lights, and then installing the tip lenses.

After a bit, my hangarmate arrived.  He’s an A&P and had agreed to give my FWF install a thorough look before attempting to start it up.  After several visitors from around the airport, we got down to business.  The only areas of concern he noted:

  • The plastic brake line tubing on the lower baffle tie rods…will it take the heat?  It’s something I’ve seen pretty commonly on other build logs, so I assume it’ll be ok.  An item to watch.  He has had success with .063″ safety wire looped with washers on each end.
  • The fuel flow transducer, as it’s not mounted level.  Another place to watch and check for accuracy.  Airflow Performance recommends installing it in the line between the fuel servo and the distribution spider, and I had a heck of a time finding a place to put it.  This installation is copied from another builder (though of course I can’t remember who, now).  He installed in the tunnel inside, and doesn’t have any problems with inaccurate readings with the boost pump on.

With the inspection complete, there wasn’t much left to do but kick the tires & light the fires.  We spun the engine with the starter until the EFIS registered oil pressure, then installed and torqued the top plugs.  After talking through procedures and briefing the test, we rolled the plane outside, tied it to the truck, and lit it off.  It caught on the first try, but I wasn’t quite fast enough getting the purge control in.  Hit it again, and faster this time, and it stayed running.  Eyes like a hawk on the oil pressure…60+ psi, perfect.  Ran it up to 1500 RPM, a quick mag check, slowly brought the RPM back down above idle, quickly flipped both ignitions off, then on, to verify that they did indeed shut down.  Throttle to idle and shut down.  The EFIS recorded .03 of hobbs time, or just under 2 minutes.  Engine start successful, and no leaks (yet).

Pushed her back in the hangar and gave everything a good check over.  Read the dipstick to establish a baseline (reads @ 8 quarts) to measure oil consumption.  Wiped up the oil that sprayed over various things, a combination of oil blown out of the exhaust (some of the preservative oil seeped into the exhaust system), and leftover drips from installing the bottom plugs.  Downloaded the data log from the EFIS for analysis and/or recordkeeping.

Talked about where to get pitot-static/transponder check/weighing done.

Measured the N numbers…they measure 2 31/32″ high…1/32″ short of the requirement.  Problem for the DAR?  Tom Berge was very specific that I’d have problems if they were not 3″.  Perhaps safer to strip ‘em off and order new ones…  I should have measured them more carefully before applying them.

Headed back to the house early for dinner, and to escape the heat.

Too few photos of the day, because I forgot to charge my phone last night and it died early on.

Hours: 4.5 | Posted in Endgame | Comments Off

2nd July 2012

Making plans

Not alot of real work today, but a few more things crossed off the list, and a bunch of plans made.

Added a fillet of flox to the wingtip foam ribs, followed by a strip of glass tape.  Because it was so warm today (mid- to upper-90′s), the epoxy kicked quite fast and generated some heat.  That caused a tiny wave to form in the fiberglass tip above one spot where the flox was particularly thick, but you can’t really see it unless you know where to look, and the light is right.  It’ll be super easy to fix in the prep & finishing of the tips, anyway.  Set the tips aside to cure, and they should be installable tomorrow, possibly for the last time before flight.

Cleaned up a few drips of oil from yesterday’s engine work, and added 8 quarts of the prescribed oil for break-in (Phillips X/C 20W50, which is also the recommended regular operating oil by ECI).

So, the plans…I called a bunch of people today to start working on details moving toward first flight.

  • Tim Mahoney (DAR)…talked about paperwork, fees, and test flight area.  He advised me on the process, and that I should call the Minneapolis MIDO and request their amateur-built packet, which contains some forms unique to their office that aren’t available from the FAA website.  The basic outline of the process:
    • Get the packet from the MIDO
    • Fill out the forms to the best of my ability
    • Call Tim and he’ll go over the forms with me and make sure they’re correct
    • Submit the paperwork to the MIDO
    • Wait a few days and call them to make sure they received and processed it
    • Call Tim and he will obtain the paperwork from the MIDO, look it over, and assign a test flight area
    • Arrange with Tim to come and do the inspection
    • Pay the DAR fee
  • Minneapolis MIDO…the woman who knows how to put together the amateur-built packets is out of the office all week, but the guy who answered the phone will give her my name and address when she gets back.  Alrighty, then.
  • Jim, my hangarmate, also an A&P…we’re going to get together tomorrow morning to look over the FWF install in preparation for first engine start.
  • Tom Berge, transition trainer & test pilot…preliminary arrangements made to have him do a thorough inspection on July 8, and reserved the entire week of July 23 for transition training.  Because of my low hours, I need to get 15 hours of RV-A dual.  Knowing the impact my flight lessons have on the weather, it will storm the entire week.  We talked for quite awhile and Tom had several suggestions, which I give weight to, given his experience building & flying these things:
    • The oil pump will do a fine job of oiling the engine to prepare for start, nothing fancy required.  Put oil in, pull top or bottom plugs, and spin it until you have oil pressure.  Put plugs in, man the extinguisher, and fire away.
    • Make sure to have the purge valve selected to ‘Purge’ when spinning the engine to get oil pressure, as the fuel pump will be pumping fuel!
    • Once flooded, it’s a pain to unflood the engine.  Lycomings will almost always start (but not necessarily run) at ICO, so start there and richen as necessary.
    • Remember to turn on the ignitions, they start better that way.
    • Make sure the dataplate and paperwork match.
    • Double-check the N numbers to make sure they really are 3″ tall.
    • The danger of ground runs is heat…keep them to a minimum to avoid glazing.  FAA may want something different, it’s a conflict.
    • These aren’t one-off designs, we’re not really testing the airframe/design, we’re testing systems.  Two exceptions:
      • Checking that the skid ball is centered
      • Checking for a heavy wing
    • Install wheel pants & fairings for first flight & break-in, rather than waiting until later.
      • The “more drag to make the break in easier while flying slower” argument is BS.
      • Better cooling (which comes with increased airflow through the cowling, which comes with higher airspeed) is more important…again, heat is the enemy.
      • Look at the current OAT (99 at RGK today) and think about it.
      • (This argument makes alot of sense, even if I hate fiberglass…)
    • Strongly recommend installing a backup airspeed indicator.
      • My panel has only one source of AS info, the EFIS.
      • No GPS groundspeed fallback (only GPS display is currently on EFIS).
      • Screen failures can and do happen.
      • AS is the critical instrument to back up…altitude you can manage by looking out the window.
      • Gauge marked with ranges for the airframe isn’t a bad idea (Van’s sells them).
      • Eventually want a stickon to cover the backup or it will be a crutch and won’t learn to read the EFIS.

So, lots to think about, and several more items to add to the list.  I had a 2.25″ hole cut into my panel, which is currently blanked out, for “future expansion”…from the dimensional drawing online, it looks like the UMA analog indicator Van’s sells will fit in that spot without clearance problems (the concern is depth due to the canopy frame).  If it doesn’t, MGL makes some digital gauges that are relatively affordable, and quite shallow.

And yes, more fiberglass work on the list.

Hours: 2.4 | Posted in Endgame | 1 Comment

1st July 2012

A tiger in the tank

The tiger has yet to roar, but today was the day to prove out the fuel system.

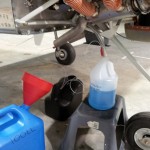
First, I shook the wings again and drained the tanks into the can through a filter funnel that I picked up on the way to the airport.  Trying to get as much dust and debris that may be in the tanks flushed out before pumping fuel into the system.  This time, I completely removed the fuel drains for better flow.

I brought a flare-to-NPT fitting from home, which I threaded into a piece of plastic hose, then connected that to the fuel feed line removed from the servo, so the flow could be directed into whatever container was necessary.  I reinstalled the fuel drains, put fuel back in the tanks, and switched on the boost pump.  After changing the circuit breaker value on the pump circuit (it was set to 5A, when the pump draws 6 according to its dataplate…now set to 7A value), I was able to complete the flush of the fuel system from tank to servo inlet.

I pumped the entire contents of each tank back into the can, until the pump drew air, and then drained the remaining fuel from each tank.  This is the unusable fuel amount.
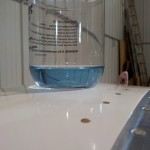
Having flushed the lines, I re-added fuel to the tanks and set up the line to pump into a jug which I’d marked with a half-gallon line.   By recording the time it took for a half gallon to be pumped, I can calculate the gallons per hour that the system is capable of supplying.  I tested both left and right tanks, and both took 33 seconds to pump 1/2 gallon, which equates with a fuel flow of 54.5 gallons per hour — more than enough to supply my IO-320.
The next step is to flush and flow-test the servo, spider, and injector lines.  Per the Airflow Performance install manual, I removed the line from each injector and directed it into a cup.  Opening the throttle and mixture and switching the boost pump on caused fuel to flow at the injectors.  I flushed two cups worth from each injector, then ran the pump for some time, and recorded the amount of fuel pumped by each line.  We’re looking for less than 10% difference.  I was also able to confirm at this point that the fuel flow transducer is, indeed, transducing.
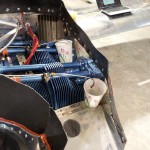
Removed the fuel pressure line from the transducer manifold and ran the pump until fuel emerged, then reconnected.  Purging these pressure sender lines helps give stable readings.  Reassembled the fuel system.

Time to move on to the other life-fluid of the engine, oil.  The engine has been filled with 3+ gallons of oil to keep its internals from rusting, so that needed to be drained out.  Some of it had also seeped into the cylinders, and that needed to be removed as well.  So, all spark plugs were removed, and the gush of oil caught in a funnel and/or wiped of from whatever it ran onto.  The rest of the oil was drained out through the sump as it would be on a normal oil change.

Spark plugs were cleaned and gapped per the Pmag instruction manual (.030″ to .035″; I set these at .031″ to allow for erosion over time).  A plug was connected to each ignition lead, and grounded against the engine case.  The prop was carefully pulled through with each ignition hot, to verify that the correct plugs were firing at the correct prop angle (fronts @ TDC, rears @ 180 from TDC)…all is good.

Antiseize was applied to a set of four plugs, and they were installed into the bottom holes and torqued to the ECI spec for 14mm plug bosses (180 in-lb, aka 15 ft-lb).  Ignition wires connected.  Top plugs will remain out for now, since the prop will need to be spun for preoiling (a procedure I need to decide how I will do…)
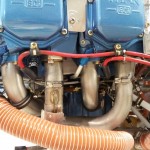
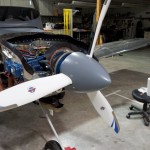
Installed the spinner, as I’ve read that the centrifugal force is enough to bend or remove the gap filler plates if the engine is run without it.  At this point, I believe the engine needs only oil (and to bleed the oil pressure line) and a good inspection before first start.
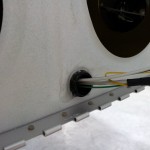
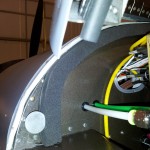
Pulled the wingtips and installed the nutplates that hold the screws which secure the tip lenses.  Wanted to add some flox & glass tape to the ribs, but I’m all out of epoxy mixing cups and gloves…tomorrow?  I did apply some Goop to the wing conduit at the outboard rib, to keep it from rattling around or pulling back into the wing.
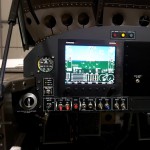
I have also been spending time in the evenings working on the POH, and presentation of the build log in some paper format for the inspection.
Hours: 5.4 | Posted in Endgame | Comments Off

30th June 2012

Let the fuel bills begin

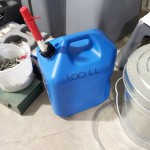
Not perhaps the most auspicious of milestones, but I did put the first avgas money into the project today…5 gallons worth into a new blue fuel jug, for the sake of fuel system testing.

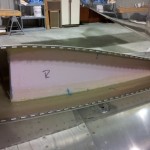
But first…most of the day was actually spent on or near the wingtips.  I spent awhile shaping some foam ribs to go inside the tips, to strengthen, eliminate oil-canning, and hold the proper shape.  Once I had one side looking good, I marked the spot of each rib, traced them on fresh foam, and cut a matching set for the other side, which provided a good starting point.  After setting the location of each rib for proper shape of the tip, I mixed up some flox and buttered the edges, set them in place, and pinned the tips back to the wings to hold the proper shape & alignment while the epoxy cures.  I’ll pull them tomorrow, add more flox to fill in any gaps, and lay a strip of glass tape along the edges of the larger foam rib, for good measure.  (No photos of this because I was covered in foam dust and epoxy.)

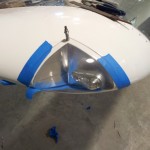
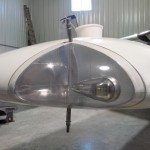
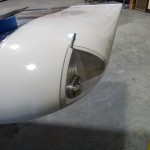
Wingtips curing nicely, I moved on to the lenses which cover the lighting “bay” in each tip.  I remembered to bring the replacement lens this time, and I had dropped the belt/disc sander off the other day, so all the parts were in place.  It’s nothing too difficult, just a lot of repetitive and time-consuming fitting, sanding, filing, fitting again, and repeating the whole process.  Since it fits a curve at two points, each bit you take off changes the fit of the rest of the lens, so it took awhile to get it right.  Once satisfied, I drilled a #40 hole at the corner, top & bottom.  Clecoed to test fit, then enlarged to #27 for a #6 screw, removed, and drilled/countersunk holes for nutplates.  Those will be installed tomorrow when the tips come off after the epoxy cures.

Moving inboard a bit, I removed and cleaned the lenses for the landing & taxi lights.  They were quite dirty on the inside surface, since the wings were stored leading-edge down in the cradle.  Shiny and clear again now, though.

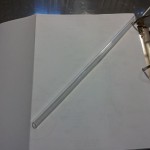
Cut some lengths of acrylic tubing from a 6′ piece I had ordered a while back, and smoothed the ends.  This will become a fuel dipstick for checking the tanks.

On to some engine work in preparation for an eventual first engine start…

  • Removed the paper towels that I’d stuffed in the fuel servo inlet to keep out bugs/etc.
  • Used a syringe to apply some Mouse Milk to the exhaust ball joints.
  • Connected the computer to each Pmag in turn to verify the timing (also cross-checked with the indicator lights on the ignition body), and make sure that the advance was limited to the “basic” setting (35 degrees).  Once the engine has been broken in, we’ll dial this up to the more advanced 40° setting, which should help the engine run more efficiently.  The two ignitions are timed nicely together, and they are timed to 1° after TDC, rather than TDC directly.  Based on the manual, I’m going to leave this be for now, since they do suggest that it be up to 3 degrees after TDC for lightweight props, which mine is.  We can tweak later if necessary.

Later on, I drove down to the fuel pumps to fill up the aforementioned can with fuel.  Poured some into each tank (BTW, I hate the newfangled gas nozzles that you have to push down against a spring to keep the fuel flowing…and their vent inlets are so tiny that the flow rate is pathetic), sloshed it around by rocking the plane, then drained it back out again — the idea being to get as much junk out of the tank as possible.  Filtered it back into the can, and poured from the can back into each tank.  Sumping into a tester showed clearer fuel this time.

Disconnected the fuel line from the servo inlet, but I didn’t have the fittings with me to extend it anywhere useful, nor a measured container to pump fuel into, so I just capped off the line and servo inlet for another day.

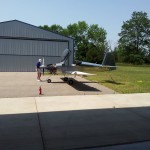
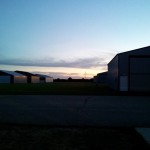
Three project visitors today; Art (Lancair) from the airport brought his Australian pilot friend (Jabiru) around to check on the progress, and Bob Collins (RV-7A) dropped in later in the evening to chat and take a look, while on a flight around his test area.  As the sun was setting, I caught this neat picture out of the hangar door, with the cloud shadows…  A good day.

Hours: 9.4 | Posted in Endgame, Wingtips | Comments Off

28th June 2012

That’s how we roll

The replacement nav/strobe assembly arrived, along with the replacement wingtip lens.  My hangarmate fixed my up with an engine hoist and sling for raising the nose to work on the nosegear.  So, time for a night at the hangar.

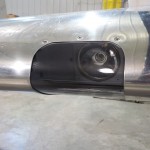
Trimmed the leads on the new nav/strobe, and crimped on Molex pins.  Tested it out for awhile, and it stays in sync with the others, so — problem solved.  Removed the old unit from the wingtip and installed the new one.  The faulty one will be on its way back to AeroLEDs tomorrow morning for an autopsy.  While I had it off, I grabbed a photo of the mounting bracket installed.

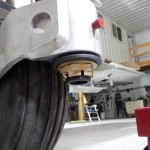
Easily raised the nose with a sling around the prop spacer, hooked to the engine hoist.  I removed and disassembled the nosewheel and fork, cleaned the axle shaft/bearing seal mating surfaces, and installed the axle according to the directions (tighten the ring until the bearings don’t rotate with the wheel), then tightened the screw on the preload-setting ring.  Set that aside for a bit, while I attended to the fork assembly.

Cleaned & greased the bushings in the fork, along with the spindle.  Slid the fork on and installed the washer stack and big nut, then tightened it down with the giant (3/4″ drive) socket/ratchet, until I had the desired figure on the fish scale.  My cheapo fish scale I bought isn’t perhaps the pinnacle of professional measuring devices, but it got the job done.  On the advice of those who have gone before, I set the breakout force high (26lbs), so it has room to drop as the parts wear in during initial use.  Once I had that set, I drilled the 1/8″ hole across the spindle, removed the nut to deburr, and reinstalled the whole stackup with cotter pin.
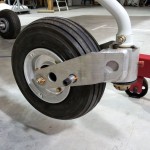
Reinstalled the nosewheel to the fork, torqued and marked everything, and we’re done.
   

Hours: 2.2 | Posted in Electrical, Endgame, Gear & Fairings | Comments Off

25th June 2012

Tips & alarms

Deburred, countersunk for, and installed the wingtip aft closeout ribs.  I added a nutplate to each one for securing the hinge ends, though I’m not sure yet exactly what that will look like.  They were installed with a fillet of flox, after roughing up the surface, and blind-riveted in place.  The rivets will be covered with micro filler eventually, so the pops are not a cosmetic issue, and I was able to reverse the ribs and place the smooth side inboard this way.

After that, sat in the seat with the engine manuals and configured the limits and alarms in the EFIS.  Nice evening outside, quite cool (~60°) considering in 36 hours the heat index is predicted to be over 100°…

Hours: 2.8 | Posted in Endgame, Wingtips | Comments Off