12th March 2012

Tapped out

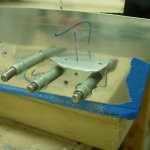
Finding no easy (read: cheap & fast) way to procure a 4-40 tap needed to clean micro out of the taillight attach nuts, I decided to have a go at it with a screw.  Which worked fine.  The empennage is officially ready to move the the airport.

Hours: 0.2 | Posted in Wing & Tail Joins | Comments Off

4th March 2012

Moving on from tips

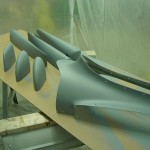
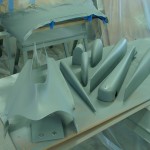
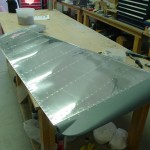
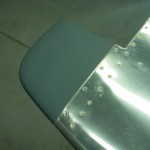
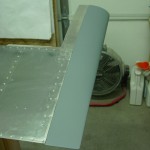
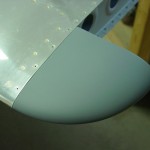
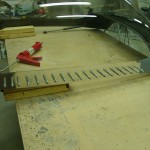
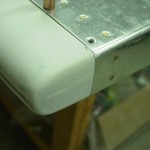
With the first batch of fiberglass parts done, today saw the attachment of all the empennage tips to their respective stabilizers and control surfaces.  The emp fairing was set aside for the day the tail is installed at the airport, and the spray booth collapsed until the next round.  The only remaining item for the emp is that the taillight screw holes on the rudder need to be tapped to remove some excess micro that got in them.  After that, the emp parts will make their way to the airport at some point, to wait with the wings for the Big Move of the fuselage.

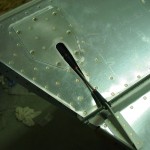
While working on the left elevator, also final-installed the trim pushrod and cotter pins.

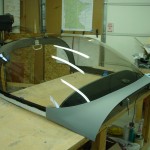
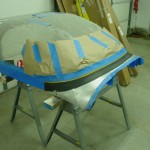
The plastic covering on the canopy was the original as shipped in the finish kit, and had become quite tattered, along with being covered in dust and overspray of all sorts — I removed it, and will cover the canopy with layers of saran wrap to keep it pretty in the interim.  Today, cleaned, prepped, and attached the canopy side skirt pieces to the canopy frame.  Currently, they’re clecoed in place to let the bead of Sika cure, then I’ll add the rivets.  Also fabricated the exterior canopy lift handle (pilot’s side only, thanks) and drilled to the frame.  The canopy is very static-y when cleaning with a microfiber cloth, which means it didn’t stay clean for long, but every dust particle in the shop was attracted to it.


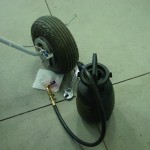
Re-bled the right brakes again, but still have a soft right brake pedal compared to the left.  I see no leaks, even under pressure, where air might be entering, so I can only blame the bleeder tank somehow.  Sort of disheartening, as the original system fill was rock-solid on both sides…too easy.  But the leaks at the pedals had to be fixed.  I wonder if draining the whole right side and refilling would provide better results.  I also wonder about the design of the bleeder valve, and whether air can’t find a path to enter there.

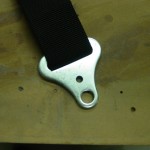
Decided to look at the installation of the crotch straps.  Pulled the seat pans and found that it would work well to simply drill a new hole in the crotch strap bracket, up from the giant factory hole.  I marked them in situ, and drilled both to 1/4″.  The geometry of this area requires an angle drill, but my largest bit is 5/16, so I will need to procure a 1/4″ threaded bit to complete the installation.

While messing around in the fuse with seatbelts, I happened to notice that four bolts were never put in the center section — whoops!  These are the bolts that go through the inboard tubing support brackets, just outside the fuel selector, top & bottom on both sides.  Obviously, I installed those bolts.

Hours: 7.2 | Posted in Center Fuselage, Gear & Fairings, Wing & Tail Joins | Comments Off

3rd March 2012

Topcoat fairings // brakes

Two sessions today.  In the afternoon, sanded the K36 smooth — that stuff sands very easy — and sprayed a topcoat of DPLF epoxy primer, per the advice of folks at VAF, who say it is more resistant to oil, etc.

In the evening, came back to respray one elevator tip, whose finish was marred when the plastic sheet that makes up the paint booth perimeter fell on it while drying.  Argh, and it doesn’t look quite as good as the other, but good enough to last until the plane is painted for real…just trying to make sure the glass is protected and looks decent here.

Also tightened one more leaking NPT elbow on the passenger’s left brake, and re-bled the left brake system.  Replaced the broken right brake bleeder screw, and re-bled that side, but there was a continual stream of tiny bubbles in the fluid and the right brake is definitely softer than the left.  I think pumping up the bleeder tank put bubbles in the fluid when the level in the tank got low, so I filled it back up and pumped it up.  I’ll leave it set overnight to allow the bubbles to settle out, and re-bleed again tomorrow; hopefully that’ll fix it.

Hours: 5.0 | Posted in Gear & Fairings, Wing & Tail Joins | Comments Off

2nd March 2012

Pinholes

Mixed a dollop of Superfil and worked it into the few remaining pinholes before work.

Response to my question on VAF about topcoating the K36 (or not) until paint leans in the direction of spraying a final coat of DPLF, which will provide more protection from oil, etc.  It’s also a nicer color…

Hours: 0.2 | Posted in Wing & Tail Joins | Comments Off

1st March 2012

He shoots, he sands

Wiped down all the fiberglass parts, and sprayed on a few coats of K36.  A few pinholes remain on the rudder top and empennage fairing; the rest are fine.  I need to figure out whether the K36 is acceptable to leave as the final finish, or if it needs another coat of something on top, to tide over until finish paint, which may not come for a good long while.

Hours: 2.5 | Posted in Wing & Tail Joins | Comments Off

28th February 2012

More ___ sanding

Scraped and sanded the filler which was applied in the previous session.  Shaped the rudder top TE to match the rudder skin.  Ready for more spraying when I find the time.

Hours: 3.2 | Posted in Wing & Tail Joins | Comments Off

26th February 2012

Filling (&) leaks

Mixed up some Super-Fil and worked it into the remaining pinholes on all the fiberglass parts that were sprayed yesterday.  Next will be sand the filler & spray another coat.

Pulled the top skin off and moved a couple pins on the ADS-B connector, since newer versions of the box have a slightly different pinout.

With the top skin off, found that a few of the elbow fittings on the brake cylinders were leaking fluid.  Removed the hoses and turned them in one more rotation, which, at least initially, seems to have cleared up the slight leaks.  Re-bled the brake system with fluid, and in the process managed to snap the nipple off one of the bleeder screws.  Dangit — at least it was only the nipple, so the brake system is closed, and I just need to order another bleeder screw.

Reconnected the oil temp sensor wire, which had been removed in a previous session to install an oil line.

Hooked up the new serial converter and it works; checked communication with the Pmags, and verified the configuration in the APRS tracker.

Hours: 6.5 | Posted in Canopy & Frame, Electrical, Plumbing, Wing & Tail Joins | Comments Off

25th February 2012

Working the list

Finally, a work session with something more than sanding.  Worked a bunch of list items over a full day in the shop:

Brushed epoxy on the front of the top rudder tip, filling the pinholes in the micro which was sanded yesterday.  Added a blob of micro to the trailing edge, where the glass tip ended short of the metal portion.  I’ll refit this to the rudder tomorrow and sand the tip TE to match the rudder.

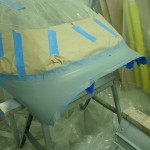
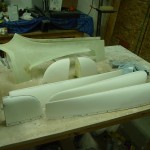
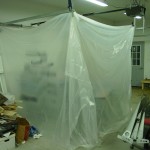
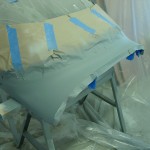
Set up a plastic-sheet spray booth, cleaned the HVLP gun,  and sprayed PPG DPLF epoxy primer on the canopy fairing, HS and VS tips, elevator tips, rudder bottom, and empennage fairing.  After that, it was time to air out the shop and bring it up to temperature again, as the epoxy primer and subsequent gun cleaning step kick off a lot of fumes.  I found only two pinholes in the canopy fairing, both over screw heads.  The emp fairing has a goodly number still (as I expected), and the tips have a few.  I’ll let the primer cure overnight, then fill the holes and sand level before laying down the K36 which is the next step in finishing.  That puts the second coat on schedule for Monday or Tuesday, though it looks like I may have to work on Tue night.  The recoat window is one week.
  

On to the cowling, I cleaned up the cut line on the rear of the inlet duct, then fabricated a piece of airseal and a metal backing strip, fitting them around the bottom of the duct.  This will mate up with the top piece, which is installed on the airbox, to seal the gap between duct and airbox.  A test fit, after tweaking the alignment of the airbox, showed it worked well.
 

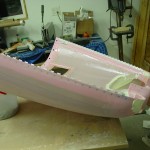
Next, I countersunk all the rivet holes for the cowling hinges, and drilled some “ooze holes” in the hinge to give epoxy something extra to bond to.  Sanded the cowling and the hinges with a rough grit, and laid a bead of epoxy/flox along the hinge lines.  Clecoed the hinges on, then riveted them down, and cleaned up the flox that squeezed out all around.  Ran hinge pins through the hinges to make sure none of the eyes were epoxied shut.  Also floxed/riveted the oil door hinge to the cowl and door.
 

Put rivets in the remaining 5 holes under the left side canopy deck, originally left open to attach clips to hold the static line.  One hole was behind the center section cover, and inaccessible for bucking, so I used a Cherry rivet instead.

Torqued the nuts on the control cables at the quadrant, and the stopnuts on the control horns attaching the cables to the quadrant levers.  Verified that cotter pins were installed on the horns (they were).
Hours: 10.4 | Posted in Canopy & Frame, Cowling & Baffles, Wing & Tail Joins | Comments Off

23rd February 2012

Sanding & minor miscellany

Sanded the empennage tips to smooth the micro filler I added earlier this week.  Also the empennage fairing, which looks decent, though I’m sure there are some ppinholes I’ve still missed.  Fit the rudder top back to the rudder, in order to sand the big glob of micro I put on the nose of that tip; the side corners of the tip were not even with the rudder skin, aand they now are.  Now I’ll need to fill the air bubble holes in that area, but that should be easy enough.  Hopefully will spray primer on some of this stuff over the weekend.

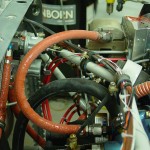
Moving to the engine, I was able to knock a couple minor things off the list.  Added a safety clip to the oil drain valve, that would prevent it from coming open unintentionally.  Also, removed the upper oil cooler line, changed the 45* fitting on the engine to a straight, and reclocked the 45* fitting on the oil cooler.  Then replaced the removed line with a longer one, to add a bit more flex, and ensure that the minimum bend radius of the hose is met.  Thanks to Tom at TS Flightlines, who turned around the order for this line in one day (and previously made all the other engine hoses to my specs).

Milestone: 1600 hours in this session.  We’ve now reached the low-end of my estimated total hours range.

Hours: 2.2 | Posted in Engine, Wing & Tail Joins | Comments Off

21st February 2012

Sanding tips

More work on the empennage tips: drilled & countersunk the rudder bottom, then removed and sanded.  Applied micro to spots on several of the tips, to fill in divots along the joints in factory layups.  Put a blob of epoxy around the rivnuts for the rudder light, to make that a little more stable.

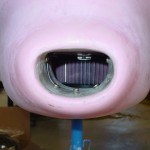
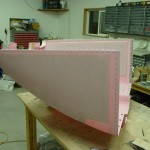
Pushed micro into the voids and large pinholes in the empennage fairing; this will likely still need another coat or two of epoxy or filler and plenty more sanding before it’s done.

On the right hand heat control, replaced the black-on-white label with a white-on-black version.  The P-touch labeller’s smallest text is larger than the size I was able to print with the Rhino, though, so it’s a bit out of proportion with the knob.  If I can find white-on-black Rhino tape, I might replace it again someday.

Slid a piece of nylon expandable sleeveing over the trim servo wires that protrude from the left elevator, for extra protection against chafing the wires.  Secured with heat-shrink on the end.

Hours: 1.5 | Posted in Wing & Tail Joins | Comments Off