17th March 2012

Punching the list

Another warm day (but this time breezy and hazy as well).  Trying to cross things off the list…

First on the agenda: loaded up the empennage and moved it to the hangar, where it will wait with the wings until final assembly.

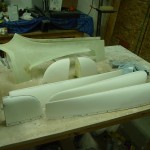
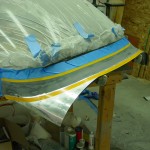
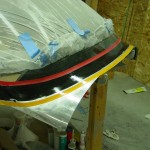
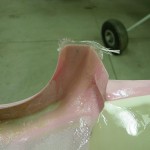
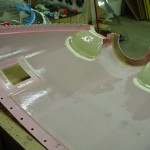
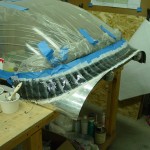
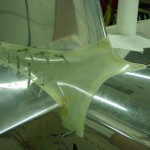
Next, set up the day’s fiberglass job.  Added a couple plies to the nose flange layup from yesterday, to give it more stiffness.  Closed off the inboard ends of the cooling inlet ramps with a 2-ply layup.  Added flox to a couple spots and deep voids.  Again today, I meant to get two rounds done, so one could cure overnight, but ran out of day.

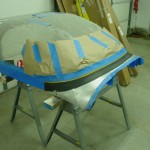
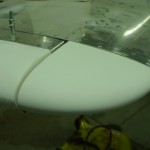
Spent awhile fussing with canopy seals.  The edge-gripper bulb seal I wanted to use on the front seems a bit too thick, as it’s interfering with the closing of the canopy — the latch requires immense force to actuate.  So, that was removed for now.  I added the same bulb seal to the side rails, and that also cause latch trouble, so I ended up slicing the bulb in half for about 60% of the length of the side rails.  It looks ragged when open, but seals fine when closed.  This is easy to replace later — I’m searching for a smaller bulb, but the 3/8″ is the smallest I’ve found so far.  I may have to explore using foam strips or something.  Also ran into trouble with the rear rollbar seal, again, difficult to close & latch.  Will explore more seals; it seems this is a spot everyone struggles to make work.

On to the “little stuff:”

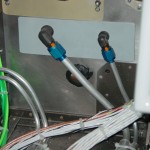
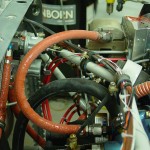
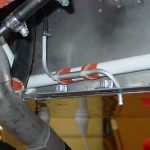
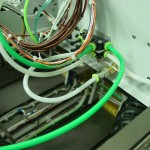
  • Slipped some clear tubing over a couple fluid lines in the tunnel to prevent any possible chafing from wire bundles (clearance is fine, but vibration does things…)
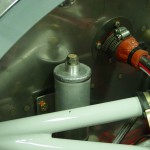
  • Installed the fuel selector & torqued all the fluid fittings in the center tunnel.
  • Installed the fuel pump and torqued those fittings.
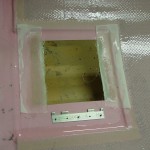
  • Installed the metal plug in the hole that provides access to the nose leg bolt.  Sealed up with a good layer of firewall sealant on both sides.
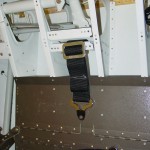
  • Installed the bolts on the RH lap belt, having received my order of hardware from Spruce.
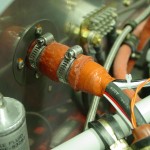
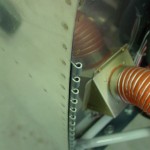
  • Finished off the firewall wiring passthrus per instructions, since wiring is complete.
  • Torqued the forward bearing on the aft elevator pushrod.
  • Checked that all bolts on the flight controls were torqued, and torqued them where they were not.
  • Swept the shop and put away tools, brake bleeding stuff, and so on.

Hours: 8.0 | Posted in Cabin & Interior, Canopy & Frame, Cowling & Baffles, Engine, Plumbing, Wing & Tail Joins | Comments Off
11th March 2012

Bits ‘n’ pieces

Several list items in this weekend’s work session.

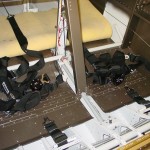
Having received the 1/4″ threaded drill I needed, drilled & deburred the crotch strap mounting holes.  Installed the crotch straps.  Drilled 1/4″ attach holes in the lap and shoulder belt attach points, and mounted those (RH lap belt temporary, as I ran out of the correct length AN4 bolts).

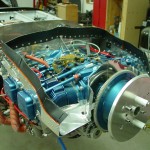
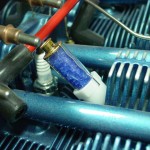
Final-installed the baffle screws with lockwashers.  Replaced temporary nuts with metal locknuts on baffle mounting brackets.  Fabricated and temporary-installed the baffle tension rods (need #6 metal locknuts), with nylon tube over the middle parts; they don’t contact anything as is, but should something shift, the nylon will prevent wear until the next inspection/oil change/etc.

Applied packing tape to the forward spinner bulkhead, laid a bead of flox on the inside of the spinner at the contact point, and clecoed it in place.  There was a moment of concern when the spinner didn’t want to release from the tape after curing for a few hours–I wanted to let the flox set up to hold proper shape before removing the spinner.  After pushing, prodding, tapping, and finally whacking it on an angle (it took quite a few good double-fisted whacks…that’s a strong piece of fiberglass…), one section popped loose and I was able to work it free.  Trimmed the squeezed-out flox off with a knife, to save weight and keep the spinner as balanced as possible, since this is part of the rotating mass.

Hours: 8.3 | Posted in Cabin & Interior, Cowling & Baffles, Engine | Comments Off

26th February 2012

Filling (&) leaks

Mixed up some Super-Fil and worked it into the remaining pinholes on all the fiberglass parts that were sprayed yesterday.  Next will be sand the filler & spray another coat.

Pulled the top skin off and moved a couple pins on the ADS-B connector, since newer versions of the box have a slightly different pinout.

With the top skin off, found that a few of the elbow fittings on the brake cylinders were leaking fluid.  Removed the hoses and turned them in one more rotation, which, at least initially, seems to have cleared up the slight leaks.  Re-bled the brake system with fluid, and in the process managed to snap the nipple off one of the bleeder screws.  Dangit — at least it was only the nipple, so the brake system is closed, and I just need to order another bleeder screw.

Reconnected the oil temp sensor wire, which had been removed in a previous session to install an oil line.

Hooked up the new serial converter and it works; checked communication with the Pmags, and verified the configuration in the APRS tracker.

Hours: 6.5 | Posted in Canopy & Frame, Electrical, Plumbing, Wing & Tail Joins | Comments Off
23rd February 2012

Sanding & minor miscellany

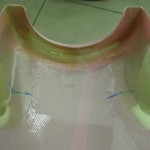
Sanded the empennage tips to smooth the micro filler I added earlier this week.  Also the empennage fairing, which looks decent, though I’m sure there are some ppinholes I’ve still missed.  Fit the rudder top back to the rudder, in order to sand the big glob of micro I put on the nose of that tip; the side corners of the tip were not even with the rudder skin, aand they now are.  Now I’ll need to fill the air bubble holes in that area, but that should be easy enough.  Hopefully will spray primer on some of this stuff over the weekend.

Moving to the engine, I was able to knock a couple minor things off the list.  Added a safety clip to the oil drain valve, that would prevent it from coming open unintentionally.  Also, removed the upper oil cooler line, changed the 45* fitting on the engine to a straight, and reclocked the 45* fitting on the oil cooler.  Then replaced the removed line with a longer one, to add a bit more flex, and ensure that the minimum bend radius of the hose is met.  Thanks to Tom at TS Flightlines, who turned around the order for this line in one day (and previously made all the other engine hoses to my specs).

Milestone: 1600 hours in this session.  We’ve now reached the low-end of my estimated total hours range.

Hours: 2.2 | Posted in Engine, Wing & Tail Joins | Comments Off

18th February 2012

A flight, and fiberglass

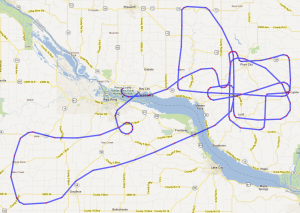
Began the day with some excitement; nearby -9A (and now -10) builder Mike Behnke was gracious enough to bring his plane down to Red Wing this morning so I could have my first RV flight — a great one!  The day was warm, calm, and relatively clear, and Mike’s plane looks and flies great.  My only experience being in 150/152/172 types, the stick-and-pushrod controls were a new thing, and a joy to fly; no slop in the control system, and just a bit of pressure required for control.  We did some turns, stalls, a bit of sightseeing, and Mike demonstrated an autopilot-coupled GPS approach.  Also got to see the AFS screens in flight, as his panel is practically identical to mine (both equipment and layout).  We also chatted about fiberglass, transition training, inspections, first flights, and so on.  Many thanks to Mike for the opportunity!  It’s another inspiration to work through the endgame of my project.

On my way out of the airport, I stopped by the hangar and pulled the fuel caps from the wings (and taped over the filler holes), as I’m considering sending them in to be engraved with the required markings, rather than using a sticker.

Into the shop after lunch, I spent several hours sanding the micro filler on the canopy fairing.  It turned out pretty well, and I think I’m going to try and move ahead with it.  To that end, I squeegeed on some straight epoxy to seal the micro and fill pinholes.  I’ll add another layer or two, then sand and see where it sits.

I used the excess epoxy to seal the inside of the emp fairing.  I’m hoping to get the rest of the emp tips ready to spray this week, then spray a whole batch of glass one night.  Once the tips are done, the emp parts will move to the hangar.

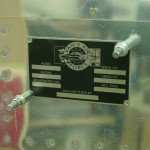
Drilled the dataplate to the fuselage — I’ll send this in for engraving with the fuel caps.  Also located some 3/32 pop rivets to attach it. Since I don’t know when the inspection will be, I’m just going to put 2012 in the date box; this field isn’t even required.

Then I took a look at the top hose from oil cooler to engine; I think the bend radius on this hose is too tight, and I’ll need to order a longer hose, change the fitting on the engine, and reclock the fitting on the oil cooler, to allow a more sweeping bend in the hose.  It’ll be more in the way of filter changes, but don’t want to take any chances with an oil hose collapsing.

Added a silicone boot to the oil temp sensor wire; more for vibration support of the wire than for short-circuit protection.

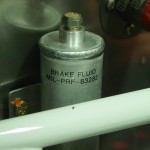
Stuck a label on the brake reservoir, indicating what the thing is, and the spec of the fluid it’s filled with.

Traced the spinner diameter and used some geometry to trisect it, in preparation for making the prop cutouts.  Still need to figure how I’ll determine the shape of the cut, not owning one of those curve-finder pin apparatus.

Hours: 5.1 | Posted in Canopy & Frame, Engine, Wing & Tail Joins | Comments Off

14th February 2012

Lay on, sand off

More fun with cowling to start the day: added some glass to a spot in the nose of the upper cowling that was thinned out by sanding, and laid up a couple plies at the sides of the oil door (+ peel ply).  Took the extra epoxy and squeegeed it on the inside of the top cowl.

Taking a break from fiberglass work, I filled the brake system with fluid.  This was pretty easy with the use of the brake bleeder tank I picked up from ATS, which came with the correct bleeder fitting for the calipers.  I filled up the tank with fluid, attached a NPT-to-hose-barb fitting to the brake reservoir in place of the cap, with a clear nylon tube to the empty fluid canister, and pumped away.  Once a stream of uninterrupted fluid had flowed out of the reservoir, I switched sides and repeated.  No leaks apparent, but I still need to climb in and test the system under pedal pressure, as well as check the operation of the parking brake.

Back to work: spent considerable time sanding down the fillet of Sika at the canopy base.  I decided to do a layup of glass here, for a number of reasons.  To enable that, I pared down the Sika fillet, exposing some plexi above it, and some aluminum below it.  Scuffed everything up well, and laid out edge lines with electrical tape.  I cut a ply of “Rutan Bid” glass cloth, and a ply of a cloth with a tighter, denser weave to place on top of that; both were curves cut on a bias, for a smooth fairing with no ply overlaps.  Mixed a batch of epoxy with added black colorant, and laid up both plies of glass, plus a layer of dacron peel ply.  Today was the first I’ve used the peel ply, so we’ll see tomorrow if I did it right.

One more little item on the list, plugged into the VP-X and updated it to the latest firmware version.  The cheap USB to RS-232 converter I bought for $9 is junk and won’t install on my computer, so I haven’t been able to service the APRS unit.  I’ll borrow the one from work that I was using before, and find a better one to get for the shop.

Also looked at the fit of the Crow crotch straps, which look like they’ll fit into the brackets without trouble.

Hours: 9.5 | Posted in Cowling & Baffles, Electrical, Gear & Fairings | Comments Off

4th February 2012

Punch

Didn’t get part of Friday off from work as I’d hoped, but today I proceeded with the weekend plan of highlighting a bunch of items on the punch list, and knocking them off…

Mixed up a batch of firewall sealant (don’t smell that stuff…wow) and sealed the perimeter of the firewall sides and bottom, and a fillet in the lower corners.  The top curve will get done later when the top skin is put on.  Let that tack up, then clecoed & riveted the sides and bottom, along with the shims, hinges, and camloc strips.  By moving the exhaust stacks and using a variety of yokes, I was able to easily squeeze every rivet but the centerline bottom rivet, which was unsqueezable with any yoke from any angle.  That hole now sports a pulled rivet.  Once the camloc strips were on, the camloc receptacles were added.  Done.

With the lower edge of the firewall complete, I added the metal portion of the fuel pump vent line.  Done.

The metal fairing strips that run underneath the HS were next; drilled and tapped the appropriate holes in the aft longerons, drilled the strips, and test fit.  To see how the fit was, I added the HS back on for a moment, and marked the trims that needed to be made.  After several iterations, I had the 1/32 to 1/16″ gap called for in the plans, so the strips were primed.  Still need to countersink the strips, but Almost Done.

Removed the canopy strut attach blocks and primed/painted them.  While they were drying, I removed the blue tape that has been covering the canopy decks; underneath, I found (as I suspected) that some of the adhesive had become gummy, so that’ll have to be washed up.  Later, reinstalled the strut pivots, and reinstalled the assembly to the canopy decks.  Done.

Big job of the night: redo the intake studs in the engine sump so the nuts have enough threads protruding.  This required moving the exhaust stacks (again) and partial disassembly of the entire fuel servo/control cable works — not an easy task due to the limited room to swing a wrench; several of the bolts can only be turned one flat (1/6 turn) at a time.  Eventually, though, it was off, the studs removed, holes cleaned, and reinstalled studs to the correct depth.  Not much was really needed, only 1/8″ or so on each one.  Some of them ended up being a little longer than necessary, but there’s plenty of thread and the nuts are not bottomed, so all is well.  You don’t want to bottom the stud out in the blind hole, as it will stress the threads and can cause them to fracture.  I used a torque wrench to verify that the driving torque requirement was met, and installed with red loctite per the AFP manual.  Much reassembly later, we’re back in business, and the nagging “that’s not right yet” of those studs is gone.  Verified stop-to-stop movement of throttle and mixture.  Done.

Enlarged the drain holes on the fuselage to #19 based on talk that the #30 hole isn’t big enough, and (especially if any gunk is present) the surface tension of water will prevent it from draining.  Also added a drain hole at the lowest point of the fuselage (which is under the seats, and not at a bulkhead), and one under the fuel pump area.

Placarded the alternate static valve installed the other day, and remade the fuel purge and center cabin heat placards with white on black, which looks nicer on the black panel.  Also made black on clear labels for the extra PTT buttons on the fwd canopy decks, and for the pilot’s stick functions (PTT, Trim Up/Dn, and AP CWS)…I expect those will fall off over time and use, but my understanding is that it’s better to have everything labelled to the point of excess at inspection time.

Hours: 11.4 | Posted in Cowling & Baffles, Engine, Wing & Tail Joins | Comments Off

2nd February 2012

Venting

Drilled and installed the fairing nutplates on the HS.

Countersunk and re-primed the top cowl camloc strips (oops).

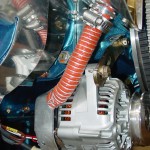
Cut and attached the blast tube to the alternator with a double-wrap of safety wire.  I’m all ears if someone has a better way of doing this, but it’s reported to have worked.  Also rumors that the alternator doesn’t need it, but cooler is always better for electronics.

Tightened and re-saftied the dipstick tube, as it was weeping just a bit at the gasket, since the engine is full of oil now.

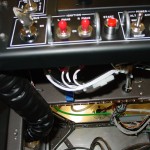
Installed the alternate static toggle low on the subpanel behind EFIS 1.  I bought a toggle switch guard to put over it, since the actuating force to open the switch (thereby venting the static system to the cabin) is quite low.  The guard needs a good strong push to open & latch, and it holds the valve firmly closed in the down position.  I sat in the seat and the switch is out of sight, though easy to reach under the panel.  It still needs a placard, though, because my labeller was too cold to print labels.  (It looks like the wire bundle is very much in the way, but it’s just a result of the camera location.)

Checked to be sure I’d run the remote output port from the transponder to the ADS-B connector (I had), as the need for that connection came up on a recent VAF thread again.

Wasted the rest of the night sitting in the seat playing with the avionics.

Hours: 2.4 | Posted in Engine, Plumbing, Wing & Tail Joins | Comments Off
29th January 2012

Pop rivets & dust

Allison joined me in the shop for a bit to finish removing the tape gunk from the empennage fiberglassing adventure.  While she worked on that, I sanded the micro and shaped the edges of the emp fairing.  After fitting it back onto the plane, I’m pretty happy with the fit.  Now, I’m going to use this (and the emp tips) as a learning canvas for fiberglass finishing.  I have a box of PPG stuff here that I’m planning to use, which I chose because it seemed to be the most well-documented on the forums and build logs.

I also drilled the HS tips to #30, dimpled the skin, and countersunk the fiberglass.  These are ready for finishing, then attaching.  The goal with the fiberglass stuff is to get it to an acceptable level of finish and wearing a protective coating.  If it needs to be dealt with further, I can revisit it before paint (or let the pros make it shine as part of the pain process).

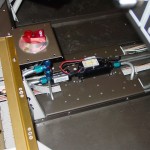
With the fiberglass dust (ack) cleaned off the workbench, I pulled the clecoes from the baffle airseal strips and installed the large-head pop rivets that hold it in place.

Finally, I installed the latest version of the EFIS software from AFS.  The problem where the screen blinks durin initialization when displaying the VP-X status page has not been fixed.  I pulled the config files to load into the computer and update some things.  (Hint: Linux works better than Windows for editing these files, as the line breaks display correctly…no surprise, since the AFS box runs Linux internally…)

I’ve also been working on the paperwork side, having built an InDesign project and templates for the POH, and compiling the “best of” from several existing POH’s that others have shared on their websites.  There’s lots of specific information to research and fill in, and plenty of stuff yet to write.  Being a layout nerd and a perfectionist, it’s possible to pour hours into this part, too.

Hours: 4.5 | Posted in Cowling & Baffles, Electrical, Wing & Tail Joins | Comments Off
26th January 2012

Pickle me

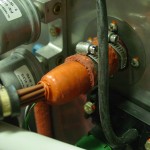
It’s been a but more than a year since my engine was built, and the protections applied at the build shop were said to be good for 12 months.  I’ve been careful not to turn the engine, and have kept it’s openings mostly plugged, but I asked the kind folks who built the engine up at Aero Sport Power what measures I should take to prolong the preservation, given that it will likely be several more months before the fires are lit.  Having procured the necessary items, I carried out their recommendation tonight:

  • Pour 3 gallons of oil into the crankcase.  They said this could be automotive oil, as it’s only there to cover and protect, not lubricate for flight.  I put in conventional (non synthetic) Valvoline.
  • Cap off the breather and exhaust stacks.  I had a plug that fit into the breather hose, and I wrapped the stacks in plastic & tape, since I don’t have any plugs that large.
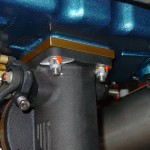
  • Cap off the intake; this is already done, before I started doing any fiberglass work on the FAB & intake scoop.
  • Insert dehydrator plugs and keep them dry.  I looked around and found some that the crystals can be taken out of and dried.  Make sure to ask that, as there are several places selling 14mm ones that are sealed, alongside the regular reusable 18mm versions.

I’ve been doing final reading on brake fluid & seals, and I decided to change out the caliper O-rings, since the stock Buna-N ones will deform in the 250* range.  There have been cases of brake fires on RV’s and similar aircraft before, so many guys are replacing the 5606 fluid (flash point in the 200′s) with the more modern 83282 (flash point in the mid 400′s).  Synthetic ATF is another option, which has specs similar to that of the 83282.  It’s also become common to change out the O-rings with Viton, which is rated to 400*. The downside to Viton is it’s poor low-temperature performance (-15*).  Since I do plan/hope to fly in the winter, I found some flourosilicone O-rings at McMaster, which have the same high-temp rating as Viton, but are also rated to -75.  (They’re listed under “military specification o-rings,” p/n 8333T255)… a little pricey at $6.25 for a 2-pack, but that’s small potatoes.

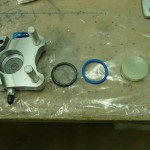
The install couldn’t be easier: remove the caliper, pop out the piston, remove the old O-ring, clean up the piston & bore, lube the O-ring and insert it, then slide the piston back in place and re-assemble.  Done.

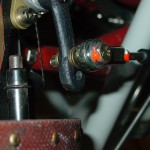
Finally, the mixture linkage has been bugging me for awhile; even with the higher hole I drilled in the quadrant lever, it wasn’t confidently hitting the stops on the fuel servo before hitting the end of the quadrant throw.  (Yes, I tried a bunch of different arm angles.)  To solve that, I pulled the mixture arm off and drilled another bolt hole a bit higher than the existing one, then reinstalled.  Works perfectly now, the stops are hit before the quadrant lever runs out of travel, and the throw matches that of the throttle lever.

Hours: 1.9 | Posted in Engine, Gear & Fairings | Comments Off