23rd February 2012

Sanding & minor miscellany

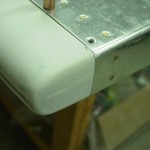
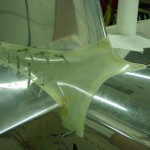
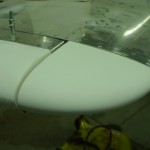
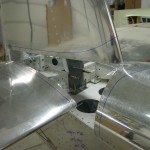
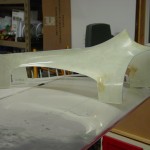
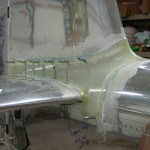
Sanded the empennage tips to smooth the micro filler I added earlier this week.  Also the empennage fairing, which looks decent, though I’m sure there are some ppinholes I’ve still missed.  Fit the rudder top back to the rudder, in order to sand the big glob of micro I put on the nose of that tip; the side corners of the tip were not even with the rudder skin, aand they now are.  Now I’ll need to fill the air bubble holes in that area, but that should be easy enough.  Hopefully will spray primer on some of this stuff over the weekend.

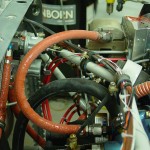
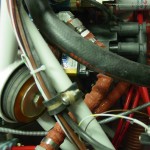
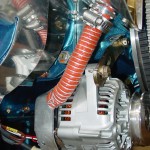
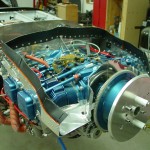
Moving to the engine, I was able to knock a couple minor things off the list.  Added a safety clip to the oil drain valve, that would prevent it from coming open unintentionally.  Also, removed the upper oil cooler line, changed the 45* fitting on the engine to a straight, and reclocked the 45* fitting on the oil cooler.  Then replaced the removed line with a longer one, to add a bit more flex, and ensure that the minimum bend radius of the hose is met.  Thanks to Tom at TS Flightlines, who turned around the order for this line in one day (and previously made all the other engine hoses to my specs).

Milestone: 1600 hours in this session.  We’ve now reached the low-end of my estimated total hours range.

Hours: 2.2 | Posted in Engine, Wing & Tail Joins | Comments Off

21st February 2012

Sanding tips

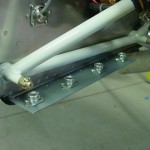
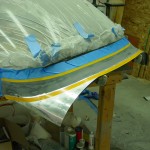
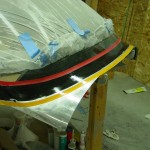
More work on the empennage tips: drilled & countersunk the rudder bottom, then removed and sanded.  Applied micro to spots on several of the tips, to fill in divots along the joints in factory layups.  Put a blob of epoxy around the rivnuts for the rudder light, to make that a little more stable.

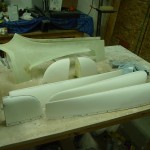
Pushed micro into the voids and large pinholes in the empennage fairing; this will likely still need another coat or two of epoxy or filler and plenty more sanding before it’s done.

On the right hand heat control, replaced the black-on-white label with a white-on-black version.  The P-touch labeller’s smallest text is larger than the size I was able to print with the Rhino, though, so it’s a bit out of proportion with the knob.  If I can find white-on-black Rhino tape, I might replace it again someday.

Slid a piece of nylon expandable sleeveing over the trim servo wires that protrude from the left elevator, for extra protection against chafing the wires.  Secured with heat-shrink on the end.

Hours: 1.5 | Posted in Wing & Tail Joins | Comments Off

19th February 2012

Mr. Sandman

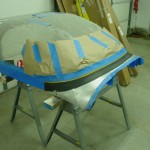
More sanding, and nothing but sanding.  Sanded down the coats of epoxy that were applied to the canopy fairing last night; I think it’s going to come out alright.  Masked off the canopy and Allison helped me move it to sawhorses to wait for spraying.

Sanded down the empennage fairing, so that can be primed too, though there are a couple spots that need a bit of micro and followup sanding.

Spent the rest of the session starting work on the emp tips: final-drilling the holes, dimpling/countersinking, and sanding for primer.  One of the elevator tips needs a little micro along the seam, and the rudder top fairing will, too.  Hoping to get the rest of the tip work (just the rudder bottom) done tomorrow and apply some micro, then spray all this stuff midweek.  I think it’ll be a mental boost to have all the glasswork except the cowling “done” (for now, and excepting gear fairings which will probably wait until after first flight.)

Hours: 6.1 | Posted in Canopy & Frame, Wing & Tail Joins | Comments Off

18th February 2012

A flight, and fiberglass

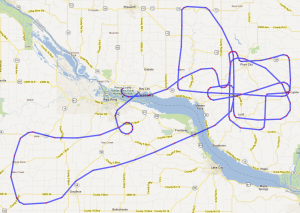
Began the day with some excitement; nearby -9A (and now -10) builder Mike Behnke was gracious enough to bring his plane down to Red Wing this morning so I could have my first RV flight — a great one!  The day was warm, calm, and relatively clear, and Mike’s plane looks and flies great.  My only experience being in 150/152/172 types, the stick-and-pushrod controls were a new thing, and a joy to fly; no slop in the control system, and just a bit of pressure required for control.  We did some turns, stalls, a bit of sightseeing, and Mike demonstrated an autopilot-coupled GPS approach.  Also got to see the AFS screens in flight, as his panel is practically identical to mine (both equipment and layout).  We also chatted about fiberglass, transition training, inspections, first flights, and so on.  Many thanks to Mike for the opportunity!  It’s another inspiration to work through the endgame of my project.

On my way out of the airport, I stopped by the hangar and pulled the fuel caps from the wings (and taped over the filler holes), as I’m considering sending them in to be engraved with the required markings, rather than using a sticker.

Into the shop after lunch, I spent several hours sanding the micro filler on the canopy fairing.  It turned out pretty well, and I think I’m going to try and move ahead with it.  To that end, I squeegeed on some straight epoxy to seal the micro and fill pinholes.  I’ll add another layer or two, then sand and see where it sits.

I used the excess epoxy to seal the inside of the emp fairing.  I’m hoping to get the rest of the emp tips ready to spray this week, then spray a whole batch of glass one night.  Once the tips are done, the emp parts will move to the hangar.

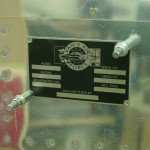
Drilled the dataplate to the fuselage — I’ll send this in for engraving with the fuel caps.  Also located some 3/32 pop rivets to attach it. Since I don’t know when the inspection will be, I’m just going to put 2012 in the date box; this field isn’t even required.

Then I took a look at the top hose from oil cooler to engine; I think the bend radius on this hose is too tight, and I’ll need to order a longer hose, change the fitting on the engine, and reclock the fitting on the oil cooler, to allow a more sweeping bend in the hose.  It’ll be more in the way of filter changes, but don’t want to take any chances with an oil hose collapsing.

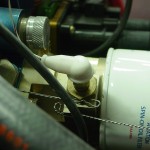
Added a silicone boot to the oil temp sensor wire; more for vibration support of the wire than for short-circuit protection.

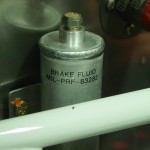
Stuck a label on the brake reservoir, indicating what the thing is, and the spec of the fluid it’s filled with.

Traced the spinner diameter and used some geometry to trisect it, in preparation for making the prop cutouts.  Still need to figure how I’ll determine the shape of the cut, not owning one of those curve-finder pin apparatus.

Hours: 5.1 | Posted in Canopy & Frame, Engine, Wing & Tail Joins | Comments Off

5th February 2012

Momentum lost

Countersunk & installed the lower HS fairing strips.

Installed an alternate static placard on the panel.

Re-fit the cowling and set the depth of the bottom cowl camlocs.

Fussed with the cowling, bulkhead, and spinner a bit, and came away not feeling so good.  The spacers I used when fitting the cowl must have been off by just a touch, because it now appears the cowl is shifted off to the left by a small amount.  The result of this is that the desired 1/4″ gap behind the spinner measures 1/4″ at the left side, but only 1/8″ on the right.  If the cowl hadn’t already been fit and drilled, hinges cut, etc, this wouldn’t be that big of a deal, just slide the right side aft.  As it is, I can see two options: 1) remove all the hinges, camlocs & such, fill the drilled holes, and refit the cowling, or 2) install the top skin, camloc strips, and camlocs (because I already drilled the camloc receptacle holes to full size, I can’t just cleco the cowl to the strips any more), attach the cowls in position, and rework the front of the cowling to provide the desired gaps.  The cowling might also be sitting a bit high, given the common recommendation to set it low to allow for engine sag.

All in all — Ugh.  I wasn’t looking forward to the fiberglassing to begin with, and this further dampens my desire to get started.

EDIT: After some reading, apparently this is not uncommon, and an accepted way to deal with it is to add layers of glass to the aft side of the cowl spinner area, and sand back until the gap is even all around.  Spots where the gap is too large can be built up with filler, and the nose reshaped as necessary.

Hours: 1.7 | Posted in Cowling & Baffles, Wing & Tail Joins | Comments Off

4th February 2012

Punch

Didn’t get part of Friday off from work as I’d hoped, but today I proceeded with the weekend plan of highlighting a bunch of items on the punch list, and knocking them off…

Mixed up a batch of firewall sealant (don’t smell that stuff…wow) and sealed the perimeter of the firewall sides and bottom, and a fillet in the lower corners.  The top curve will get done later when the top skin is put on.  Let that tack up, then clecoed & riveted the sides and bottom, along with the shims, hinges, and camloc strips.  By moving the exhaust stacks and using a variety of yokes, I was able to easily squeeze every rivet but the centerline bottom rivet, which was unsqueezable with any yoke from any angle.  That hole now sports a pulled rivet.  Once the camloc strips were on, the camloc receptacles were added.  Done.
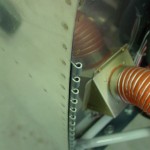
With the lower edge of the firewall complete, I added the metal portion of the fuel pump vent line.  Done.
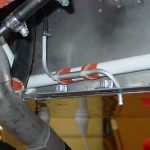
The metal fairing strips that run underneath the HS were next; drilled and tapped the appropriate holes in the aft longerons, drilled the strips, and test fit.  To see how the fit was, I added the HS back on for a moment, and marked the trims that needed to be made.  After several iterations, I had the 1/32 to 1/16″ gap called for in the plans, so the strips were primed.  Still need to countersink the strips, but Almost Done.
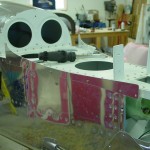
Removed the canopy strut attach blocks and primed/painted them.  While they were drying, I removed the blue tape that has been covering the canopy decks; underneath, I found (as I suspected) that some of the adhesive had become gummy, so that’ll have to be washed up.  Later, reinstalled the strut pivots, and reinstalled the assembly to the canopy decks.  Done.
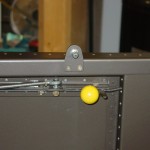
Big job of the night: redo the intake studs in the engine sump so the nuts have enough threads protruding.  This required moving the exhaust stacks (again) and partial disassembly of the entire fuel servo/control cable works — not an easy task due to the limited room to swing a wrench; several of the bolts can only be turned one flat (1/6 turn) at a time.  Eventually, though, it was off, the studs removed, holes cleaned, and reinstalled studs to the correct depth.  Not much was really needed, only 1/8″ or so on each one.  Some of them ended up being a little longer than necessary, but there’s plenty of thread and the nuts are not bottomed, so all is well.  You don’t want to bottom the stud out in the blind hole, as it will stress the threads and can cause them to fracture.  I used a torque wrench to verify that the driving torque requirement was met, and installed with red loctite per the AFP manual.  Much reassembly later, we’re back in business, and the nagging “that’s not right yet” of those studs is gone.  Verified stop-to-stop movement of throttle and mixture.  Done.
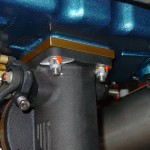
Enlarged the drain holes on the fuselage to #19 based on talk that the #30 hole isn’t big enough, and (especially if any gunk is present) the surface tension of water will prevent it from draining.  Also added a drain hole at the lowest point of the fuselage (which is under the seats, and not at a bulkhead), and one under the fuel pump area.

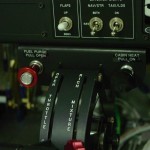
Placarded the alternate static valve installed the other day, and remade the fuel purge and center cabin heat placards with white on black, which looks nicer on the black panel.  Also made black on clear labels for the extra PTT buttons on the fwd canopy decks, and for the pilot’s stick functions (PTT, Trim Up/Dn, and AP CWS)…I expect those will fall off over time and use, but my understanding is that it’s better to have everything labelled to the point of excess at inspection time.
Hours: 11.4 | Posted in Cowling & Baffles, Engine, Wing & Tail Joins | Comments Off

2nd February 2012

Venting

Drilled and installed the fairing nutplates on the HS.

Countersunk and re-primed the top cowl camloc strips (oops).

Cut and attached the blast tube to the alternator with a double-wrap of safety wire.  I’m all ears if someone has a better way of doing this, but it’s reported to have worked.  Also rumors that the alternator doesn’t need it, but cooler is always better for electronics.

Tightened and re-saftied the dipstick tube, as it was weeping just a bit at the gasket, since the engine is full of oil now.

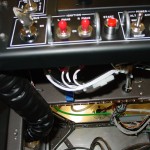
Installed the alternate static toggle low on the subpanel behind EFIS 1.  I bought a toggle switch guard to put over it, since the actuating force to open the switch (thereby venting the static system to the cabin) is quite low.  The guard needs a good strong push to open & latch, and it holds the valve firmly closed in the down position.  I sat in the seat and the switch is out of sight, though easy to reach under the panel.  It still needs a placard, though, because my labeller was too cold to print labels.  (It looks like the wire bundle is very much in the way, but it’s just a result of the camera location.)

Checked to be sure I’d run the remote output port from the transponder to the ADS-B connector (I had), as the need for that connection came up on a recent VAF thread again.

Wasted the rest of the night sitting in the seat playing with the avionics.

Hours: 2.4 | Posted in Engine, Plumbing, Wing & Tail Joins | Comments Off

30th January 2012

Docked Tail

Removed the clecoes around the firewall perimeter, along with the lower cowling side hinges and shim strips.  Primed these and the camloc strips in preparation for riveting the firewall (after inserting sealant).

Removed the empennage; they likely will not go back on until final assembly.

Torqued & marked the rod-end bearings on the elevators & rudder.

Riveted the VS forward attach bracket to the VS, and riveted/bolted the rear attach angle to the fuselage aft deck.

Drilled/countersunk/dimpled the VS tip; set that aside with the HS tips to await fiberglass finishing.

Countersunk the emp fairing attach holes for tinnerman washers.  Drilled and riveted the emp fairing nutplates on the VS.  I’d like to get the entire empennage group tips smoothed, sprayed and riveted on, and take them to the hangar to stash with the wings.

Torqued & marked the brake line connections at the calipers.  The brake system could be filled & bled at any time.

Hours: 3.6 | Posted in Wing & Tail Joins | Comments Off

29th January 2012

Pop rivets & dust

Allison joined me in the shop for a bit to finish removing the tape gunk from the empennage fiberglassing adventure.  While she worked on that, I sanded the micro and shaped the edges of the emp fairing.  After fitting it back onto the plane, I’m pretty happy with the fit.  Now, I’m going to use this (and the emp tips) as a learning canvas for fiberglass finishing.  I have a box of PPG stuff here that I’m planning to use, which I chose because it seemed to be the most well-documented on the forums and build logs.

I also drilled the HS tips to #30, dimpled the skin, and countersunk the fiberglass.  These are ready for finishing, then attaching.  The goal with the fiberglass stuff is to get it to an acceptable level of finish and wearing a protective coating.  If it needs to be dealt with further, I can revisit it before paint (or let the pros make it shine as part of the pain process).

With the fiberglass dust (ack) cleaned off the workbench, I pulled the clecoes from the baffle airseal strips and installed the large-head pop rivets that hold it in place.

Finally, I installed the latest version of the EFIS software from AFS.  The problem where the screen blinks durin initialization when displaying the VP-X status page has not been fixed.  I pulled the config files to load into the computer and update some things.  (Hint: Linux works better than Windows for editing these files, as the line breaks display correctly…no surprise, since the AFS box runs Linux internally…)

I’ve also been working on the paperwork side, having built an InDesign project and templates for the POH, and compiling the “best of” from several existing POH’s that others have shared on their websites.  There’s lots of specific information to research and fill in, and plenty of stuff yet to write.  Being a layout nerd and a perfectionist, it’s possible to pour hours into this part, too.

Hours: 4.5 | Posted in Cowling & Baffles, Electrical, Wing & Tail Joins | Comments Off

29th December 2011

Cover your tail

Trying to get the plane to the point where the tail feathers can be removed and stored, to allow more garage parking.

Fit the stock empennage fairing as best I could, which is essentially a ton of on-mark-off-sand-repeat, until it gets close.  Then I marked some final trim lines and sanded it back to there. Taped in place and carefully drilled #40 through the fairing into the open holes in the metal.

Next, to fill the little gaps that remain…  Taped up the metal surfaces and waxed them, and mixed up a batch of epoxy with micro and cabosil, slathered it on the inside of the fairing edges, and clecoed the fairing in place.  The idea is that the micro will fill the gap; once it’s cured, the fairing can be removed and the edges sanded pretty, then the rest of the finishing process can go on.

(Update: 55* in the shop is clearly not enough for efficient fiberglassing; the fairing took 4 days to set up completely, and that’s after pulling it off and bringing it in the house to sit.)

Also trimmed the layup on the cowling intake snout, and shaped it to be even with the intake.

Hours: 2.8 | Posted in Cowling & Baffles, Wing & Tail Joins | Comments Off