1st March 2010

Putzing around

Went to the shop after fixing the garage door opener (new drive gear & bushings have it running smoothly again) with the intent of figuring out some antenna doublers, thinking that it would be a good idea to install them while access to the fuselage is easy for dimpling, deburring, and riveting.  Stood around staring at it for awhile, pondering, and made no progress on that — wondering if now is really the time, or not.  My proposed list of antennas:

  • VHF Com 1 and 2 (Comant CI-122 bent whips): install under removable portion of seat pans, behind wing spar, left and right outermost bays of fuselage
  • VOR/LOC/GS (Comant CI-157P or CI-158C “cat whiskers”): bottom of tailcone, just behind fwd edge of aft bottom tail skin
  • Transponder (DeltaPop): near centerline of tailcone, somewhere aft of F-706 bulkhead [must be +3' from transponder itself]
  • ADS-B (DeltaPop): right side fwd fuselage, near front fuel vent [must be +4' from transponder antenna]
  • GPS (whatever 430W specifies): top side of fuselage aft of F-706
  • GPS2, GPS3 (?): under cowling or aft canopy window?
  • ELT (whatever is specified): undecided, perhaps top of fuse or along roll bar
  • APRS (VHF com or Loran antenna?): undecided, perhaps opposite of ADS-B, or in a wingtip

Lots of stuff to think about.  The two of these where access would be most restricted in the future would be the transponder and the VOR, as they are aft of the cabin area, and perhaps the VHF comms.  I’ve looked all over the web and seen many different ways of mounting antennas: some use no doubler, some use a “floating” doubler secured only by the mounting bolts of the antenna itself, some rivet a flat doubler to the skin, some use a flanged doubler riveted to the skin, and some tie a doubler into nearby structure (either with or without riveting to the skin as well).  The latter ones seem sturdiest, but are they overkill?  I’m probably making this far more complex than it needs to be, but it seemed that this would be the ideal time to put these in, if they were to be riveted to skin and/or structure.

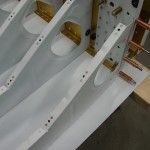
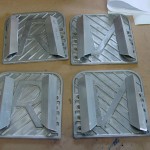
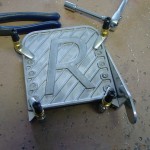
With all that indecision rolling about, I found something easy to do, even though it’s not needed for awhile: I laid out and cut the lightening holes in the seat back supports, and marked their flanges for trimming.  And, I drilled a 1/4″ hole in the left side of the 705 bulkhead, just under the longeron, for routing of the static line.  Whee.

Hours: 0.5 | Posted in Cabin & Interior | Comments Off
27th February 2010

Ready for priming

Finished the final deburring on the side skins, and dimpled the three skins with help from Allison.  Fuselage parts are now ready for priming, which will probably be next Sunday when I next have a large block of time to spend.

Hours: 3.1 | Posted in Forward Fuselage | Comments Off

25th February 2010

Still deburring

Countersunk the main longerons, and deburred all the drilled holes in the side skins.

Crossed the 700 hour mark tonight, as well.

Hours: 3.3 | Posted in Forward Fuselage | Comments Off

22nd February 2010

More deburring

Deburred and dimpled the tailcone assembly and center fuselage section; installed the three nutplates on the outboard seat ribs.  Deburred the main longerons and marked them for countersinking.

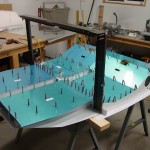
Tailcone dimpled for longerons Nutplates installed on outboard seat ribs

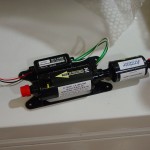
And, received a package from England in the mail today — the Andair fuel pump and filter kit I bought on the VAF group buy has arrived.  Looks to be a solid piece of kit.

Andair fuel pump & filter

Hours: 2.2 | Posted in Forward Fuselage | Comments Off

21st February 2010

And there was much deburring

The deburring continues…lots of scotchbrite, filing, countersinking, and hole deburring.  Good progress on the pile of parts, but the longerons and tailcone remain, as do the side skins.  I’ll also have to pull the seat pans off to deburr the inside of the outermost seat ribs, which were match-drilled from the side skins.

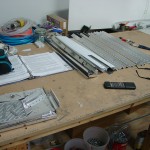
Deburred parts piled on bench Center fuselage ready for disassembly & deburring Tailcone awaiting deburring of longerons

Hours: 6.7 | Posted in Forward Fuselage | Comments Off

20th February 2010

Final parts, and disassembly

Finished up the list of remaining tasks on the fuselage: drilled the ends of the floor stiffeners to the firewall & center section angles, filed the gear socket hole cutouts into the center section, cut the holes in the wing root area for the fuel & electrical pass-thrus, fit the baggage wall structure and side panels, and match-drilled any holes that hadn’t previously been done.

Floor stiffener aft attach points drilled Baggage side wall structure in place Wing root pass-thrus drilled

With all that done, it was time to take the fuselage apart once more for the deburr/dimple/prime dance.  I think taking apart the brake pedals took nearly as long as the whole fuselage–and I only put in half the bolts!  I deburred all the solid angle pieces, the small parts, and some of the complicated stuff (ie, anything with tabs and flanges and little bits that need filing and can’t be done with the scotchbrite wheel…).  Tomorrow I can hopefully finish up the rest of the deburring; there’s oodles of countersinking to be done as well.  It’ll be several weeks now before I can get back to the project for longer than an hour or maybe two.

Fuselage disassembly Pile of deburred parts

Hours: 7.1 | Posted in Forward Fuselage | Comments Off

18th February 2010

Floor stiffeners

Fit and drilled the four floor stiffeners to the forward bottom skin.

Floor stiffeners drilled to bottom skin

Hours: 1.8 | Posted in Forward Fuselage | Comments Off

15th February 2010

Brackets, and moving parts!

Started off a day in the shop by finishing up the install of the gear webs and associated brackets & spacers.  This seems to be a common area to remake parts, so I studied some other build logs carefully last night, and I believe I got it right, without having to remake any parts.  I have not, however, yet located the 426AD3-8 rivets called out — the longest I have in my rivet organizer are -6.  So, there’s a search in need of doing.

Gear web and bracket fit and drilled

Moving right along, I set out to build the rudder/brake assembly.  I’d previously purchased a couple sets of Jim Wright‘s die-cast brake pedals (I am installing dual brakes), and last week I ordered some hardware from McMaster-Carr to install them.  I went with stainless hex-head cap screws, but I had to guess at the length–I ordered 5/8″, but it turns out them could have been 1/2″.   Something to add to the list for a future order, since they’ll be an easy swap.  I also ordered some Oilite bushings for the pedal pivots (p/n 6338K331), along with springs, nylon bushings, and set-screw collars for the brake return springs which are a common mod.  (Smitty has the parts list, which I used, and it worked out perfectly.)  From Aircraft Spruce, I ordered four AN3-56 bolts, another recommended mod for the brake pedals…those bolts are pricey!  I aligned everything with clamps, clamping the whole rudder pedal assembly to the bottom of the workbench, then drilled the brake cylinders to the pedals.  With the oilite bushings press-fit into holes in the pedals, the long bolts, and the return springs on the cylinders, the pedals seem to have a nice smooth action.

Brake pedal angles fabricated Drilling angle to brake pedal

Next, the whole built-up assembly is fit to the fuselage.  This sounds easy, but actually requires either a large angle drill, or removal of the auxiliary longerons to which the pedal pivot blocks attach.  I chose to remove the longerons, one side at a time, for drilling–after marking the 3″ setback from the firewall.  A scrap piece of angle, match-drilled from the UHMW pivot blocks, served as a drill guide.  I put in 3 sets of holes — one at the forwardmost location (3″ from the firewall), one which is 3 1/4″ aft of that (so the aft hole becomes the forward hole), and one in the middle of those two.  I’m an average-size guy, so I fit them up in the middle set of holes for now.

Brake & rudder pedals assembled on bench Brake & rudder pedals assembled

The last step is adding the center brace.  I deburred this piece and cut the relief on the forward side, then clamped it in place and drilled it to the firewall.  Marked the location of the pivot block, then removed and drilled.  This is a mental exercise, as the hole distance on the bolts for the center pivot is 3″, where the side blocks are 3 1/4″…I failed the test when marking the holes for the forwardmost and rearmost positions, and ended up with slotted holes in those positions.  Doesn’t seem like that should be a problem, and if it is, it’s an easy piece to replace.  Seeing this assembly in the fuselage was rewarding–the first moving parts on the fuselage.  It’s sort of like the moment where you bolt the rudder to the VS for the first time in the empennage build…moving parts are exciting.

Fitting center pedals brace Pedal assembly fit to fuselage

Ten pieces left to install (floor stiffeners, and baggage compartment bits) before everything comes apart for oodles of deburring.

Hours: 10.1 | Posted in Forward Fuselage | Comments Off

13th February 2010

Forward fuse sides

Finished the gear socket holes in the bottom skin.  Fit and installed the 902 side bulkheads, and fit the gear attach webs that fit over them.  Cut the reinforcing strips that go between the side skin and the gear attach webs and deburred the edges.

Gear socket hole in bottom skin Gear web fit to fuselage side

Hours: 2.8 | Posted in Forward Fuselage | Comments Off

8th February 2010

Gear leg holes

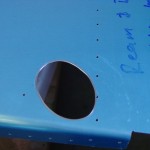
Snowblowing and a batch of last-minute CD’s to copy mean not much time for the project tonight.  I used Allison’s tracings to mark the oval holes in the bottom skin where the gear leg sockets pass through, then roughed out the holes with a unibit and file.  Next time, I’ll take them out to the cut line and smooth them with the scotchbrite wheel.

Hours: 0.3 | Posted in Forward Fuselage | Comments Off