26th July 2012

Pulling up the pants

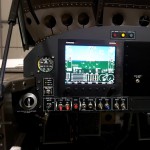
Airport-hopped for another 3 hours of transition training this morning, including a climb to 9500MSL…even on a rather hazy day, what a view; 184kts (~212 mph) groundspeed was impressive, too.  Flying a panel with a traffic system really highlights the fact that there is a lot of traffic out there that we never see — even when we know it’s there, since it’s on the display, and even when it’s relatively nearby.  And autopilot…made cruise flight and descent planning a whirl.  I’ve managed to put the wheels on the ground a couple dozen times now at a bunch of different airports.  A bunch of stalls (power-off and power-on…that deck angle is impressive) and airwork as well.  6 hours left on the requirement.

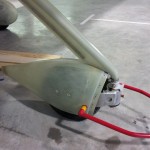
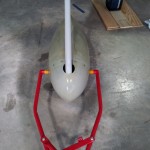
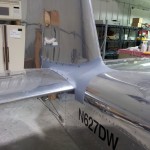
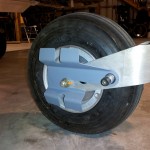
Back on the ground, the push to complete wheelpants & leg fairings continued.  I got the wheelpants both mounted up, nutplates installed on the inboard bracket, and just using locknuts for now on the outers (miniature nutplates on order).  Safetied the outer bracket bolt, and found one wheel cotter pin that hadn’t been bent.  Drilled access holes for tire inflation & pressure check, and plugged with stainless hole plugs.

Fabricated metal T’s out of .025, to reinforce the tabs at the top of the gearleg fairings, and installed those before installing the leg fairings.  Also removed the nose leg fairing again to cut slots for a hose clamp, install the metal tab T’s, and reinstall.  The upper clamp should prevent the leg from vibrating around; the plans leave it floating free to rub on things, though it’s pretty solid as it was.  The nose leg is easy to align with string, so I did that and buttoned up the nose gear again.  The mains still need to be aligned, but are otherwise done for now (until intersection fairings show up).

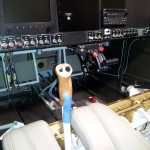
I decided that I’ll move the fire extinguisher between the seats, aft of the roll trim lever, for increased legroom, and to position it away from the probable location of any fire.  I’ll secure the bracket to the tunnel cover between the seats; I need to find some spacers, though, to raise it up, since my extinguisher bumps into the roll trim knob when all the way down flush on the cover.

Located the seatback adjuster brackets and hinges, and installed the hinges to the back of the seats.  I’ll paint the brackets to match the interior colors.

Talked to the shop on the field after lunch, and though they weren’t thrilled about it, they did agree to try and find time to do a transponder check, and weigh the plane — if they have time — on Monday morning.  They want to do it in their hangar, not mine, which means of course, that after I drain the fuel out, I get to pull it over there with the towbar…fun.  If they don’t have time for the weighing, it’ll be double the fun, since I’ll get to pull it over there & back twice.

Once we have a weight, I’ll be able to submit the inspection paperwork and get the ball rolling.  We’re close, and I’m looking forward to having it in the air.

Hours: 6.8 | Posted in Endgame, Gear & Fairings | Comments Off
25th July 2012

Cover those legs

Apologies for the previous two days’ posts…I’ve been working on the plane alongside transition training this week, and my mind is trying to absorb all that, and not recalling the precise details of all the build stuff.  Today, we flew for 3.3 more hours (in two blocks), and hammered out 15 landings across 4 different airports.

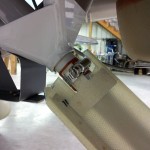
Before flying this morning, I had time to countersink, deburr, and rivet the hinge into the nose leg fairing.  After we finished for the day, I tried hard to get the rest of the pants & fairings done — didn’t succeed, but it’s close.  Still waiting on intersection fairings, so I’ll either fly without, or find a different source.  I did — after a trip out to buy hoseclamps — get a bunch done, though:

  • Fit, installed, and aligned the nose leg fairing.
  • Reinstalled the nose pant cap…this essentially finishes the nose gear work.
  • Countersunk, deburred, and riveted the hinges to the main leg fairings.
  • Trimmed and retrimmed the man leg fairings for fit and brake like clearance.
  • Added an extra brake line securing point to the bottom of the leg, to keep the hose from rubbing the fairing as it exits to make its turn aft to the caliper.
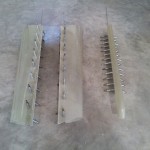
  • Laid up two plies of glass inside the tabs at the top of the leg fairing.  This’ll be trimmed again later, and filed/heated to fit around the leg.  Set aside to cure overnight.
  • Pulled the R main wheelpant and countersunk the attach screw holes, installed the split line nutplates…this one is ready for installation.
  • Looked at installing nutplates on the brackets, and found that two regular one-leg nutplates (as I’d been planning) won’t fit on the outer bracket side-by-side.  I’ll need to order a handful of the mini one-leggers, if I can figure out the part number…also, more #6 tinnerman washers, as I’ve run out.

Back home to do chores, rest & recover…more training at 7:30 am tomorrow.

Milestone: crossed 1900 hours of work on the project tonight.

Hours: 5.5 | Posted in Endgame, Gear & Fairings | Comments Off
24th July 2012

More pants

Bled the R brake system and tested…no leaks yet.

Installed the seat pans with a few screws, and dropped in the pilot seat.

Worked on the nose pant more, countersinking for the attach screws and adding nutplates.  Fit it back to the fork and finalized the size of the towbar holes.  Added an air access hole for servicing the tire, after finding the spot on the pant via laser.  Fully seated the towbar and marked it with yellow tape, as a witness line to full engagement.  This should eliminate guessing as to whether it actually went all the way onto the pins.

Spent the rest of the session working on the leg fairings.  Tracing the plan, cutting to size, finding the no-twist state, taping it secure, marking & drilling the hinges.

Hours: 7.0 | Posted in Endgame, Gear & Fairings | Comments Off
23rd July 2012

Glass pants

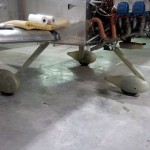
Removed the peel ply, reclecoed the pants, and final drilled wheel pant attach holes to #27 for a #6 screw.

Lots of on-off-on-off to get the tire gap on the nosewheel pant right, and to trim the hole in the top so it doesn’t hit the leg when the wheel turns.

Hours: 6.0 | Posted in Endgame, Gear & Fairings | Comments Off
22nd July 2012

Prickly pants

Most of the day was spent working on wheelpants, but before that, I temporarily attached the underwing inspection covers with screws — more prep for weighing.  This also necessitated drilling out and replacing one nutplate that had no threads.

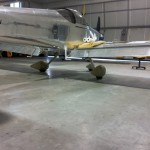
Set up the strings and lasers to align the wheelpants, and worked through the right one first.  With the process understood and completed once, the left pant went significantly faster, as it’s basically just the reverse of the right.  I opened up the tire gap to a finger’s width all around.


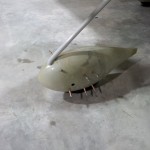
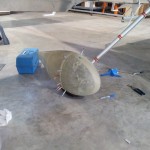
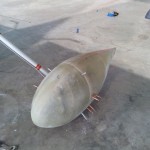
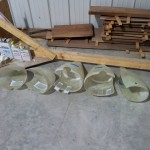
The front wheelpant was a different trick, and I did eventually get it satisfactorily drilled.  The instructions have you putting on and removing the aft pant by sliding it over the brackets…because the front of the pant is tapered down (unlike the mains, where the split line is at the widest point), you have to stretch it out to fit it over the brackets.  This went fine the first several times, but eventually, I stretched it and a big vertical tear zipped open in the left side.  So, after finishing the fitting of the pant and nose cap, and making sure it was able to pivot with freedom, I pulled all the pants and did some glass work.  Patched the nose pant back together with glass tape and epoxy, and added some buildups on the inside of the main pants, to fill gaps between the pant and the brackets.

I need to bring a larger step drill to finish the towbar holes (3/4″ isn’t big enough for the bar to enter through).  Then, all the nutplate work has to be done on the pants and brackets.  After that, leg fairings…  No word on an ETA of the intersection fairings yet.  I did some internet digging and the data indicates that the pants and leg fairings make up for most of the speed increase (10-15 kts), with the intersection fairings contributing just a couple kts of that.  I’ll weigh with the wrong fairings taped in place, since the replacements should weigh about the same; any difference ought to be negligible.

And, I still need to bleed the right brake.  I would have done it today but it always seems to make a mess; I want to pick up a foil pan to catch the drips under the caliper so I don’t make a big mess of the hangar floor.

Hours: 7.4 | Posted in Endgame, Gear & Fairings | Comments Off
21st July 2012

Punch that list

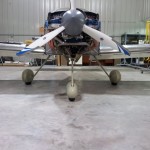
Still avoiding the wheelpants, but I knocked nearly everything else off the list, so if I make it to the hangar at a reasonable time tomorrow, I won’t have a choice but to begin…

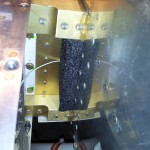
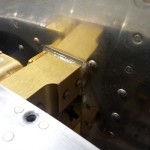
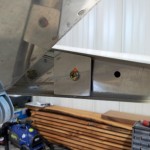
Cut foam blocks and inserted them into the gap between the upper & lower bars of the wing spar, where the spar joins the fuselage.  This should help prevent air ingress and cabin drafts.

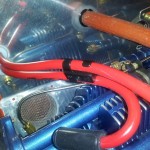
Removed most of the zipties from the ignition wires and replaced with “tubing clips” from McMaster.  There are a couple spots near the ignitions where wires are tied together from various directions; in those places the clips don’t work (they are designed for parallel wires), so the zipties remain.

Opened the right brake system at the pilot’s pedal, in order to fix the weeping leak there.  When I arrived today, a small pool of fluid had formed on the cabin floor, so it’ll be good to get this fixed.  Removed the hoses, and the elbows, and cleaned off all the EZ Turn.  Reinstalled with Loctite 567, which is specified as a high-pressure thread sealer.  The tech sheet for it says that full cure takes up to 24 hours, so I won’t rebleed that system until tomorrow, to give it the best chance of sealing up well.

Added RTV to the inboard lower cylinder baffles, where the tapered-fin “issue” is.  This fix has been reported to work just fine, so I’m going to try it before committing to a complete removal & reinstallation of the baffle system (and everything that’s mounted to it).

Installed threaded hex plugs in the tie-down holes.  The extrusion that the tie-down rings screw into are tapped deeper than the ring bolt is long, so it’s possible to thread them in too far and gouge up the outside of the skin (and any paint that may be on it).  The plugs I found are just the right length to thread in all the way, and provide a positive stop for the rings, clear of any skin damage.

Replaced the screws on wingtip and leading edge light lenses with Torx-drive, after receiving an order of the correct size from microfasteners.com.  These’ll be used for all non-structural fairings, panels, lenses, etc.

Drilled a matched set of holes in the upper corners of each crotch strap bracket.  Deburred, and installed a bolt through both halves, with a stack of washers between to act as a spacer.  This secures the floppy forward piece in place, making it less prone to bending, and easier to align the screws when installing the seat pans.

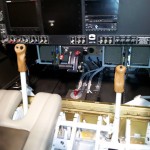
Resecured the wire bundle for the pilot stick grip.  The stick is much more comfortable now that it’s shorter…my arm rests comfortably on the leg, with fingers around the grip.  Vacuumed all the debris out of the cabin.

Placed the empennage fairing and elevator horn access panels in place, and secured with a few screws; the rest of the screws are just finger-tight in.  I need to install all the panels, fairings, screws, etc, in anticipation of having the plane weighed (once the wheelpants are on).  I’ll also drain out all the fuel.  After weighing, fuel will be added in increments to calibrate the tanks & dipsticks.

I’ve taken the next week off work, to spend time getting transition training.  When not doing that, I’ll be working on the plane; I’d like to get the pants on, W&B done, transponder check done, and inspection paperwork submitted…we’ll see how realistic that goal is.

Hours: 5.0 | Posted in Endgame | Comments Off
15th July 2012

More list items

Punched a few more things on the list tonight, after a day’s work cleaning chickens.  I expect no progress this week, since I’m working long days at the real job.  Next weekend, probably more chickens.  Latest guesstimate for flight would be sometime mid-August, since I won’t be getting to the hangar much for the rest of this month.

Bled the oil pressure line: unhooked from the transducer manifold, turned the engine until a bit of oil came out, then reattached.  This is said to improve the performance of the pressure sender.

Replaced a handful of screws on the fuel tanks whose heads had been stripped a little on original installation.

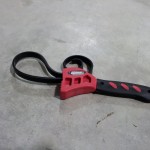
Removed the pilot stick grip with a strap wrench I picked up on the way out, then cut the stick 3″ shorter.  Unwired the grip to remove the cut section (unwiring it was easier & less messy than cutting the tube section up it’s length to split it around the wire bundle), then rewired.  Glued again in the same manner, and secured in place with some tape until the glue dries.

Applied some clear RTV to the gaps at the top & bottom of the wing spars, where they enter the fuse.  This to prevent ingress of outside air, in an attempt to increase cabin comfort.

Played with some blocking under the main wheels to level the fuselage.  2×4 chunks are pretty close, within .2 degrees.  A slightly thinner piece, or planing down a 2x, would be just right.

Hours: 2.2 | Posted in Endgame | Comments Off
12th July 2012

Working the list

Knocked a few more items off the list tonight…picked up some longer black hex screws, so I could finish mounting the backup airspeed indicator.

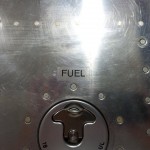
Printed and applied labels that say “FUEL” near the filler caps on each tank…my fuel caps are labelled for capacity and grade, but the checklist form from the MIDO has a specific item for this “FUEL” placard…

With the airspeed mounted, I rigged up a piece of latex “surgical” tubing I picked up at the hardware store; first, to the static port.  Tied off one end, and bunched up the tubing.  Hold one end tight over the port (tape off the other port), and release the tubing.  It will expand back to its normal size and pull a light vacuum on the static system.  I got about 1700′ of altitude gain, and it held steady, so the static system seems intact.  Checked the pitot tube as well (squeeze a fistful of tubing for this test) — also held steady, though the EFIS and backup ASI aren’t 100% accurate with each other; they match at the top end of the range, but at lower speeds, the backup reads 1-2kts lower than the EFIS.

Removed the engine sump bolts where the LH exhaust hanger connects; replaced with a fresh lockwasher and loctite.  Retorqued and sealed.  This is a Tom Berge suggestion, as he’s seen that one come loose before.

Spent the rest of the evening rerouting the pitch trim servo wire; up through the aft deck and out via the HS, then through the slot provided for the manual trim cable in the L elevator.  This’ll be a better path, as the cable won’t have to move with the elevator horns all the time.  Done.

Verified that SB 05-1-1 does not apply to this aircraft.  The service bulletin deals with strengthening the canopy bow brace aft attach point.  My kit is new enough that the updated parts configuration was included by default.

A big studio rebuild project is way behind at work due to parts not arriving on time, so I’m not sure how much I’ll be able to accomplish this weekend, as I’ll likely be working extra days to finish it up before next week’s events.  Next week will be a no-plane week, as I’m working 14-hour days in support of a weeklong conference.  It would be nice to get the wheelpants rigged up this weekend; I’ll still be waiting on intersection fairings, since it’s been confirmed that I received the wrong ones, and the A-model version is backordered.

A couple of the last big things coming up are weighing and transponder check, which I need to sort out and schedule.  It seems like a bit of a pain, because the plane has to be fully assembled before it can be weighed…and needs to be weighed before the inspection paperwork can be submitted…and needs to be completely opened up for the inspection.  Oh well, I’ll get plenty of quality time with inspection panels & a screwdriver.

Hours: 2.5 | Posted in Endgame | Comments Off
11th July 2012

The List

Worked on a couple things from the big list tonight, as I had to stop by the hangar to pick up some tools anyway.

Bolted up the backup airspeed indicator to the spare hole on the panel.  I’ll need to order some longer screws, since the case flange is quite thick.  Drilled holes in the subpanel for the pitot and static lines, and installed snap bushings.  Crawled under the panel and connected the lines to the manifolds that are installed back there, then to the instrument.  A quick-and-dirty blow test on the pitot tube seems to indicate it’s all working fine, and the analog gauge and the EFIS agree.

Stuck a foam strip to the subpanel, that the canopy frame will squeeze when it closes…another attempt to keep out as much water as possible, and/or divert it to the sides if it does enter.

Cut 3″ off the end of the passenger stick, drilled a new hole for the retainer clip, and removed the powdercoat so it will slip into the socket.  I want to do the same thing on the pilot side, if I can figure out how to get the grip off; that glue is stuck good.  Passenger side was quite easy, since the stick is removable.

Hours: 2.8 | Posted in Endgame | Comments Off

8th July 2012

Pre-inspection inspection

Brought the proper size hex wrench (5/16″ for future reference) to the hangar, so I was able to remove the towbar bolts and attach the nosewheel pant brackets to the nosegear fork.

Also fabricated and installed the retainers for the wingtip attach hinges.  I had earlier installed a nutplate on the centerline of the aft tip closeout rib, so I added an 1/8″ hole above and below that nutplate.  Bent the ends of the hinges at a 90* angle, and cut them off to a reasonable length.  The bent ends go in the holes, and then I made up a coverplate from .063″ stock, which attaches with a screw to the nutplate.  The coverplate holds the hinge pins into their holes.

Tom Berge, who is known in the area as one of “the guys” to have give your plane a serious inspection before it flies — and who also will be the test pilot on my plane’s first flights, and my transition training instructor — stopped by this afternoon to check it over, offer advice and observations, and answer several of my questions.

Overall, he found things were good, but I did come away with a lengthy list of things to check, fix, improve, or keep an eye on.  Most of them are small items, but a few notables:

  • Insert a piece of foam to the gap in the spar where it joins the center section, to block drafts; this seems to be where most of the air gets in that is known for cooling between one’s legs.  This was on my list, I just have to procure some foam.  Also recommended to RTV the smaller gaps at top & bottom of the spar for the same reason.
  • Shorten the sticks, the stock length is too long.  I left them stock length, not knowing any differently, but I believe this now after riding in Jim’s 9A the other day…his are short and the hand position is quite a bit more comfortable than mine.  All I need to sort out is how the heck I’m going to remove the grips…I put them on with a single small vertical bead of adhesive, thinking that I may need to remove them for exactly this reason, but they are very well attached now.
  • Found that I have weeping on the pilot side brake master cyls (again).  Must have started after the taxis we did the other day, since the brakes were really used for the first time.  I’ll have to get some different sealant on hand, since EZ-turn clearly isn’t getting the job done.  Then re-bleed the brakes again…oh, joy.
  • Biggest issue — apparently the cylinders that my engine has require a special modification to the stock baffles because of the tapered fins.  It’s a curved blocking plate that is riveted to the inboard side of the inner baffle strip on the bottom of the engine, that prevents air from spilling out where the strip doesn’t make full contact with the cylinder.  They’re fabricated from plans that ECI has at the end of a technical document on their website.  And yes, all the baffles need to be removed to install them.  Ugh — I am not looking forward to that.  I’m sorely tempted to fill the gap with RTV, and install the plates the first time the baffles need to come off for some other reason.  (Apparently this same thing happened to another local builder too; he filled with RTV and hasn’t had any problems because of it.)

Bunch of other stuff to fix and consider, but I’ll avoid retyping the entire list here for sanity.

After Tom left, I knocked a couple things off the “new” punch list…

  • Removed tach drive cap and added loctite to the threads, then reinstalled.
  • Added a few ziptie bases on the aft side of the center section, where a couple wires were rubbing or close to it.
  • Bent the ends of the oil door hinge to secure it from vibrating out.
  • Checked the sidetone adjustment on the SL-40.  Tom recommended 75 from the default he thought was 138.  Mine is set to a default of 0, which the manual says is “slaved to the volume control.”  I’ll fuss with it when I roll the plane out someday to do a radio check, and see how it works in this mode.

Hours: 5.0 | Posted in Endgame | Comments Off