8th January 2011

Firewall sealing

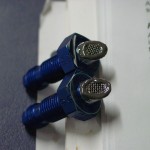
Spent the morning at the Minnesota Wing meeting, talking and looking at a local RV-7 that was recently finished, which provided some good inspiration to move ahead on the FWF stuff; also had the change to talk to folks about some open questions: mufflers and heater boxes, seat heat switch location and wire routing, transition training, and so on.  Notes to self: the Torx screws on tips and hex-heads for interior panels look nice; heated seat wiring can be run out underneath the flap motor housing, and the cushion cables are long enough to reach; relays can go in the flap housing with switches on the crossbar (though they are hard to reach in flight, it cuts down on wiring run through the center section).

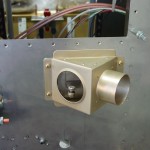
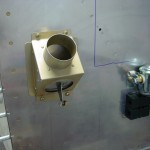
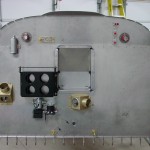
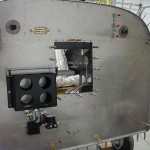
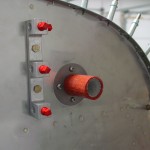
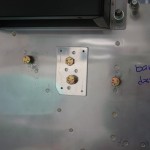
Back in the shop this afternoon, my goal was to get most of the firewall components installed and ready to hang the engine tomorrow.  Number one on the list was the heater boxes.  I chose to mount one in the center, feeding into the stock diffuser box; the second one is placed on the passenger side, far outboard.  I oriented that one with the outlet (which dumps the heated air when the valve is closed) pointing down, thinking that it would provide better airflow to the lower cowl exit.  This meant that the box had to be up the firewall some amount to allow room for the control cable to exit below it, so it ended up next to the battery.  Hopefully I don’t regret this, but I’ve been pondering it for several weeks and it was time to make a decision and get on with it.  I think in this location, it would be easy to add a flange on the cabin side if desired later, to direct the air from that vent to an eyeball or glareshield vent.  Everyone I talked to who has the muffler exhaust, or has flown a plane with it, is pleased with it and says that there is more than enough heat output, which will be a good thing.

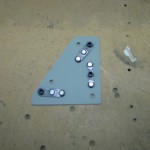
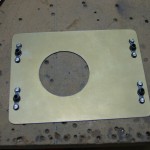
I used a 2″ hole saw (buying the kit of quality hole saws was a good move, as I’ve had zero difficulty cutting the stainless) with the drill motor slowed down (regulator set ~35psi) to make the holes, and used the doubler for a template to drill the mounting holes.  I decided to use #8 screws rather than the #6 called for in the plans, mostly because I had truss-head #8 screws, and only countersunk #6 screws.  And, rather than using nuts on the backside, I put nutplates on the doubler to allow for easier one-man installation and future service.  These are the triangular heat boxes from Robbins Wings, which have a stainless steel hinge and flapper, with an aluminum box.  The theory being that if there was a fire, the box might melt away, but the flapper, being stainless, would remain to cover the 2″ hole in the firewall.  This is a variation on the all-stainless box, and seems good to me.  They include the doublers, and are set up for control cables on the engine side.

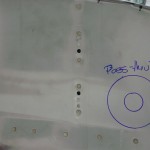
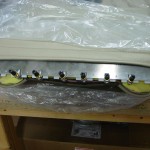
With the heat boxes in place, the next order of business was to install the firewall recess.  Besides removing the top skin, this meant mixing up the firewall sealant, Flamemaster CS 1900.  It is a two-part concoction, similar to Proseal, but part A is a very stiff paste and part B a thin liquid; it is difficult to mix, and remains very thick after mixing.  The data sheet indicated that it could be thinned for application, including brushing, by use of ketone solvents.  A little research told me that acetone is a basic ketone solvent (which saved me a trip to the store for MEK), and it took a lot of acetone to get it to a workable consistency.  Put it in a freezer bag for application, same as I did with the Proseal on the fuel tanks.  After wiping all the parts down with solvent as instructed, I ran a bead between the recess and the firewall and clecoed it in place.  I let that begin to set up while I sealed and installed both wiring pass-thrus, and sealed around the brake reservoir penetration.  Then I went back and riveted the recess in place, and sealed around the edges and in the seams and corners, filling the holes at the corners with a blob of sealant.  Cleaned up the mess and called it good.  Once the recess was in and the sealant had tacked, I bolted and torqued the battery box and heater boxes.  No pictures of the sealing process, because it’s hard to use the camera when your hands are covered in black goop.  The copius acetone thinning didn’t seem to affect it’s ability to cure, and it skins over fairly rapidly after dispensing.

Once the sealing was complete and cleaned up, I installed and clamped the outer firesleeve on the wiring passthrus, as it needs to be in place before the wires are run, and I didn’t want to forget it later and have to take all the wires out to install it.  (Like flaring tube without a B-nut, or soldering a connector without the backshell — not that I’ve ever done either of those…)

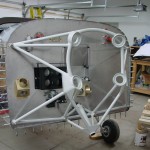
Engine mount is next…had to fit and remove a couple times to work on the nose gear bolt clearance, and I ended up putting a little “dent” in the firewall behind the gear leg to shift it aft and provide clearance for the bolt & nut.  I’ve read that this is not uncommon.  I also had to file a bit more off of the lower fuel pump nutplate to clear the lower mount tube, and I filled both nutplates with firewall sealant, since I’m not using them (this pump location is used only for carbureted engines; I wasn’t sure whether I would have carb or FI when I built the firewall, so I put the doubler & nutplates in).  As of now, the engine mount is bolted up, but not yet torqued, as I expect to need to remove it (along with the engine) one more time to drill and install all the cable and plumbing penetrations, once I figure out where they need to go.

Hours: 4.9 | Posted in Engine, Forward Fuselage | Comments Off
7th January 2011

Brain dump: Oils

Killing time today, I found myself reading about aviation oils … this post records that for some point in the future when I might want to remember the info.

Break-in period should use mineral oils only, no synthetics.  Whether or not AD (ashless dispersant) oils are recommended for break-in depends on who you ask, but ECI (who is the manufacturer of my engine components) recommends Phillips X/C 20W-50, which is an AD oil.  The non-AD version is Phillips Type M 20W-50.

AeroSport says to “use mineral oil for the first 25 hours, and avoid synthetic blends for the first 100 hours.”  Since avoiding synthetic blends would, then, mean using mineral oils, I wonder if they mean a non-AD oil for the first 25, or perhaps a straight weight oil (rather than a multi-grade).

Multi-grade oils seem to be well liked, either in 100% mineral or synthetic blends, due to their lower viscosity at cold temperatures — which allows for better lubrication on cold starts, and especially in cold weather.  Another advantage is that one oil can be used in all seasons, eliminating the need to change oils from summer to winter.  There is commentary that says multi-grade oils drain off of engine parts more than straight weight oils do, offering less protection for inactivity and on start-up…on the other hand, oil producers claim research that says this is only a myth.  Phillips’ study in their lubricants FAQ:

The oil retention test was performed by measuring the mass of oil retained on the surface of a steel coupon which was suspended from a highly sensitive balance. The steel coupon was dipped into the test oil which was heated to 200°F and then cooled down to room temperature to mimic the situation in aviation engines when the engine is shut down at a higher temperature and then cools down to ambient temperature for idling or inactivity. The total weight of the steel coupon plus the amount of oil retained on the test piece was recorded every 2 hours for 48 hours total. Test results showed that after the parts rested for 12 hours, very little of the original oil film remained on the surface and the rest flowed back to the reservoir regardless of the viscosity and initial temperature of the oils tested. In fact, the oil drains very quickly within the first 2 hours, and then slows down significantly over time leaving less than 8% in mass and 2um in oil film thickness (as measured by FTIR) on the surface after just 20 hours.

Synthetics are another are of debate, with some on both sides; some say it doesn’t matter.  Full-synthetic seems to be generally frowned upon, while semi-synthetic (aka synthetic blend) seems to be well-liked.  Some info in both the Phillips and Exxon FAQs indicates synthetics don’t do as well at keeping contaminants in suspension, which is why they usually appear in a blend.

The last issue is the anti-scuff additive, aka LW-16702.  This is required by Lycoming for a short list of engines (mine does not fall on that list), but recommends it for all engines.  I haven’t yet found a recommendation one way or another from ECI literature.  Searching the forums is inconclusive.  More info from the Phillips FAQ:

Lycoming has three engines in varying configurations that require the Lycoming additive LW-16702 or equivalent. These engines have cam lobe and lifter design features that require additional scuff protection above and beyond the other Lycoming engine models. Below is the list of engines that we found in the Lycoming literature that requires the LW-16702 or equivalent additive as found in Phillips 66 Type A 100AW.

  • O-320H
  • O-360E
  • LO-360E
  • TO-360E
  • LTO-360E
  • TIO-541
  • TIGO-541

I do buy into the multigrade argument, and popular oils in that category are:

  • Phillips X/C 20W-50: 100% mineral, AD-type, no anti-scuff additive. (ECI recommends for break-in and continuous operation.)
  • Exxon Elite 20W-50: synthetic blend, AD-type, with anti-scuff additive.
  • AeroShell W15W50: synthetic blend, AD-type, with anti-scuff additive.

All of these seem popular on the forums, with various stories of better success with one or the other.  I feel like the Exxon and AeroShell oils had more users in the posts I read than the Phillips did, and several highly positive reviews of the Exxon (the biggest complaint seemed to be the too-big spout on the quart cans).  Phillips has no multigrade with the anti-scuff, and the others have no multigrade without it.  So, the synthetic/non-synthetic decision goes hand-in-hand with the anti-scuff decision.

All that’s to say that I’ll have to figure this out at some point, but the first 100 hours, at least, will be on the Phillips X/C 20W-50 (unless I come across information that would indicate the Type M, non-AD oil is better for that, but both ECI and Phillips indicate that the AD-type is preferred).  Semi-synthetic?  Anti-scuff?  To be determined; need more research on synthetics.  FWIW, the Phillips FAQ downplays synthetics, Exxon talks them up (they sell them), and AeroShell’s site doesn’t talk about it either way.  If I had to pick today, based on everything I read, I think I would use the Phillips for the first 100 hours, then the Exxon.  Not 100% sure, though…maybe stay with the Phillips.  ECI notes that if one needs to replace a cylinder, the oil wouldn’t need to be switched to break it in (though presumably one would do an oil change at that time anyway since the guts of the engine would have been exposed, so perhaps not as big of a deal as they make of it.)

Phillips’ marketing spiel:

X/C 20W-50 is the first approved multiviscosity aviation oil for opposed piston engines. It provides better engine performance than any single-grade oil in all weather conditions. X/C 20W-50 is formulated with an ashless dispersant package allowing for cleaner engine operation. X/C 20W-50 is recommended for break-in. It provides a cleaner and quicker break-in than traditional all mineral single grade oils. Plus, X/C is an operational oil so there is no need to switch oils after break-in. X/C 20W-50 utilizes all petroleum base oils which provide excellent solvency and is successful in preventing lead and lead salts.

Exxon’s marketing spiel:

Exxon Elite is a blend of synthetic and mineral-based oils (plus a highly effective additive package). Why a semi-synthetic? Our engineers determined that a fully synthetic oil may not have the solvency to handle the lead deposits that result from the use of leaded fuel. So they developed Exxon Elite as a semi-synthetic formulation that combines the best of both synthetics and conventional oils.

As a multigrade oil, it offers the flexibility to lubricate effectively over a wider range of temperatures than monograde oils. Compared to a monograde oil, a multigrade oil provides better cold-start protection and a stronger lubricant film at typical operating temperatures. Other benefits include lower oil consumption and better fuel economy.

Followup: some scuttlebutt on VAF, quoting an Aviation Consumer article, suggests that the Exxon and AeroShell multigrades are essentially similar, both having good anti-corrosion, with the AeroShell ahead in anti-wear.  Phillips is noted as an “also-ran.”  Of course, the articles are from 2002, and the VAF post from 2006, perhaps changes have been made since then?

Posted in Maintenance | Comments Off
6th January 2011

Round things, and things that go ’round

More items from the pre-engine-hanging punch list tonight…

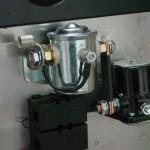
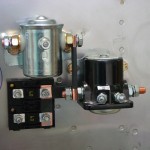
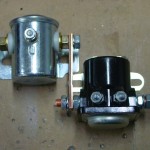
Installed the protection diode on the master contactor.  Need to order another diode for the starter contactor.

Installed the right-hand wiring passthru in the firewall, pretty much in a mirror-image location of the left one.  I found a number of builders who have put them here and said it worked well.  Their photos showed good wiring routes for everything, and it will be an ideal position for feeding the main buss wire into the Vertical Power box.  It also leaves open some real estate on the bottom of the firewall for the possibility of putting a heater box there.

Put the engine mount in place and snugged down the bolts to hold it.  Put the nose gear in and temporarily placed the bolt at the top.  I’m wondering if it would be a good idea to upgrade this to a close-tolerance bolt; I know some have tried taper pins but had a heck of a time reaming the tapered hole in the hard steel leg.

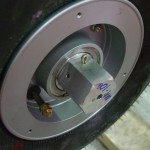
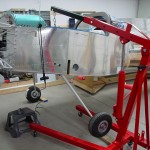
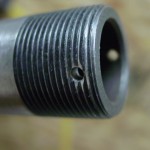
Decided to finish off the main gear legs, so hoisted the fuselage up one side at a time to adjust and drill the axle nuts for cotter pins.  The engine hoist and a double cargo strap to the gear tower worked nicely to get the wheel off the ground.  Since the gear-leg bolts are not yet torqued, it was easy to drill the top side, then pull the leg to drill the bottom hole.  After marking each hole with a drill bit, I removed the nut and ground a depression in the threads with a burr in the Dremel tool, then replaced the nut and drilled the hole.  Found this method on the forums, and it worked well to keep the axle threads from splitting and tearing up the nut threads.

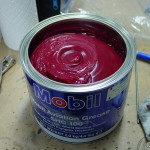
For the gear, I’m using the grease recommended by the maker of the main wheels, Mobil Aviation SHC 100, a non-clay-based synthetic grease.  The smallest quantity I could find to buy was the 4.4-lb can…that’s a lot of grease, and it’s spendy stuff too.  I’m using this because the main wheels came already packed with it, and the nose wheel isn’t packed with anything; may as well use the same stuff all around.

Still to do before engine hang: seal and install the firewall recess (which will involve removing the top skin), seal and install the wiring passthrus and brake reservoir, pack the front wheel bearings, and deal with the oil pressure fitting.  Need to look up the mix ratio for the CS1900 firewall sealant so I can mix smaller batches than the entire pint can.

Hours: 2.9 | Posted in Electrical, Gear & Fairings | Comments Off
4th January 2011

Firewall population

Installing more stuff on the firewall was the order of business again tonight…

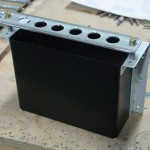
  • Painted the battery box and temporarily fit it in place (permanent install after firewall recess is riveted).
  • Riveted the nutplates for the oil/manifold pressure hose adel clamps, as well as the fuse block doubler & nutplates.
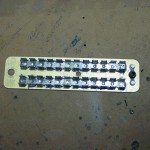
  • Installed the fuse blocks and buss bars.  Located one protection diode, but my crimpers are at work, and it looks like a second diode will need to be ordered.
  • Drilled and installed nutplates for the transducer manifold, and temporarily fit the manifold (needs to come back off to install the hose fittings, which I need to order).
  • Located, drilled, and temporarily installed the left-side wiring passthru (will install permanently with sealant).
  • Fiddled around again with locations for the right-side passthru and both heater boxes.  Still undecided.  Basic question for the passthru is high (like the left side), or low (nearer the contactors).  Saw a recommendation to locate them where the wiring has a graceful path to the engine mount tubes, so wiring can follow the tubes.  This can be made to work either high or low.  Looking for photos of other folks’ master buss cable installs.
  • Installed the fuel vent fittings in the bottom skin.  Still need to secure & torque the B-nuts.

Hours: 3.1 | Posted in Electrical, Engine | Comments Off
31st December 2010

Seats in, more electrical

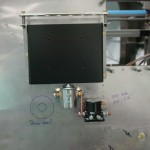
More futzing with the firewall, getting bits and pieces in place while waiting for engine mounts to arrive.  The “forest of tabs” ground block from B&C arrived yesterday, so that was drilled to the firewall today.  I added an extra bolt at the end of the aft piece, to guard against any vibrations…installed a nutplate for it on the aft side, so the bolt on the fwd side could be used for an adel clamp or whatever if needed in the future.

Re-fit the fuse holders to the firewall and made up the copper bars that connect the two fuses, plus the bar that feeds the switched side of the battery contactor to the fuses, and the lug that will connect the battery cable to the contactor.  Once the copper bars were fit and drilled, I used some heatshrink tube to cover all but the ends, and notched the covers of the fuse holders to fit over the bars.

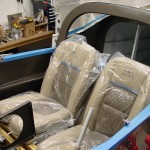
That done, I decided to fit the backrests and drill the seat hinges.  The install guide makes this seem a bigger deal than it actually was, and they went in pretty quick and easy.  I used the hinges I had made up during the fuselage build.  I may have to re-do the right side later with a new piece of hinge (Classic Aero includes hinge pieces, so I have spares), depending on how tight the canopy frame is to the seatback.

Also mixed up some proseal and glued the stainless screens to the fuel vent fittings.

Hours: 4.5 | Posted in Cabin & Interior, Electrical | Comments Off
28th December 2010

Engine unloaded

No real project work tonight, but I did manage to assemble an engine hoist I picked up, and unload the engine from the back of the truck.  Also over the past few days, a bunch of parts have been ordered for FWF-related stuff, so waiting on all that to show up–due to the holidays, it should start arriving next Monday, after I’m back to work full-time.  Ah, well.

Hours: 0.5 | Posted in Engine | Comments Off
27th December 2010

Firewall fiddling

Drilled the lightening holes in the battery box with a hole saw, then cleaned them up with a rotary file and scotchbrite wheel, all in the drill press.  Will need to pick up a can of black spray paint for the box, as my can is shot (too many seasons of freezing, I think).

Dug out the “MIDI” fuse blocks and decided to mount them below and to the left of the contactors, so I fabricated a doubler plate for them; I need to order a bunch of different kinds of nutplates including single-leggers and corners–which I should have done awhile ago, but they’re spendy little things.

Drilled the holes for mounting the nutplates for the oil pressure line, but there too, need to order nutplates.

Hours: 2.3 | Posted in Electrical | Comments Off
26th December 2010

Battery box & contactors

Worked more on the firewall tonight:

  • finished up and mounted the doubler for the contactors
  • installed the nutplates for the battery box and fabricated the battery hold-down bar and spacers
  • drilled pilot holes for the lightening holes in the box (need to bring my hole saws home tomorrow to finish the  box)
  • installed the nutplate for the breather hose
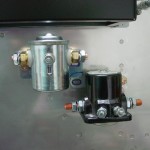
  • made up the copper bar that runs between the contactors and ground down the mounting ear on the master contactor so it will nest with the starter contactor
  • played around with possible locations for the wiring pass-thrus

Was going to install the two nutplates for the oil pressure hose as well, but can’t decide where they’re intended to be installed — I have seen pictures with them at the top corners of the recess, but turns out that hole location is a bear, since it has no flat spots for the “ears” of the nutplate.  So, more research.

Hours: 2.9 | Posted in Electrical | Comments Off
23rd December 2010

Holiday shop time

Took advantage of the “extra” day off from work (since Christmas day falls on the weekend this year) to get in some shop time, since the rest of the holiday weekend will be spent doing the relatives thing.  It’s been nearly a month since I’ve done any work on the project, due to work and more work…’tis the season.  I met my goal of wrapping up all my freelance projects by Christmas, so I should be able to use more of my time away from the office to work in the shop.  Having that engine sitting there is a motivator!

Before heading out, I put in a few orders to various vendors for parts, including Lord mounts and bolts, transducer manifold, baffles and airbox, firewall sealant, wheel bearing grease, etc.  Still plenty to order, but this should let me get the engine mounted.  Also talking to SteinAir to get panel build parts and engine sensors.

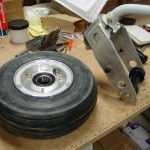
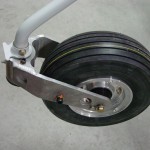
First order of business in the shop was assembly of the nosegear, since the leg will need to be in place to support the weight of the engine.  After assembling the fork with the various bolts and spacers, I mounted the tube & tire to the wheel and assembled it to the fork loosely (the bearings still need to be greased, once my can of grease arrives…).  I have the Matco axle and drilled that to the fork, but won’t adjust the preload setting until the bearings are greased.  I bolted the engine mount up temporarily to look at some spacing & layout things for deciding where to install various bits, and slid the nose leg into place.  At that point, I realized that I had installed the swivel stop piece backwards; the stops should be on the forward side of the fork, not aft.  An easy swap, dropping the fork and reversing it the right way round, and all is well.

As long as the engine mount was bolted up, I took the opportunity to address the spacers needed behind the inner bottom mount points.  It turned out that after filing the lower pump nutplate down to provide clearance, all that was needed was a .063 piece, so I fabbed two circular spacers from a piece of scrap and bolted them in to test…perfect.  Pulled the gear leg and engine mount, and set to work drilling holes in the firewall.

First, the brake reservoir.  Recommended locations for all this stuff if given on the plans, so it’s just a matter of measuring it out and drilling.  Well, then drilling more, countersinking, deburring the stainless firewall, and riveting nutplates… The reservoir went on fine; I ended up using three regular washers on each side to keep the top of the canister from rubbing the bent upper part of the firewall.  Next up, I measured and drilled the hole that’s needed for access to the nosegear leg bolt, which ended up being right where I had marked it with a drill bit through the bolt hole.  This will get a stainless plug to close it once the leg is installed.

Next on the list was the battery box, so I pulled that out and drilled/dimpled/riveted the side angles to the box.  I will drill the lightening holes later, since my hole saw set is still at the office from the big studio build. I drilled out the necessary rivets from the firewall and clecoed the box in place for now.  I’m intending to–as much as is practical–install everything on the firewall using nutplates on the aft side so that removal/installation can be a one-person job from the front, without having to crawl under the panel to twist wrenches.  The battery box is prepunched for nutplates to be attached to the mounting angles, then bolts run from the cabin side to attach it.  I don’t see why this couldn’t be reversed, and bolted on from the front, so I’ll research that to make sure I’m not all wet.

With the battery box clecoed on for spacing, the next logical step was the contactors, but I’ve read that the doubler in the plans may not put the holes in the correct locations.  Instead,  I drilled out the specified rivets and installed the nutplates on the stiffeners, and fabricated the doubler with no holes.  I bolted the contactors up temporarily and marked where the center holes needed to be for them to align well, then drilled those holes.  I’ll back-drill the doubler from these holes next session.

To do: figure out where all the other nutplates need to go on the firewall for breather tubes, oil pressure line, etc.  I’m planning to hang the engine and then figure out where the best place for throttle/mixture/purge cables to pass will be, along with the dual heater boxes, about which I am still undecided as to the preferred location(s).  Considering either center/right, left/right, or both in the center.

Hours: 5.8 | Posted in Electrical | Comments Off
22nd December 2010

Christmas comes early

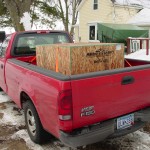
How to quadruple the value of a pickup truck…
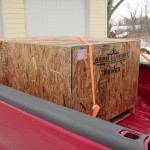
Picked up the shiny new Aero Sport Power engine today (1 day shy of 4 years since the tail kit was delivered, but who’s counting) at the freight depot, after a bit of a shipping snafu (I was expecting a call when it arrived so I could go pick it up…after watching the “expected delivery” date keep incrementing on the tracking site I called them, they said it had already arrived and had been sitting for several days because they had no phone number.  The phone number was marked on both the paperwork and the side of the box…)

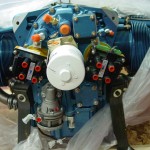
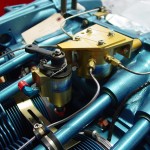
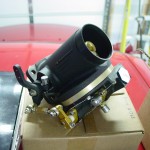
Four lag bolts later, I popped the top on the crate and beheld the wonders.  160 horses in a metallic blue package.  The Airflow Performance throttle body is an impressive piece of kit, as well.  Another box contained ignition leads, installation hardware and brackets, the wiring harness for the preheat system, engine manual and logbook, break-in guide, FI service manual, and even a couple shirts.

After inspection, I wrapped it back up in the plastic sheet with the desiccant bags inside for the time being.  I suppose I should get some of those desiccant plugs that screw into the spark plug holes to help keep the guts dry.  Until I get an engine hoist, it’ll have to sit in the back of the truck, though, which means Allison’s car is outside…which means we’re sure to get another whopper of a snowstorm.

Posted in Engine | Comments Off