28th January 2012

Of Baffles & Such

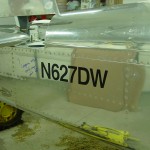
Decided to apply the N-number decals tonight.  These are intended to be pseudo-temporary markings, until she gets painted someday, but they’re permanent for now.

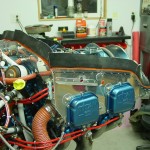
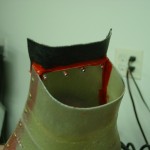
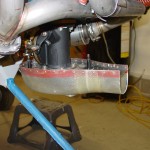
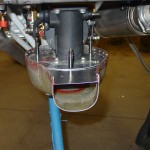
Removed the airseal from the baffles, cleaned them, then ran a bead of red RTV along the baffles, and clecoed the airseal back in place.  I’ll let this cure overnight and install the baffle rivets tomorrow.  Also fitted the airseal to the top of the FAB.

And made up some pieces of airseal that will cover the spark plug access holes for the rear cylinders.

Hours: 1.8 | Posted in Cowling & Baffles | Comments Off

26th January 2012

Pickle me

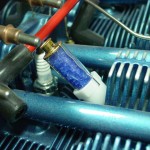
It’s been a but more than a year since my engine was built, and the protections applied at the build shop were said to be good for 12 months.  I’ve been careful not to turn the engine, and have kept it’s openings mostly plugged, but I asked the kind folks who built the engine up at Aero Sport Power what measures I should take to prolong the preservation, given that it will likely be several more months before the fires are lit.  Having procured the necessary items, I carried out their recommendation tonight:

  • Pour 3 gallons of oil into the crankcase.  They said this could be automotive oil, as it’s only there to cover and protect, not lubricate for flight.  I put in conventional (non synthetic) Valvoline.
  • Cap off the breather and exhaust stacks.  I had a plug that fit into the breather hose, and I wrapped the stacks in plastic & tape, since I don’t have any plugs that large.
  • Cap off the intake; this is already done, before I started doing any fiberglass work on the FAB & intake scoop.
  • Insert dehydrator plugs and keep them dry.  I looked around and found some that the crystals can be taken out of and dried.  Make sure to ask that, as there are several places selling 14mm ones that are sealed, alongside the regular reusable 18mm versions.

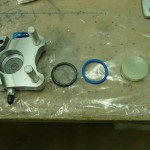
I’ve been doing final reading on brake fluid & seals, and I decided to change out the caliper O-rings, since the stock Buna-N ones will deform in the 250* range.  There have been cases of brake fires on RV’s and similar aircraft before, so many guys are replacing the 5606 fluid (flash point in the 200′s) with the more modern 83282 (flash point in the mid 400′s).  Synthetic ATF is another option, which has specs similar to that of the 83282.  It’s also become common to change out the O-rings with Viton, which is rated to 400*. The downside to Viton is it’s poor low-temperature performance (-15*).  Since I do plan/hope to fly in the winter, I found some flourosilicone O-rings at McMaster, which have the same high-temp rating as Viton, but are also rated to -75.  (They’re listed under “military specification o-rings,” p/n 8333T255)… a little pricey at $6.25 for a 2-pack, but that’s small potatoes.

The install couldn’t be easier: remove the caliper, pop out the piston, remove the old O-ring, clean up the piston & bore, lube the O-ring and insert it, then slide the piston back in place and re-assemble.  Done.

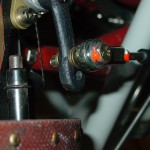
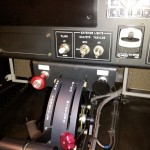
Finally, the mixture linkage has been bugging me for awhile; even with the higher hole I drilled in the quadrant lever, it wasn’t confidently hitting the stops on the fuel servo before hitting the end of the quadrant throw.  (Yes, I tried a bunch of different arm angles.)  To solve that, I pulled the mixture arm off and drilled another bolt hole a bit higher than the existing one, then reinstalled.  Works perfectly now, the stops are hit before the quadrant lever runs out of travel, and the throw matches that of the throttle lever.

Hours: 1.9 | Posted in Engine, Gear & Fairings | Comments Off

21st January 2012

Airbox assembly

Installed what should be the last firewall eyeball, for the alternate air control cable.

Fooled around with a piece of ceramic batting, to explore how it would work to fit it on the cabin side of the firewall.  I wish it were stiffer, the stuff I ordered is sort of floppy.  I think it would stay in place if cut to the right dimensions and backed with metal foil. I may do this yet, but still waffling.  Plenty of planes flying without it…  If I do decide to put it in, I want to do it before the top skin is riveted.

Attached the cable-end fitting to the alternate air slider assembly, then drilled the assembly to the airbox.  Made spacer strips for each side so the cotter pin wouldn’t rub on the fiberglass.  Riveted the slider to the airbox, with an RTV “gasket” to the hole in the bottom of the box.

Cut the filter holder clips and drilled them to the airbox top; deburred, countersunk, and installed with nutplates.  Riveted the airbox top to the glass bowl, again with a bead of RTV around the perimeter for an airtight seal.  Temp fit the whole airbox assembly to the fuel servo.

Hours: 4.5 | Posted in Engine | Comments Off

7th January 2012

Looking it in the nose

Received the prop spacer, crush plate, and bolt kit, and test-fit that to the engine.  Deburred the rear spinner bulkhead and test-fit that as well, along with the entire cowling, to see how close I came out on the cowling/spinner fit with my PVC spacers — looks like it will work.

Now that the emp fairing epoxy/micro sludge has finally set up hard, I went to remove the packing tape used to prevent the epoxy from adhering to the aluminum, and found that the plastic layer of the tape peeled off, leaving 90% of the adhesive behind, stuck to the plane.  Ugh.  Acetone doesn’t do anything besides make it gummy and smear it all over, so I’ll have to pick up some other solvents from the store and see what will remove it.  It doesn’t scrape well, but mechanical rubbing (with a finger) removes it slowly in little balls.  Clearly, some better tape is in order for future layups.

Hours: 1.5 | Posted in Cowling & Baffles | Comments Off

29th December 2011

Cover your tail

Trying to get the plane to the point where the tail feathers can be removed and stored, to allow more garage parking.

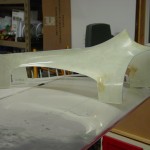
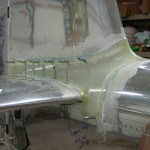
Fit the stock empennage fairing as best I could, which is essentially a ton of on-mark-off-sand-repeat, until it gets close.  Then I marked some final trim lines and sanded it back to there. Taped in place and carefully drilled #40 through the fairing into the open holes in the metal.

Next, to fill the little gaps that remain…  Taped up the metal surfaces and waxed them, and mixed up a batch of epoxy with micro and cabosil, slathered it on the inside of the fairing edges, and clecoed the fairing in place.  The idea is that the micro will fill the gap; once it’s cured, the fairing can be removed and the edges sanded pretty, then the rest of the finishing process can go on.

(Update: 55* in the shop is clearly not enough for efficient fiberglassing; the fairing took 4 days to set up completely, and that’s after pulling it off and bringing it in the house to sit.)

Also trimmed the layup on the cowling intake snout, and shaped it to be even with the intake.

Hours: 2.8 | Posted in Cowling & Baffles, Wing & Tail Joins | Comments Off

28th December 2011

Letting it breathe

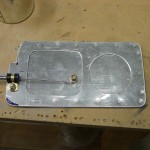
Spent most of today working on the FAB install, namely fabricating a sliding-door mechanism for the alternate air intake, which is a safety feature which will allow the pilot to keep the engine running in the event the regular air intake becomes clogged (filter icing, bird ingestion, etc).  I’ve made a copy of a design that was floated on VAF, which utilizes a stacked-plate configuration affixed to the bottom of the airbox, rather than the hinged circular door supplied in the kit.  This design solves the weak spot (hinge ear) in the supplied piece, and further reduces the possibility of hardware ingestion if something were to come loose inside the FAB.

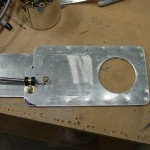
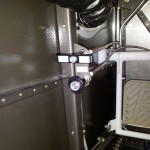
Along with the sliding door mechanism, which I’ve test-fit, a control cable is required.  I didn’t make any provision so far for this cable in the cockpit, but I was able to re-make the bracket near the pilot’s left knee that I’d put in previously to hold the parking brake control.  Now, the parking brake and alternate air controls are there, one above the other.

I also made labels (at least temporary ones, since I’ll redo them in black tape later) for the various control cables:

  • Cabin Heat / Pull Open (x2)
  • Fuel Purge / Pull Open
  • Park Brake / Pull to Engage
  • Alt Air / Pull Open


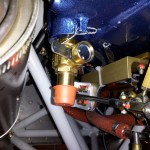
And, I removed the oil drain plug from the RH drain port, and installed the Fumoto quick-drain valve I picked up awhile back.  It doesn’t come with any provision for safety-wiring (being an industrial equipment piece, rather than aviation-specific), and I didn’t like the first attempt, which wrapped a loop of wire around the valve body; it seemed possible for the wire to shift and open the valve, clearly not a “safety” outcome.  I ended up drilling a hole through part of the flange, and safetying it to the boss provided on the engine sump.

Hours: 7.0 | Posted in Engine | Comments Off

27th December 2011

Somewhere, under all the dust

Happy Holidays — Christmas Eve is the anniversary date of the arrival of the empennage kit, so this marks the beginning of year 6 of the project.  I really hope to get this plane flying this year, though enough plans have been laid and lost that I won’t bank on it at this point.  The biggest remaining hurdles are all the fiberglass work, final assembly, and the “tax kit” (yes–thank you Minnesota–I will be required to pay over $6k in various taxes and fees before I’m allowed to fly it, and then a significant ongoing annual tax, as well…)

With Christmas as the associated family travel receding into the distance, the holiday schedule at work lined up to give us two 4-day weekends in a row.  I, like many others, decided to cash in a bit of stored-up PTO to have a 9-day mini-”vacation” from the office, before heading back to build out another recording studio in January, along with new student training and a bunch of deferred maintenance items.  And, I’m putting off the non-work work that I need to do a bit longer, in order to log a couple hours on the airplane project.

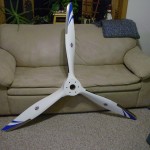
Today’s task was to find the thing under the pile of hay, dust, and remodeling debris that has accumulated in the shop since I last touched it over three months ago in September.  Several hours later, the shop was clean again, and most of the tools found and returned to their home.  A new storage stack was built out of cabinets removed from the kitchen, and more things stored away in the attic.  With the floor swept, I was able to move the plane out where I could walk around it, and, under the dust (it’ll need a good cleaning for sure), it seems to be as I left it — in need of a propeller (which arrived just before Christmas, and the spacer kit should be here next week), some loose ends around the engine, and alot of fiberglass work, plus some finishing touches on the canopy…and the rest of a two-page punch list.  Time to get started.
I finished the last task I’d started three months ago: heat-shrinking a piece of tube around a copper buss bar to connect the AFS amp shunt to the alternator fuse.  Installed that and the fuse, and put the charger on the battery to top off any charge it lost while sitting (the charger indicated very little had been lost).  I decided to install the AFS amp shunt after seeing that the VP-X amperage reading was not displayed in the bargraph metering as I thought it would, nor is there any monitoring/alarming on the amp value reported from the VP-X.  Tp be clear, you can see the amps & volts reported by the VP-X, by calling up the VP-X page, but not in the regular bargraph meters in the EFIS.  So, I put in the amp shunt, to have a reading there…but I put it in the alternator line, rather than the master buss line.  This essentially gives me the ability to monitor two different amp readings: one showing how much current is being provided by the alternator, and a second (from the VP-X) showing the total current being used by the electrical systems.  Simple math then gives the current being provided by the battery (or consumed in the manner of charging), and having both available should allow for easy diagnosis of a failing alternator and/or battery.

Pulled out the FAB and started looking at how I want to do the alternate air door…this is on the priority list, since I want to install the eyeball for the control cable before I rivet on the top skin, as drilling those holes will be easier without that in the way.  I think I will build a sliding door modeled after those I’ve seen on VAF, as there are numerous reports of the swivel door in the plans failing, when the pivot eye breaks off.  Also need to find a place to mount the control cable — probably under the parking brake handle, or perhaps on the lower left subpanel, depending on how ugly of a reach it is to access it from the pilot’s seat.

(this log entry has an inflated number of hours, as I believe there were one, possibly two, work sessions that never made it into the log, wherein the amp shunt was installed and a doubler plate fashioned for it’s mounting, the rudder pedal links installed — probably among other unknown things that have been lost from my mind over time.)
Hours: 4.0 | Posted in Electrical, Engine | Comments Off

22nd September 2011

Rudder pedal links

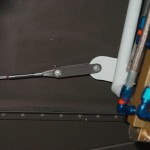
Over the past two nights, spray-painted both sides of the steel links that connect the rudder pedals to the cables.

Hours: 0.2 | Posted in Wing & Tail Joins | Comments Off

19th September 2011

Top skin prep

Sprayed primer on the forward top skin, and left to dry overnight.  Located the steel strip from which the rudder pedal links are to be cut; marked and cut those, drilled the holes, and rounded the ends on the bench grinder.  Sanded them down, and sprayed a coat of primer to keep them from re-rusting.  Tomorrow I’ll spray a topcoat on them, and then they will be installed prior to riveting the top skin, to take advantage of easier access.

Hours: 1.5 | Posted in Upper Fuse & Skins | Comments Off

18th September 2011

Last skin prep

Took some high-resolution photos of the area forward of the subpanel, which may come in handy later on when I need to recall how something was done under there, or visualize it from a different angle prior to stuffing myself under the panel to work on it.  Then, started prep on the forward top skin, which’ll soon be riveted in place over that area.  Deburred, dimpled, and scuffed the skin.  Hopefully we’ll have a warm calm evening this week to shoot the white primer on it–I’ve used white on everything in that upper area, with the hope that it will make working up there more pleasant/visible later.

I need to pick up some more syringes from the farm store to use for placing the firewall sealant before riveting.

Took another look at the fit of the empennage fairing; I’d like to get that done before the weather turns too cold, so that I can pull the tail feathers, move them to the hangar, and have room for cars in the garage during winter.

Hours: 2.0 | Posted in Upper Fuse & Skins | Comments Off