5th February 2011

Plumbing and wiring

Working on several areas today:

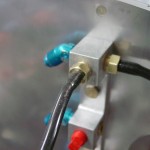
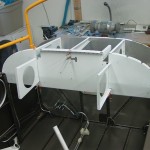
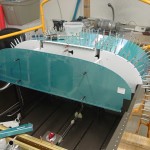
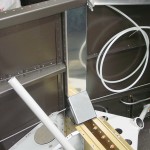
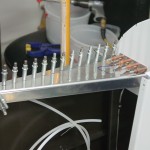
  • Installed 1/8″ NPT to barb fitting nipples in the transducer manifold for the manifold pressure line; one will feed MP to the P-Mags, the other to the sensor for the engine monitor screen.
  • Fit and temporary-installed silicone tubing from the manifold to the P-mags, and a stub for the MP sensor when it arrives.
  • Measured for fuel hoses and pressure sensor lines (fuel, oil, MP) with a piece of tubing.  I should now have the list of most of what I need to order, except for the oil cooler hoses, which I won’t be able to measure until baffles and cooler are installed.
  • Ran wire from the panel to the wing roots, forward of the main spar, for the fuel level sensors; wires I forgot in the earlier wiring work to those locations.
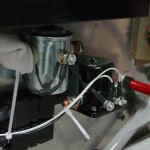
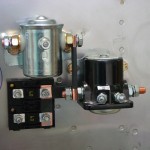
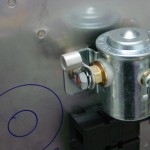
  • Pulled wires to the FWF electrical area, for master contactor, starter engage, and starter engaged annunciator.  Terminated and landed the contactor ends, and verified proper operation of the contactors.  Secured the wires, at least for now.  These should eventually get high-temp tie-wraps.
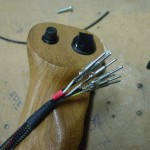
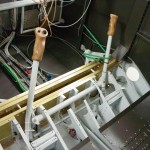
  • Wired the connectors on the stick grips, and glued the grips on with Goop.  I’ll have to see how it cures in a few days, whether it’s too soft for this or not.  I believe it will be removable with enough force, which would be a positive thing if I ever wanted to change grip function (add a switch, for example) or if a wire needed to be repaired.  But, I want it to feel solid, and the grip not to move or flex under normal use.
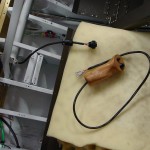
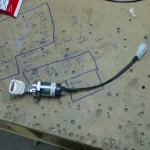
  • Put connectors on the master keyswitch and the aux PTT switches.  These connectors aren’t strictly necessary, as the wires could be soldered to them inside the plane, but soldering is a much more pleasant experience when not carried out upside down; I also want to be able to remove the panel without the need to unsolder things, which means a connector on the master switch, since it installs from the front of the panel (unlike the toggles, which install from the back with nuts on the front side.)  Installed the aux PTT switches, and glued a tie-wrap base to the underside of the forward canopy decks to secure the PTT wires and static line.

Hours: 7.3 | Posted in Cabin & Interior, Electrical, Plumbing | Comments Off
31st December 2010

Seats in, more electrical

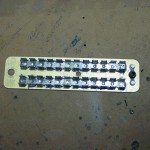
More futzing with the firewall, getting bits and pieces in place while waiting for engine mounts to arrive.  The “forest of tabs” ground block from B&C arrived yesterday, so that was drilled to the firewall today.  I added an extra bolt at the end of the aft piece, to guard against any vibrations…installed a nutplate for it on the aft side, so the bolt on the fwd side could be used for an adel clamp or whatever if needed in the future.

Re-fit the fuse holders to the firewall and made up the copper bars that connect the two fuses, plus the bar that feeds the switched side of the battery contactor to the fuses, and the lug that will connect the battery cable to the contactor.  Once the copper bars were fit and drilled, I used some heatshrink tube to cover all but the ends, and notched the covers of the fuse holders to fit over the bars.

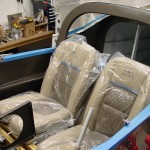
That done, I decided to fit the backrests and drill the seat hinges.  The install guide makes this seem a bigger deal than it actually was, and they went in pretty quick and easy.  I used the hinges I had made up during the fuselage build.  I may have to re-do the right side later with a new piece of hinge (Classic Aero includes hinge pieces, so I have spares), depending on how tight the canopy frame is to the seatback.

Also mixed up some proseal and glued the stainless screens to the fuel vent fittings.

Hours: 4.5 | Posted in Cabin & Interior, Electrical | Comments Off
10th November 2010

Sitting pretty

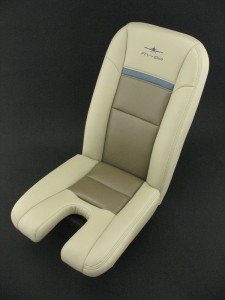
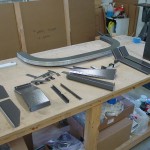
Lots of work at work, and more work when I come home at night…the only plane progress has been unpacking the replacement angle stock for the tank bracket (along with the 4-channel dimmer I ordered as long as I was paying for shipping).  However, I did find a picture of my seat on Classic Aero’s website today…they’ve been posting many recent customer shipments in a gallery to show a broader range of designs, and they took a far better photo than I did.  Haven’t sat in them yet, but they sure do look nice:

Classic Aero Aviator Ultraleather: Papyrus, Walnut, Diplomat Blue

Seat details for future reference:

  • Classic Aero Aviator style, “horizontal stripe” design
  • Ultraleather fabric
  • Papyrus edge color
  • Walnut center color
  • Diplomat Blue stripe color
  • Embroidery matches blue stripe color
  • Built-in seat heaters
  • Papyrus color stick boots (not shown)
  • Front carpet in Latte color (not shown)
  • Aileron pushrod boots and glareshield pinch welt (not shown)

Posted in Cabin & Interior | Comments Off
1st August 2010

Small step

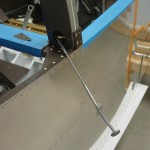
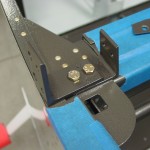
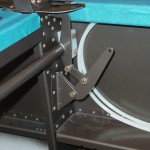
Nothing much accomplished today…cut a piece of hinge and messed around with ways to mount the flap position sensor I picked up at OSH.  I will need some adel clamps to fashion a pivot point on the flap actuator to attach the sensor arm.  Thought about the canopy, and electrical systems…

Hours: 1.0 | Posted in Cabin & Interior | Comments Off
16th July 2010

Wrapping up odds ‘n’ ends

Another session of disparate small tasks.  Perhaps the less focused building sessions are what causes the feeling of being overwhelmed that builders seem to get in the end stages; there’s a hint of that here.  I’m trying to wrap up some odds and ends around the fuselage before diving into the canopy work.

  • Finished drilling the roll bar brace for the cover plate, and drilled it for nutplates.  I didn’t have enough #6 nutplates to do all the holes, so I left a few easily accessible ones without; they’ll be easy to stick in later, when my shipment from Van’s arrives next week.
  • Primed and painted the cover plate…wow, is the spray-can primer I picked up easy to use, it will come in handy for one-off bits from here to the end.
  • Riveted and bolted the roll bar to the fuselage.  Clecoed the structure aft of the baggage bulkhead solidly together before bolting this on, to set the correct location fore/aft.  It’s difficult to get any large tools in there, and fitting the washers and nuts is a trick, too–the tool that I called the “grabber” growing up (I’m sure it has a real name…) came in very handy here, to hold the washers and nuts in the right place.
  • Applied UHMW tape to the inside of the canopy latch angles, riveted them to the side skin, and assembled the rest of the latch mechanism.
  • Put a strip of UHMW tape across the top of the flap motor housing, where the canopy latch tube rubs slightly.
  • Mixed up a small batch of proseal and stuck the NACA vents to the side skins.  (Forgot to put the screens on the fuel vents while I had it mixed up…darn!)
  • Made an antenna drill template, and drilled for the Com1, Com2, and Transponder antennas.  Very handy that they all use the same mount spacing (though beware, the Com antennas are longer fore/aft than the transponder).  These are from DeltaPop, and though I can’t yet comment on their performance, they’re reasonably priced and quite attractive.  Other users report good things, including the folks at NavWorx, who recommended the ADS-B antenna for use with their boxes (I have that antenna too, and will be prewiring for the NavWorx transceiver…).  There is also an APRS antenna in the works, I believe.
  • Drilled a hole for a wee rubber grommet in the aft bulkhead, to feed wiring to the rudder for nav/strobe lights.  I ordered a 100-pack of 1/8″ ID grommets from McMaster Carr, because that’s the smallest pack they sell; I’m set for life now.  I discovered later that SteinAir sells a kit with an assortment of different sizes…  I also ordered a bunch of different tie-wrap bases including the regular square-base type and some other useful-looking ones like thru-hole mounts; having the different kinds on hand will come in handy for the electrical installation.
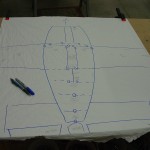
  • Spread out a big piece of paper and drew a crude representation of an airplane on it, and looked at laying out the various wire runs through the fuselage.  I want to get the pieces aft of the baggage bulkhead in place, so I can close up the aft fuselage.

Roll bar brace drilled for nutplates Installing nuts on roll bar Roll bar bolted in place

UHMW tape on canopy latch angles Canopy latch installed Installing NACA vent scoops

Wiring grommet in aft bulkhead Fitting comm antennas Comm antenna mouting detail Plotting wiring runs

Hours: 4.3 | Posted in Cabin & Interior | Comments Off
14th July 2010

More cabin assembly

A conglomeration of cabin tasks tonight:

  • Riveted the forward canopy decks to the longerons and subpanel.
  • Installed the spar upright cap strips with blind rivets.
  • Installed the canopy hinge blocks.
  • Riveted the parking brake valve bracket to the firewall, and bolted on the valve.
  • Attached the brake lines to the valve and torqued.
  • Laid out, cut and drilled a removable cover plate for the bottom of the roll bar brace.
  • Cleco-clamped my finger and decided to call it a night.

Hours: 3.4 | Posted in Cabin & Interior | Comments Off
13th July 2010

Cabin assembly

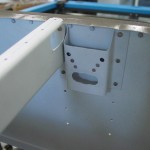
Today’s session was mostly about turning little parts into larger assemblies, some of which got mounted to the fuselage.  Riveted together the fuel pump doghouse, roll bar brace, forward canopy decks, and subpanel left/right sections.

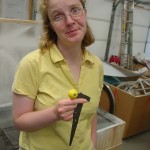
When the assemblies were assembled, I set about installing things…first up, the main canopy latch.  After riveting on the latch bellcrank pivot bracket, the roll bar brackets, and latch weldment were bolted in place, and the latch bellcrank installed and connected to the weldment, complete with cotter pins.  The side latch handle isn’t installed yet (I’m waiting on some UHMW tape to arrive), but the pushrod is assembled, and the knob screwed to the handle.

Primed pile of parts Roll bar brackets bolted in Latch and bellcrank Allison shows her disdain of the yellow knob

Before installing the subpanel, the firewall needed to be dimpled for the flush rivets which attach the subpanel ribs.  The top two holes of each were reachable with the squeezer, but the lower three were not.  I ended up using the rivets themselves as a dimple die–”pre-dimpling” the firewall with a couple taps of the gun, with the rib backed by a squeezer yoke; it then dimpled itself nicely as the rivet was driven.  This worked beautifully on the rather malleable stainless firewall; I don’t know how well it would work on an aluminum piece, especially anything thick.

That done, the subpanel assemblies were inserted and clecoed, then riveted to each other, the firewall, and side bulkheads.  Shooting the side bulkhead rivets required undoing one of the adel clamps securing the fuel line and gently bending it out of the way for a moment to allow access for the gun.  Next, the forward canopy decks were clecoed in place.  Also stuck the rudder pedals in, lest that be forgotten until access is made impossible; they’re not yet bolted down, so could be strapped up out of the way to allow for access to the lower firewall.

Tonight’s art project: cut out the templates for the NACA vent installation.

Hat channel for canopy release mechanism Forward canopy deck clecoed Subpanel riveted in place Firewall to subpanel rib rivets

Hours: 4.9 | Posted in Cabin & Interior | Comments Off
12th July 2010

Cabin pieces painted

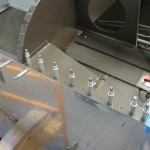
Picked up another quart of paint and sprayed the pile of parts prepped yesterday.  Set to dry overnight, with some assembly on the plate for tomorrow.  Also ordered some wire bushings, extra nutplates, UHMW tape, and a couple other odds and ends in preparation for wiring work.

Hours: 1.8 | Posted in Cabin & Interior | Comments Off
8th July 2010

Fitting subpanel assembly and more

The big deal for tonight was fitting the subpanel assembly, which needs to be in place before the canopy fitting can begin.  Before putting this in, I clamped an angle across the firewall at longeron level, and bent the top section forward…I can’t find it anywhere in the plans, but Smitty’s log says the bend is 8 degrees, which is what I did, and it worked out perfectly.

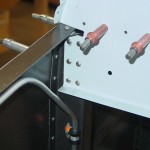
On the bench, I riveted the “stub ribs” to the outboard subpanel sections, then clecoed them into the fuselage.  The center subpanel section then fits between the outer two and is clecoed in place.  I left the panel ribs full-size for now, and I’ll deal with them later on, once I know where everything will be in the panel.  With the structure in place, I fit and drilled the top skin, using the centerlined I had drawn on all the non-prepunched pieces earlier.

Outboard subpanel sections clecoed Center subpanel in place

Of course, with the panel ribs sticking out there, I had to cleco the panel in for a moment to see how it looked.  I wish I had seats to sit in it and check out the fit!  (Though my current panel plan has the bottom extended down by 1.5″…)  It looks more and more like an airplane, even if the cockpit does keep getting smaller.

Panel clecoed, top skin drilled

For kicks, I deburred the spar upright cap strips and slid them into place.  I don’t recall that the manual ever mentioned these, but other folks have installed them at this point with no ill effects.  Of course, they’ll first need to be drilled, deburred, and painted.

Cap strips fit, ready for drilling

Finally, back to the subpanel structure: I drilled the angle clip to the front of the center rib and the firewall, then set about fitting the forward canopy decks.  A pretty easy task, that, just go slow on the trimming–repeated trips to the scotchbrite wheel worked wonders, and gave a pretty tight fit between the forward and aft decks.  Word of warning: if you’ve already run your static tubing forward, remember that it’s under the longeron, and be careful not to drill a hole in it.  Oops.  Thankfully, I ordered plenty of extra and have enough left to re-run that piece; I can cut from the “holey” piece for any behind-panel jumpers I might need.

Forward canopy decks drilled Status shot

Rambling begins here: With the exception of fitting the wings, and locating a couple angle clips to attach the panel, I’ve come the the end of the fuselage instructions.  The canopy fitting starts next in the book, and from here, the project could take any number of paths with regard to the order of operations.  Canopy, electrical, avionics/panel, engine, fiberglass tips…the strict order of dependencies sort of disappears.  It seems that it can be taken in pretty much any order, as long as you think through the implications ahead of time, and are willing to live with the consequences.  I think the current plan is to do the canopy first, hoping to get it in the bag by the end of summer.  That will leave the winter for engine and electrical installs, and avionics prewire.  I may curse that decision later, while laying under the riveted subpanel trying to get all the wiring in place, but I think it’s the best decision for progress and cashflow reasons.  I’m planning on a trip to Oshkosh this year, to finalize decisions on all the components (though most of it is pretty finalized in my head already, if not on paper), and take advantage of any screaming deals that may be on offer.  Who knows, maybe I’ll get lucky at the Van’s demo ride line and actually get to fly in an RV, 1000 hours into the build!

Hours: 3.6 | Posted in Cabin & Interior | Comments Off
8th July 2010

The smell of primer in the morning

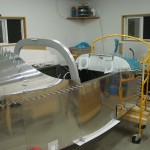
This morning, primed the subpanel components and dimpled where necessary for first fitting.  Also pulled the roll bar brace and associated parts, prepped and primed them.  There’s a stack of things awaiting finish paint now, that will likely wait for a bit.  I haven’t yet decided whether to paint the bits between the subpanel and the panel — they’ll be covered by the glareshield when the canopy is closed, but open for viewing with the canopy open.  Leaving the stuff ahead of the subpanel with just the white primer might be a benefit for later maintenance (white reflects light, and that cave area is accessed from underneath with a flashlight…), but the parts aft of the subpanel are all out in the open for maintenance access.  Hmm.
Hours: 2.0 | Posted in Cabin & Interior | Comments Off