Fitting subpanel assembly and more
Hours: 3.6 | Posted in Cabin & InteriorThe big deal for tonight was fitting the subpanel assembly, which needs to be in place before the canopy fitting can begin. Before putting this in, I clamped an angle across the firewall at longeron level, and bent the top section forward…I can’t find it anywhere in the plans, but Smitty’s log says the bend is 8 degrees, which is what I did, and it worked out perfectly.
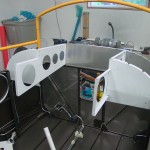
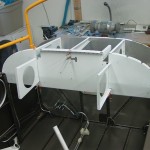
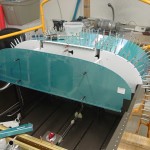
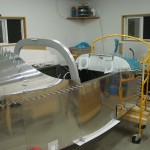
On the bench, I riveted the “stub ribs” to the outboard subpanel sections, then clecoed them into the fuselage. The center subpanel section then fits between the outer two and is clecoed in place. I left the panel ribs full-size for now, and I’ll deal with them later on, once I know where everything will be in the panel. With the structure in place, I fit and drilled the top skin, using the centerlined I had drawn on all the non-prepunched pieces earlier.
Of course, with the panel ribs sticking out there, I had to cleco the panel in for a moment to see how it looked. I wish I had seats to sit in it and check out the fit! (Though my current panel plan has the bottom extended down by 1.5″…) It looks more and more like an airplane, even if the cockpit does keep getting smaller.
For kicks, I deburred the spar upright cap strips and slid them into place. I don’t recall that the manual ever mentioned these, but other folks have installed them at this point with no ill effects. Of course, they’ll first need to be drilled, deburred, and painted.
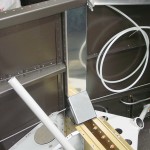
Finally, back to the subpanel structure: I drilled the angle clip to the front of the center rib and the firewall, then set about fitting the forward canopy decks. A pretty easy task, that, just go slow on the trimming–repeated trips to the scotchbrite wheel worked wonders, and gave a pretty tight fit between the forward and aft decks. Word of warning: if you’ve already run your static tubing forward, remember that it’s under the longeron, and be careful not to drill a hole in it. Oops. Thankfully, I ordered plenty of extra and have enough left to re-run that piece; I can cut from the “holey” piece for any behind-panel jumpers I might need.
Rambling begins here: With the exception of fitting the wings, and locating a couple angle clips to attach the panel, I’ve come the the end of the fuselage instructions. The canopy fitting starts next in the book, and from here, the project could take any number of paths with regard to the order of operations. Canopy, electrical, avionics/panel, engine, fiberglass tips…the strict order of dependencies sort of disappears. It seems that it can be taken in pretty much any order, as long as you think through the implications ahead of time, and are willing to live with the consequences. I think the current plan is to do the canopy first, hoping to get it in the bag by the end of summer. That will leave the winter for engine and electrical installs, and avionics prewire. I may curse that decision later, while laying under the riveted subpanel trying to get all the wiring in place, but I think it’s the best decision for progress and cashflow reasons. I’m planning on a trip to Oshkosh this year, to finalize decisions on all the components (though most of it is pretty finalized in my head already, if not on paper), and take advantage of any screaming deals that may be on offer. Who knows, maybe I’ll get lucky at the Van’s demo ride line and actually get to fly in an RV, 1000 hours into the build!
