7th
November
2009
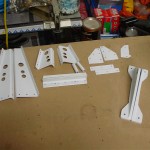
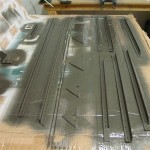
An unexpected warm weekend provided the perfect opportunity to prime the parts I had ready — essentially, the firewall and center section components, plus the aileron pushrods left from the wings. The air was right for priming, warm and dry, and things moved quickly, though I did have to etch & dry the parts first. After priming the parts, I let them dry for awhile, then sprayed the visible side of the firewall parts with Rustoleum Hammered from a rattle can. We picked out the Dark Bronze color the other day at Menards, and I think it looks nice. I was impressed with the pictures I saw from some other builders who used this paint, and though it may not be as durable as something like JetFlex (nor come in as many color options), I appreciate the fact that it can be easily touched up by buying another can from any hardware store. Word on the street is that it reaches its max hardness after a week or two of curing.
While I had the primer out, I poured some into the aileron pushrods to coat the insides, and pop-riveted the ends on. (Hint: don’t prime the mating surfaces of the pushrod and the end piece, rather, install them “wet,” as the thickness of two coats of primer makes an already tight fit an impossible one.) Later in the evening, I squeezed the nutplates onto the center section pieces, and riveted the web stiffeners to the forward bulkhead, as well as dug up and installed the snap bushings.
Hours: 5.5 | Posted in Bulkheads, Wings |
31st
October
2009
Started off tonight with more center section — I picked up some hardware-store Grade 8 bolts to use as temporaries in the wing spar bolt holes, two large and two small on each side. Then I set to fabricating the 1 7/16″ aluminum tube spacers that go on bolts between the bulkheads (not the wooden ones). After making four perfect spacers, I realized that only two were called for. Somehow, I’d been thinking I needed a top and bottom set, and in the process used up the second piece of tubing, which must have been intended for a later part. Will have to order a new chunk in the next Van’s order.
With that said, I now had two extra spacers…so I made sure they fit where they were supposed to, and drilled those holes in the bulkheads to size. Then I removed those two and placed them around the 1/4″ bolts at the top and bottom of each side–voila, they’ve taken the place of the wooden spacers. (I’ve read of some folks using PVC pipe chunks instead of wooden spacers, so using these extra tube pieces, which I took great care to get the correct size, should work.)
Moving beyond the center section, work began on the F-705 bulkhead, which is the structural member that the rear spar attaches to, and also provides support to hold the seats upright, and latch the canopy shut. The bottom of the bulkhead involves some large aluminum bar stock, which I cut to length, deburred, and marked as appropriate. I also cut to length the doubler bars and rough-cut the spacers that go between the two pieces.
This bulkhead appears to be the place where the instructions become quite terse. “The details are on drawing 20″ seems to indicate “use drawing 20 to figure out what you need to fabricate, bend, drill, countersink, and so on; we’re only going to mention the big important stuff here.” I’m fine reading the drawings–in fact, I enjoy working from the drawings and visualizing how the parts fit together–but I do see what others have commented on in the disappearance of hand-holding from Van’s.
Life is crazy, but shop time is cheap therapy.
Hours: 2.4 | Posted in Bulkheads |
26th
October
2009
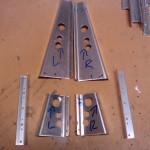
Work sessions are becoming fewer and farther between as the pace of the academic/work year picks up. Started tonight by removing the control column from the center section bulkhead and setting it aside. Drilled, deburred, countersunk, spot-primed, and installed the nutplates on the top of the forward and aft bulkhead pieces. Fit and drilled the cover plate brackets, then deburred the edges and drilled the snap bushing holes and nutplate holes. These will be fit with the nutplates after priming. Finished up by fabricating the web stiffeners, drilling and countersinking as appropriate. There’s a pile of parts that need priming, then the center section can be riveted, at least as far as it goes for now. I also need to build the 1 7/16″ spacer blocks that are used in the assembly of the center section.
Hours: 2.6 | Posted in Bulkheads |
19th
October
2009
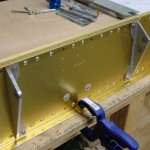
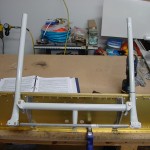
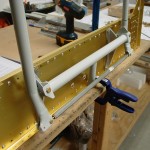
Cut and shaped the brackets that hold the control column to the spar, bolted them in place, then assembled the controls onto the brackets. Some finesse adjusting required here, as things don’t fit quite right out of the box. The techniques that are used in the aileron bellcranks are useful here–chucking the brass bushings in the drill press to file them to length, for instance.
Locating all the right washers and such proved interesting as well, and tells me that I really ought to get an organizer or three and put the hardware bags in compartments by type, rather than looking them up by bag number. For one, there are multiple bags containing the same part (washers or nuts, for instance). With the assumption that I will eventually perform that organizational task, I’m just using the parts as I come across them in whatever bag, unless the bag is marked for a specific use (eg. tip-up hardware or belt attach bolts).
The directions say that the control column assembly may be removed as a unit…as others before me have noted, this is impossible, since you can’t remove the attach bolts without removing the stick bases first. Getting all those washers back in there will be fun when it’s installed in the airplane…
Hours: 2.6 | Posted in Bulkheads |
18th
October
2009
Riveted the vertical pieces of the fore and aft center section bulkheads, as well as the thick spacer bars that go on the aft section. The -14 rivets called out here are not quite long enough, but they are the longest ones provided in the kit. It appears that their function is basically to hold the bars in place, much like the rivets on a nutplate; there are two large bolts that pass through each one and tie the wing spar to the center section bulkhead.
Hours: 1.4 | Posted in Bulkheads |
12th
October
2009
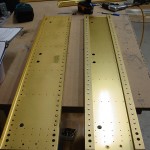
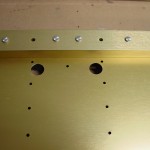
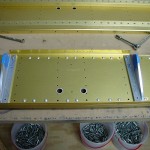
Continued work on the center section: laid out and drilled all the holes for snap bushings, drilled the thick bars that attach to the aft piece, drilled the vertical pieces to the lower spar pieces, deburred and spot-primed all the holes. Started work on the control column mounts by laying out the cut lines and drilling the holes that hold the mounts to the bulkhead. Filed down a weld spot inside the copilot stick base, so the stick slips all the way into the sleeve.
Also determined (by looking at some other websites, then re-reading the plans carefully again) that my second attempt at the fuel pump doubler was still not correct — all the rivets on this piece have their flush heads on the aft side, not just the ones on the nutplates (which are called out for attention in the manual). Hopefully, the third time will be the charm…
Hours: 2.8 | Posted in Bulkheads |
11th
October
2009
Finished deburring the firewall by filing all the edges smooth. Deburring the stainless steel wasn’t as bad as I was expecting; the sharp edges knocked down fairly easily with a file, and the small file set was well-suited for the scallops around the curved edges. After the edges were smooth (and safe), I dimpled all the holes in the firewall…easy.
Located all the parts for the center section (aka F-904 bulkhead); peeled off the blue plastic and marked left/right, etc. The first task here is to drill a series of holes for various things (like wiring, rudder cables, fuel lines, and so on) to pass through. I enlarged the four pre-drilled holes, and measured/marked a couple others before it was time to quit.
Hours: 1.0 | Posted in Bulkheads |
10th
October
2009
Deburred all drilled holes on the firewall, and the edges of the recess cutout.
Hours: 0.8 | Posted in Bulkheads |
8th
October
2009
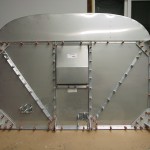
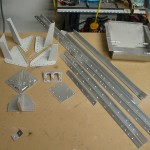
Drilled the holes to size on all the firewall parts, then disassembled for deburring and countersinking. Fabricated a new fuel pump doubler plate when I accidentally countersunk the wrong side of the platenut attach holes — the flush heads go on the aft side of the firewall, opposite the rest of the rivets on this piece. (This is so the fuel pump can sit flat against the aft face of the plate.) Deburred/countersunk all edges and holes of the smaller pieces, leaving just the firewall and recess to deal with. Deburring the stainless looks like a chore.
Hours: 3.1 | Posted in Bulkheads |
1st
October
2009
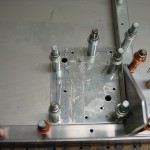
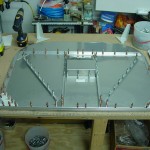
Spent a few hours before work today in the shop, and completed fabrication of the various angles and doublers that are needed in the firewall assembly. There’s some pretty hefty angle to chop up in this step. I may try to get components done up through the bulkheads, and then have one big priming session…though the progress of riveting something, like the firewall, would be a good motivator.
Working with the firewall has me contemplating the recent thread on VAF about firewall insulation; one of the guys is a proponent of engine-side insulation to protect the aluminum components, but I wonder if it’s really necessary–how many RV’s have had in-flight engine fires, and of those who have, how many were hot & long enough to melt the aluminum rivets and cause the firewall assembly to fail? Before this most recent thread twist, I was thinking of using the ceramic sheets/blankets with some sort of tabs or sheets to hold them in place, on the cabin side, since a flame-thrower test showed that solution to be effective for occupant protection. Some anecdotes also suggest not insulating the FW at all, since the heat from normal ops helps heat the cabin in cooler climates. What do production aircraft do? Much to ponder.
Hours: 3.5 | Posted in Bulkheads |


