27th
April
2012
Just when you think you’re done sanding…
Sanded the K36 on the top cowl and spinner, and sanded the DPLF on the top skin smooth. Bottom cowl tonight? Then spray the white inside, followed by the DPLF sealer outside (hopefully done tomorrow).
Hours: 1.6 | Posted in Cowling & Baffles |
26th
April
2012
Sprayed two layers of K36 surfacer on the cowls and spinner. Tomorrow, sanding. Hopefully my order of more DPLF will show up soon, since I’m out.
The top skin looks decent enough that I’m just going to sand the first layer of DPLF and re-spray with the final coat of DPLF sealer; thinking that this will cause the least headache for any prep work a painter will need to do in the future, while protecting the metal and covering up the ugly factor of the micro filler areas.
Hours: 1.2 | Posted in Cowling & Baffles |
25th
April
2012
Today’s goal: get the spraying started on the cowling. To do that, first I needed to finish sanding the side hinge joint gaps. Lots of on-off of the top cowl as I slowly whittled the gap open, then once it was close, used a thing sanding tool (paper glued to a thin metal strip) to create a straight, even gap.
Next up was addressing the forward baffle airseal. I’ve tried a couple iterations of this and been unhappy, so this morning I saved a bunch of pictures of different builders’ solutions — not one the same, mind you. With a concept in my head, I tried a couple things and settled on one that seems to work, matching up with the curves of the cowling and inlet ramps. I still need to file the front of the baffle where I trimmed it, rivet these in place, and stitch together a couple of the overlapping “paddles” of airseal. More on-off of the cowling as this process progressed.
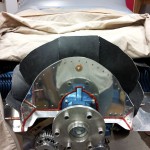
Nextly, masked off the forward top skin — aka “boot cowl” — sanded, and cleaned it in prep for primer. Took the cowls and spinner outside and gave them a thorough wash with Dawn and lots of water. Covered up the canopy with plastic and the engine with a dropcloth.
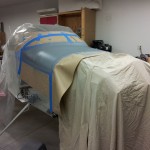
Once the cowls were dry and wiped once more with a microfiber cloth, set up the sawhorses and plastic drape, and mixed up a batch of DPLF primer. Sprayed the oil door, spinner, both cowls inside & out, top skin, and canopy fairing (again, because it had suffered several large scratches during installation). Left that to dry while I ran to town to pick up some spot putty and topcoat paint.
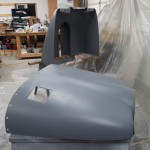
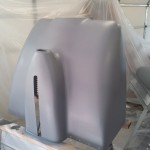
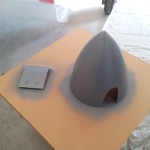
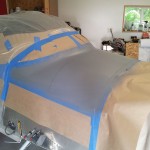
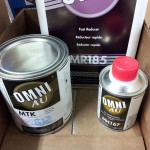
Came back and attacked the remaining pinholes with fast-setting (20 min) spot putty. Once dry, sanded off everything but the tiny bit inside the pinhole. Resprayed DPLF over the sanded areas. Tomorrow night–assuming I escape from work at a reasonable hour–the exterior of the fiberglass parts will be sprayed with K36. The inside of the cowls will be sprayed with the paint I picked up, PPG Omni acrylic urethane, single-stage two-part. This will seal up the surfaces against oil, and the white color will increase visibility under the cowl, and make leaks easy to spot.
Hours: 9.5 | Posted in Cowling & Baffles |
21st
April
2012
Sanded the micro blob that was added to the cowling nose. Started work on the side hinge lines…these are tricky, because you can’t sand them to an even gap before attaching the hinges, since the hinges are what hold them in place. But with the hinges joined, the gap is too small to get a small file, or even my thinnest sanding tool, into. I’ll have to either somehow mark the lines and file to them, or iteratively widen the gap until a file will slip in.
Hours: 0.8 | Posted in Cowling & Baffles |
14th
April
2012
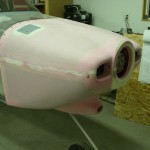
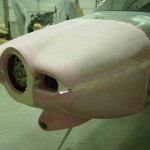
Scraped, filed, sanded the remainder of the top cowl. Cleaned up the hinges and joined the cowl halves together, then sanded the hinge lines so they’d match up. Still need to do some work to obtain an even 1/16″ gap along the sides, it’s narrow right now.
Put the cowls on the plane to check the fit of the front baffle airseal — turns out I cut it too short, and I’m not happy with the way the corners are, so I’ll order another piece of seal fabric and re-do that part.
Mixed up a small batch of micro and applied to the LH nose where I sanded a flat spot (oops).
Sanded the spinner. Swept the shop.
Posted in Cowling & Baffles |
11th
April
2012
Scraped & sanded the RH half of the top cowl.
Hours: 1.8 | Posted in Cowling & Baffles |
9th
April
2012
8+ hours sanding, scraping, filing, smoothing, and what to show — a floor full of epoxy dust; the bottom cowl sanding finished (save for the side hinge joint, which I’ll final sand with the cowls joined), and the oil door area of the top cowl.
On the up side — sanding the neat epoxy is drudgery, but because there’s no glass, it doesn’t leave you full of prickles at the end of the day…
Posted in Cowling & Baffles |
8th
April
2012
Nearly two hours sanding on the cowling’s new epoxy shell. I figure I’m about 10% done with it. Joy.
Hours: 1.8 | Posted in Cowling & Baffles |
7th
April
2012
Started the day with another layer of epoxy on the cowling halves. Should be ready for sanding on Monday.
Covered critical parts with plastic and washed the engine with Dawn and lots of water, to remove the fiberglass dust left behind from all the sanding over the last months. Dried with the air hose, towels, paper towels, and plugging in the engine heater. It really starts to get warm quite rapidly.
Trimmed & smoothed the front baffle, and cut some pieces of airseal, then drilled and punched holes. I won’t do the final attach of that until I have a chance to re-fit the cowls to check for proper clearances & airseal contact. Red RTV’d the perimeter of the baffles all around the engine, and filled various holes at corners & such.
Touched up a couple dings in the engine mount powdercoat with the powdercoat-colored paint.
Hours: 6.0 | Posted in Cowling & Baffles, Engine |
6th
April
2012
Sanded the rear edge split lines of the cowling to provide an even 1/16″ gap to allow for paint. Sanded the gearleg cutout to center the leg, by widening it to one side & straightening the lines.
Rolled on a layer of slightly thinned epoxy, then later in the day, a squeegeed second layer. It’ll get another layer in the morning, then allowed to fully cure before sanding.
Spent a bunch of time wrestling with adel clamps in the process of installing a metal piece for the last 16″ or so of the breather tube. The end of the tube is cut to align against the left exhaust pipe.
Hours: 5.0 | Posted in Cowling & Baffles, Engine |


