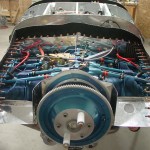
Fiberglass & baffles
Hours: 9.2 | Posted in Cowling & Baffles, Wing & Tail JoinsA very fiberglassy day, once again. Also did a bunch of (more) reading on what primers and other coatings are required/recommended for finishing the glass parts. I’ve identified the list that I would need if I were doing prep for parts that would be painted now/soon (PPG DPLF, followed by K36 or K38) — the part I need to sort out still is whether that is an acceptable stopping place for a plane that likely will not be painted for several years, or if some other coating/sealer/etc needs to be put on top. I found that the K36 can be mixed either as a primer/surfacer, or as a sealer, where a base or clear component is added; perhaps that’s a good final step.
So, today’s work…sanded the epoxy coat on the HS/VS tips — that stuff is hard. Which is as intended, really…but I was still surprised at the amount of work it took to sand. These are now ready for the priming/finishing steps. I need to get the rest of the empennage tips to this stage as well, then I’ll have a go with whatever process I settle on.
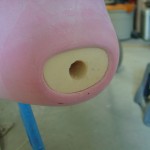
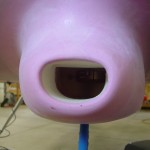
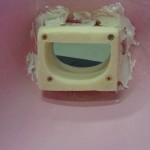
The next big job was to create the union between the lower cowl and the airbox. Firstly, the front snout of the airbox needed to be trimmed back sufficiently to give clearance for the cowl to drop down vertically, so it can be removed with the prop in place. This took several on-off-trim-test cycles with the lower cowl; I put the top plate of the box on the servo and trimmed that to fit, then trimmed the fiberglass bowl once the last trim point had been established. I cut a hole through the middle of the foam blocks attached yesterday with a hole saw, then used files to work it out to the necessary size and shape. During this process, I discovered that the epoxy I used yesterday to glue the two pieces of foam together was too hard for the job; the rear foam piece cracked off when the hole saw hit the layer of hard epoxy. So, I made some measurements and fit another piece of foam to the aft side, using contact cement and a screw in each corner because I’m impatient and didn’t want to wait for it to set up. That worked out, and I was able to shape a nice transition to the airbox.
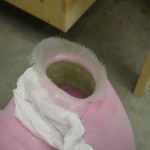
With the transition duct mold done, I had to do a layup to form the actual duct. Wetting out the cloth (2 layers of the Rutan bid) was easy, putting it in place inside the duct, and getting it to stay there, was another story, but I emerged victorious, if a bit sticky. To finish off the inside, I cut another piece of cloth, some lighter, tighter weave stuff I got, and laid that up as the final inside layer, which should leave it a bit easier to finish than the relatively coarse cloth. I secured this all in position and left it to cure. Later in the day, I trimmed the long excess and brushed a layer of epoxy on the inside, as the first step toward finishing. Sanding inside that duct will be fun… Tomorrow, assuming it’s set up enough, I’ll remove the foam and lay up another layer or two of cloth around the outside of the duct to securely fix it to the cowl.
Spent a bit of time cleaning up the shop, stuffing the trash pile in the corner into the garbage can and sweeping, before moving to the next task.
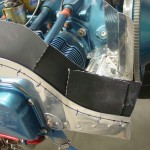
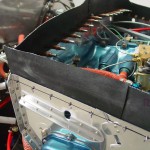
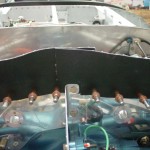
I decided to tackle cutting and fitting the airseal fabric on the engine baffles. Started by making templates of all the baffle tops from cardboard, then cutting 3″ wide pieces of fabric matching those curves. Laid out a rivet pattern on both side baffles, and drilled/deburred. Taped the fabric in place and marked the holes, then drilled them in the fabric on the bench–the fabric is tough to drill, and didn’t drill well in place. Even on the bench, it didn’t really drill, just poked a hole through. Some have had luck here with leather punches, though I can get clecoes and rivets through the holes, so I don’t know how critical that would be.
The side baffles are in two pieces, to match the fore/aft split in the baffles. I made nice curved pieces for the front segment, but they needed to be cut once in place in order for the fabric to bend over properly. One cut overlaps itself, but the other opens up a gap, so I made a gap filler piece for each side, as well. The aft segment, which came next, is also in two pieces, and the right side is captured between the baffle itself and the bracket which is bolted to the engine case. Laying the top cowl on, it seems like these will work. I need to see what’s needed for adhesive when affixing these — I bought some Pliobond earlier, but for these which are riveted, perhaps just red RTV is the thing to do. I have not yet dealt with the front baffle, since it needs additional trimming and figuring out the interface to the top cowl.
Also need to sort out how the airseal fabric works at the front of the airbox; it appears that it’s riveted to the outside of the airbox, and seals as best it can around the outside of the cowling duct, not the inside. I made the second piece of foam the right thickness so that the foam very nearly touches the opening of the FAB as currently trimmed, and I’ll trim the fiberglass of the duct to that point before removing the foam, so that obtaining the correct gap between cowl duct and FAB will be an easy task of measure and trim.
