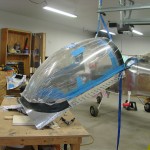
Canopy miscellany
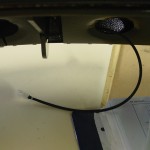
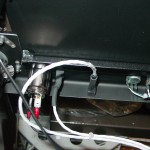
Hours: 5.0 | Posted in Canopy & Frame, ElectricalTerminated the lighting wires that emerge from the underside of the canopy structure in a mating plug to the one installed on the subpanel the other day, and covered the loop with nylon sleeving for chafe protection. Drilled a hole in the center of the glareshield to pass the GPS cable through. Unpinned the puck GPS cable from the DB9 connector, so it can be passed through the canopy hole when ready, and put a snap bushing on the cable. Two cables will come from the canopy, the panel floodlight and the GPS, both of which have a disconnect on the subpanel.
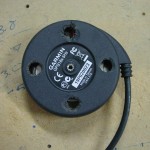
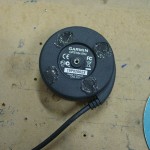
Also removed the magnets from the bottom of the GPS puck, and filled the holes with RTV to re-seal the casing, since with the magnets removed, you can see the sensor board and wires inside the unit. Temporarily reconnected the GPS to the EFIS to verify that nothing was damaged during magnet removal; all appears functional.
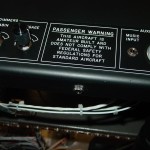
Soldered a 3.5mm jack on the end of the cable that’s connected to the passenger phones line of the audio panel, and installed that jack into the bottom flange of the instrument panel, over on the passenger side. I wired this up to provide a convenient place to tap into the intercom/radio audio with an audio or video recorder. All audio wiring is now complete.
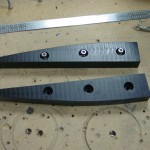
Worked with the block of black Delrin I ordered to fabricate and install the canopy closure guides. The idea is that these low-friction guideblocks will capture the latch fingers as the canopy lowers, then align them properly with the holes they must pass through. By providing a mechanical means for alignment (rather than relying on a human to guide it), the hope is that the possibility of cracked canopy corners or beat-up latch plates will be reduced. This is a fairly common addition, it seems.
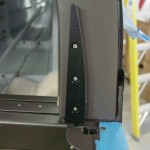
I started with a block of Delrin from McMaster, 1/2″ thick, 1″ wide, and 12″ long. Measured and marked some guide lines, cut on the bandsaw, shaped on the disc sander, and cleaned up with a razor blade and scotchbrite, ending up with a pair of symmetrical guide blocks that look decent and should do the job. To secure them, I decided to use #6 hex-head screws. I drilled the holes, 3 per block, with #27 for the screws, then counterbored a 3/8″ flat-bottomed hole (start with a regular 3/8″, finish with the forstner bit again) about halfway through the block, then pressed in a 3/8″ OD #6 black stainless washer, which will spread out the screw force, but you can’t tell it’s in there, since the color matches that of the Delrin. Used the blocks to match-drill the rollbar, then tapped the holes, since getting nuts and wrenches that far up in the hollow rollbar would be nearly impossible. These blocks are not structural, and they’re plenty solid with the tapped holes. I think the install turned out well, though I’ll have to wait awhile until canopy installation to see how they actually work.
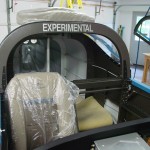
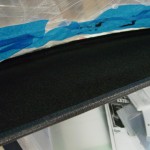
Used some newspaper taped together to make a pattern for the glareshield covering, then transferred that pattern to the material, and cut. I’m using a big piece of industrial fabric which is the loop-side of hook-and-loop fasteners. Essentially, it’s a giant piece of female Velcro. The GPS puck will be fastened to it by sticking dots of male velcro on the bottom, and any other items that would be handily secured there can be fastened in the same way: wrap a strip around pens, flashlights, and so on. I left the aft end of the cut fabric long, then fit the piece to the forward edge curve (the inside of the canopy bubble), and wrapped the aft end over the glareshield edge. Using the pinch welt I got from Classic Aero, I secured the aft edge in place, then cut with a razor blade along the edge of the pinch welt on the bottom side to remove the excess length. Poked a hole matching the hole drilled in the glareshield earlier, where the snap bushing will go. Finally, I flipped the entire piece out, over the pinch welt. I’ll find some adhesive material to apply to the glareshield, then roll the fabric down over the top of it, to bond it securely in place.
