Aft electrical
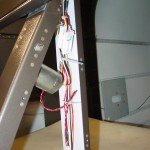
Hours: 5.8 | Posted in ElectricalMore electrical work today, though it doesn’t seem like much was accomplished for the time I spent. After finishing the installation of the terminal block for the heated seats and hooking it up, I decided to remove it and use knife splices instead. The terminal block was nearly as wide as the channel it was mounted in, and the bundle of wires running the rest of the way up the channel would have needed to pass over it. I didn’t like the looks of it, as it seemed like an opportunity for wires to chafe and short to the relatively large power line feeding the seats. I may redo it yet again with a Molex connector of some sort later…the Molexes I have now are only rated to 6 amps. I think heatshrink over the knife splices will be sufficient, however, and removed easily enough if necessary.
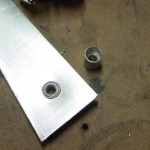
Next, I struggled with fitting the wiring harness for the heated seats into the allotted space. I dug out the nut-sert kit and put nuts on the left & right side of the tunnel to secure the relays; since these nuts have no self-locking feature, I used blue Loctite on the #8 screws. Also installed a wiretie base to secure the large harness/connector that leads to the relay. After monkeying with the switch harness for some time, I decided to remove the factory heatshrink, which made things far easier to deal with. I think that since it’s sold for installation into cars, they cover all the wires with the heatshrink so they’ll be protected when people don’t secure them properly. The rest of the wire bundles aren’t covered with heatshrink, though, and everything will be secured well. Without the covering, the bundles are much more flexible and I was able to spool up the excess and secure it. This could be shortened with appropriate connectors, as well, but I have nothing that’s rated for the current at the moment. I also radiused the bottom corners of the aft flap channel to provide an opening for the leads to exit en route to the cushions.
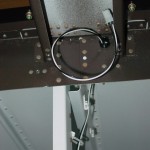
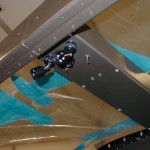
Next up was installing the map light panel — which meant running a pair of wires to it — which meant installing wire bases along the path. As long as I was stuffed into the baggage compartment with the appropriate tools, I also laid out and put wire bases on paths to the AHRS mounting area and over to the ELT mount. With all the bases in place, I pulled in the wires to the map light and put a Molex on the end, then connected and installed the map light panel. Stuck the wire ends under the battery bolts and flipped the switches, and they lit up.
Also spent an hour or so this afternoon adjusting the panel CAD, after I realized that I had the radio stack too far to the right. The position doesn’t matter for anything that doesn’t penetrate the subpanel (since we can cut off the ribs aft of the subpanel and install them wherever they work), but since the radios need to go through the subpanel due to length, they cannot be positioned over the left or right ribs, as that’d interfere with the rib forward of the subpanel. 5/8″ to the left, problem solved.


