Canopy trimming and more
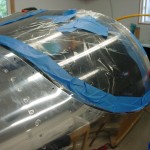
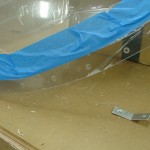
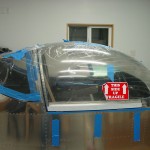
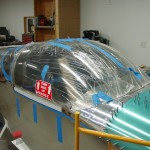
Hours: 7.5 | Posted in Canopy & Frame, ElectricalOff-and-on in the shop today while working through other non-RV projects, eating away at the canopy stuff one bite at a time. The day started by jumping in to dangerous waters: drilling the holes in the rear window. One hole was drilled at a time, then deburred from the inside, and a cleco inserted–from the inside out, so that the spreading “nibs” on the cleco wouldn’t be putting force on the plexi…rather, the large diameter body of the cleco would be holding the plexi out against the skin. While it was clecoed, it was marked for the final trim on the forward edge, as well. Off it came to finish the holes–30 holes, countersinks, and step drill enlargements later, plus final trim of the forward edge, there were still no cracks in the plexi! It was reattached and held in place with a few screws for fitting of the main canopy.
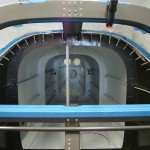
Marking and trimming of the main canopy was easy enough…by the end of the day, the canopy & rear window trimming was finished. All that’s left is to do some block sanding on the aft edge of the canopy to even up the line and provide the necessary clearance gap. A few on-off cycles were required to get everything fitting nicely, including the lower side trims and the little part where the plexi goes under the “ears” of the canopy skin.
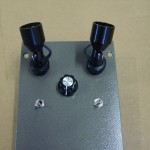
Sent an email checking on the shipment status of the SikaFlex supplies. In other news, my latest order from SteinAir showed up today–the highlights were air vents and map lights, along with the usual wires, connectors, and the like. I couldn’t resist, and I drilled my overhead panel for the lights, switches, and dimmer knob. Looks good, I think, and seems like it will work well. I also put some zip-tie bases up the rear channel of the flap housing, which will hold wires for the flap motor, position sensor, baggage lights, and phone/mic jacks (and perhaps other things, too…).
I decided to put the headset jacks at the aft end of the armrest, in the vertical bulkheads, rather than in the roll bar brace — it seemed like a better place after reading several threads, and thinking about the loading/unloading of baggage, and the possibility of hitting the plugs, or having to remove them each time a suitcase needed to go in or out. Since the plane will usually have the same people in the seats, the headsets in this position shouldn’t need to be unplugged very often. It also leaves open the option of having a place (the armrest behind the seat) to hold an ANR box, should one or us end up with a headset that has one…I’ve never liked to dangle boxes from connectors, so this fits with that well. In any event, I drilled the headset jacks and temporarily fit them in place with the isolation washers. I’ll need to look at my headset and see what the orientation of the plugs is to get the correct jack position (mic/phone inboard/outboard), for the volume control box to be right-side-up.
