Elevator fix-it
Hours: 2.8 | Posted in ElevatorsToday I received a reply to my query to Van’s regarding the twisted elevator problem. From Ken Scott:
This is a significant twist, but we have no test data that would enable us to know how much twist is too much. We haven’t built elevators with different twists and flown them, in other words.
We know there are RVs flying with twisted elevators and nothing bad has happened, but again, how much is too much?
You have two options:
1. rebuild the elevator to the intended configuration. This doesn’t necessarily mean building an all-new elevator — just drilling out rivets until you can straighten the one you have would probably work. No flight risks here — we know straight elevators work.
2. fly it the way it is and let the airplane tell you if it needs to be changed. Problems would most likely show up as rigging/trim problems rather than structural ones. Some risk here, as we really can’t say what the flight characteristics might be
Pretty much what I expected to hear, though perhaps not what I was hoping to hear. So, in reading that and thinking about it, I decided to take a look and see how difficult it would be to fix the thing, rather than hoping it would work and (possibly) having to fix it later. I’m a semi-reformed perfectionist, and every once in awhile I have these tendencies. (If there’s one place I don’t mind having perfectionist leanings, it’s in the building of the plane…)
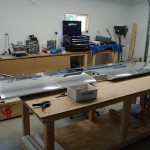
Out to the shop I went, and did some checking at various places on the table (which I’ve come to believe isn’t perfectly flat, and is probably the cause of at least some of the twist), to determine how and where the twist was built in. I drilled off the skin from both the root and counterbalance ribs first. Not enough. The trailing edge had to come undone too, and I believe this is what happened: the skin closure at the trailing edge wasn’t perfectly even when drilled originally, rather the top sheet was offset to one side, which caused the whole thing to twist.
In case there’s a question, applying heat to Proseal does not cause it to become more fluid; it just gets hot. I tried this on some scrap angle which had the stuff on it from when I sealed the TE’s, with no luck. There wasn’t enough “give” in the Prosealed trailing edges to let it move enough, so I ended up using a thin flat ‘blade’ of sorts to split the bottom skin from the AEX wedge. I didn’t spread it enough to disturb the ends of the stiffeners which had been sealed together, nor did I disturb the top skin.
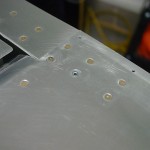
Next I clamped the whole thing to the table quite well, used a 4′ level and spare angle to prove that it was flat, and proceeded to re-squeeze rivets into the trailing edge, using the same approach as used the first time. Also squeezed a few rivets in each end rib. Initial testing after the clamps were removed looked promising, so I squeezed the rest of the rivets, and pulled the blind ones (which I had to steal from the wing hardware, so I suspect I’ll need to order some extras). Yes, my elevator has one more blind rivet than it did before, because I got carried away and drilled out an inaccessible rivet (one of the counterbalance skin to elevator skin rivets on the inside of the end rib)…the other four are at the hard-to-buck ends of the ribs.
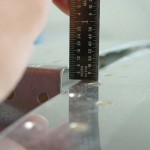
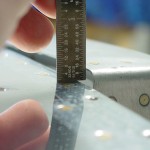
Test time…I expect the problem to be improved but not perfect. Cleaned up the table and brought the HS back up, the proceeded to hang both elevators. Clamped the counterbalances in trail, clamped the long angle across both elevators. In my hand, it looked mighty close… Rested the center of the angle (behind the control horns) on the shop chair, and took the ruler in hand to compare the two sides (the chair doesn’t go high enough to get the counterbalances flush, so I measured the height of the counterbalance nose above the HS skin. Left…6/32″. Right (rebuilt)…6/32″.
I’d call that fixed. Almost three hours, but well-spent both in solving the problem, and in regaining my confidence.
(despite how it looks in the photo, the right one did measure around 6/32″; I was supporting the camera on the HS with one hand, which caused it to tip down and increase the gap.)


