11th February 2012

Like sand through the fiberglass…

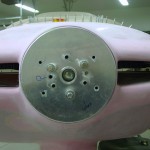
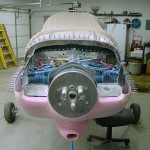
More cowling work, always more cowling work.  Though things are looking up, as I can see a path forward from here.  Tonight I managed to reshape the taper of the top cowl to the right diameter, plane back the nose of the bottom cowl, and reshape that to the right diameter.  There is the beginning of a consistent 1/4″ spinner gap now.  I marked the areas that were over that 1/4″ (the right side was narrow, while the left was wide), and will build them out with some filler, then sand and shape again.  I also have a few voids that opened up during sanding, that need to be filled.  I feel like this is good progress.

With the nose work in progress, and needing to do a bunch of epoxy work, I decided to postpone that due to the time of day.  Instead, I moved to the oil door, another spot that I’d been fearing.  This turned out to be not a big deal.  First, I trued up the edges of the oil door blank using a small square and a sanding board, then marked and sanded a radius at each corner.  Located the hidden hinge in the proper spot, and drilled it to the cowling.  Put the oil door in place and drilled it to the hinge, then adjusted the drill points because it was off (argh; the elongated holes will be epoxied shut).  Formed the door more precisely to the curve of the cowling using a heat gun, then drilled the latches to the door.  I’ll need to layup an additional ply of glass along the side edges of the cowling cutout, since the door rattles a bit; the geometry of the latches and required mounting location to clear the cutout edges require that the cowl be a bit thicker to latch firmly.

Hours: 4.4 | Posted in Cowling & Baffles | Comments Off

9th February 2012

Dust to dust

Dug into the cowling fitting tonight.  In order to get a real sense of how it could fit, I decided to install most of the camloc receptacles, leaving out only the ones that would interfere with setting rivets later (near the upper engine mount bolts, and the sensor manifold — the rest I can reach around using my favorite, the longeron yoke).  To match this, I drilled out the holes in the cowling so I could use the camlocs to secure the upper cowl in place.

Started fussing with it and after trying a few things and taking some measurements, decided to cut off the flange from the lower cowl on the right side.  This, interestingly, solved about 40% of the problem, so it appears that the two cowl halves may not have been true to each other, and I “coaxed” them too much when fitting them together.  The lower cowl stands proud of the upper by about 1/8″ which will need to be sanded off, so it may need a couple more plies of glass on the back of that side, still.  And, a new flange will need to be laid up.

After making some markings using the spinner backplate as a guide, I got after it with sanding blocks and the orbital sander, which can make this job easier/faster, despite the clouds of dust it kicks off.  Called it a night after achieving a 1/4″ gap on the top cowl.  The bottom will be next, then the taper of the nose will have to be reshaped, as the circle grows in diameter as the nose is sanded back, and the nice round edge is removed as well.

Hours: 3.3 | Posted in Cowling & Baffles | Comments Off

8th February 2012

Sanding

Fast hardener worked well overnight, with the shop heat on.  Spent tonight trimming and sanding to the original cowl edge.  Then staring at it for awhile and trying to decide how to proceed.  I need to fit the cowls together before the nose can be reshaped, so some work on the overlap flanges will be necessary.

Hours: 1.8 | Posted in Cowling & Baffles | Comments Off

7th February 2012

Glass & rubber

Broke out the “fast” hardener and laid up several plies of glass inside the nose of both cowl halves.  Once it cures, the cowls will be mounted on the plane, and the nose sanded back to a consistent distance behind the spinner.  This may require some work on the cowl overlap flanges too, since thickness has been added.  I think I’ll have to either sand the bottom flange (the “inside” piece) back before fitting, or cut the bottom flange off entirely, and lay up a new one once the nose job is finished, which would have the additional bonus of fitting perfectly (using the top cowl as a mold for the layup).

After leaving that to cure, started work on sanding the fwd canopy fairing, which so far is a giant bead of Sikaflex.  It’s tedious to sand, but doesn’t wear the sandpaper at all.  I found several air bubbles as I sanded down, though.  Not sure yet if I’ll leave the Sika as is for now (with a primer for UV protection), or lay up a couple plies of glass on top…those who have gone before report mixed results with the Sika-only fairing — the air bubbles, and possible paint cracking due to the flexibility are of concern.  I need to read up on the process for glassing the fairing.

Hours: 3.8 | Posted in Canopy & Frame, Cowling & Baffles | Comments Off

5th February 2012

Momentum lost

Countersunk & installed the lower HS fairing strips.

Installed an alternate static placard on the panel.

Re-fit the cowling and set the depth of the bottom cowl camlocs.

Fussed with the cowling, bulkhead, and spinner a bit, and came away not feeling so good.  The spacers I used when fitting the cowl must have been off by just a touch, because it now appears the cowl is shifted off to the left by a small amount.  The result of this is that the desired 1/4″ gap behind the spinner measures 1/4″ at the left side, but only 1/8″ on the right.  If the cowl hadn’t already been fit and drilled, hinges cut, etc, this wouldn’t be that big of a deal, just slide the right side aft.  As it is, I can see two options: 1) remove all the hinges, camlocs & such, fill the drilled holes, and refit the cowling, or 2) install the top skin, camloc strips, and camlocs (because I already drilled the camloc receptacle holes to full size, I can’t just cleco the cowl to the strips any more), attach the cowls in position, and rework the front of the cowling to provide the desired gaps.  The cowling might also be sitting a bit high, given the common recommendation to set it low to allow for engine sag.

All in all — Ugh.  I wasn’t looking forward to the fiberglassing to begin with, and this further dampens my desire to get started.

EDIT: After some reading, apparently this is not uncommon, and an accepted way to deal with it is to add layers of glass to the aft side of the cowl spinner area, and sand back until the gap is even all around.  Spots where the gap is too large can be built up with filler, and the nose reshaped as necessary.

Hours: 1.7 | Posted in Cowling & Baffles, Wing & Tail Joins | Comments Off

4th February 2012

Punch

Didn’t get part of Friday off from work as I’d hoped, but today I proceeded with the weekend plan of highlighting a bunch of items on the punch list, and knocking them off…

Mixed up a batch of firewall sealant (don’t smell that stuff…wow) and sealed the perimeter of the firewall sides and bottom, and a fillet in the lower corners.  The top curve will get done later when the top skin is put on.  Let that tack up, then clecoed & riveted the sides and bottom, along with the shims, hinges, and camloc strips.  By moving the exhaust stacks and using a variety of yokes, I was able to easily squeeze every rivet but the centerline bottom rivet, which was unsqueezable with any yoke from any angle.  That hole now sports a pulled rivet.  Once the camloc strips were on, the camloc receptacles were added.  Done.
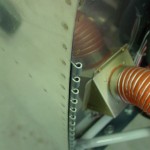
With the lower edge of the firewall complete, I added the metal portion of the fuel pump vent line.  Done.
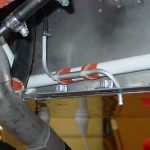
The metal fairing strips that run underneath the HS were next; drilled and tapped the appropriate holes in the aft longerons, drilled the strips, and test fit.  To see how the fit was, I added the HS back on for a moment, and marked the trims that needed to be made.  After several iterations, I had the 1/32 to 1/16″ gap called for in the plans, so the strips were primed.  Still need to countersink the strips, but Almost Done.
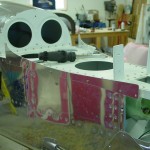
Removed the canopy strut attach blocks and primed/painted them.  While they were drying, I removed the blue tape that has been covering the canopy decks; underneath, I found (as I suspected) that some of the adhesive had become gummy, so that’ll have to be washed up.  Later, reinstalled the strut pivots, and reinstalled the assembly to the canopy decks.  Done.
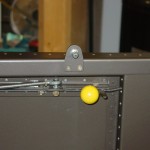
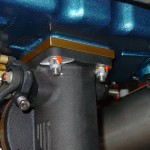
Big job of the night: redo the intake studs in the engine sump so the nuts have enough threads protruding.  This required moving the exhaust stacks (again) and partial disassembly of the entire fuel servo/control cable works — not an easy task due to the limited room to swing a wrench; several of the bolts can only be turned one flat (1/6 turn) at a time.  Eventually, though, it was off, the studs removed, holes cleaned, and reinstalled studs to the correct depth.  Not much was really needed, only 1/8″ or so on each one.  Some of them ended up being a little longer than necessary, but there’s plenty of thread and the nuts are not bottomed, so all is well.  You don’t want to bottom the stud out in the blind hole, as it will stress the threads and can cause them to fracture.  I used a torque wrench to verify that the driving torque requirement was met, and installed with red loctite per the AFP manual.  Much reassembly later, we’re back in business, and the nagging “that’s not right yet” of those studs is gone.  Verified stop-to-stop movement of throttle and mixture.  Done.
Enlarged the drain holes on the fuselage to #19 based on talk that the #30 hole isn’t big enough, and (especially if any gunk is present) the surface tension of water will prevent it from draining.  Also added a drain hole at the lowest point of the fuselage (which is under the seats, and not at a bulkhead), and one under the fuel pump area.

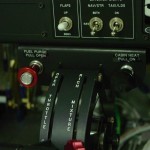
Placarded the alternate static valve installed the other day, and remade the fuel purge and center cabin heat placards with white on black, which looks nicer on the black panel.  Also made black on clear labels for the extra PTT buttons on the fwd canopy decks, and for the pilot’s stick functions (PTT, Trim Up/Dn, and AP CWS)…I expect those will fall off over time and use, but my understanding is that it’s better to have everything labelled to the point of excess at inspection time.
Hours: 11.4 | Posted in Cowling & Baffles, Engine, Wing & Tail Joins | Comments Off

2nd February 2012

Venting

Drilled and installed the fairing nutplates on the HS.

Countersunk and re-primed the top cowl camloc strips (oops).

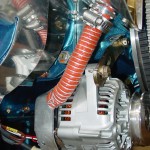
Cut and attached the blast tube to the alternator with a double-wrap of safety wire.  I’m all ears if someone has a better way of doing this, but it’s reported to have worked.  Also rumors that the alternator doesn’t need it, but cooler is always better for electronics.

Tightened and re-saftied the dipstick tube, as it was weeping just a bit at the gasket, since the engine is full of oil now.

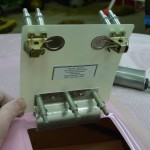
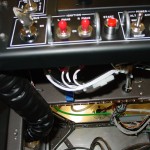
Installed the alternate static toggle low on the subpanel behind EFIS 1.  I bought a toggle switch guard to put over it, since the actuating force to open the switch (thereby venting the static system to the cabin) is quite low.  The guard needs a good strong push to open & latch, and it holds the valve firmly closed in the down position.  I sat in the seat and the switch is out of sight, though easy to reach under the panel.  It still needs a placard, though, because my labeller was too cold to print labels.  (It looks like the wire bundle is very much in the way, but it’s just a result of the camera location.)

Checked to be sure I’d run the remote output port from the transponder to the ADS-B connector (I had), as the need for that connection came up on a recent VAF thread again.

Wasted the rest of the night sitting in the seat playing with the avionics.

Hours: 2.4 | Posted in Engine, Plumbing, Wing & Tail Joins | Comments Off