11th March 2012

Bits ‘n’ pieces

Several list items in this weekend’s work session.

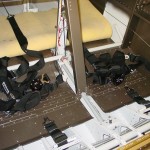
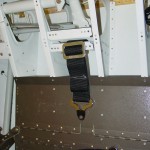
Having received the 1/4″ threaded drill I needed, drilled & deburred the crotch strap mounting holes.  Installed the crotch straps.  Drilled 1/4″ attach holes in the lap and shoulder belt attach points, and mounted those (RH lap belt temporary, as I ran out of the correct length AN4 bolts).

Final-installed the baffle screws with lockwashers.  Replaced temporary nuts with metal locknuts on baffle mounting brackets.  Fabricated and temporary-installed the baffle tension rods (need #6 metal locknuts), with nylon tube over the middle parts; they don’t contact anything as is, but should something shift, the nylon will prevent wear until the next inspection/oil change/etc.

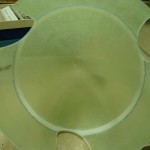
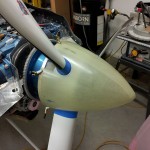
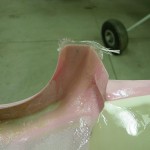
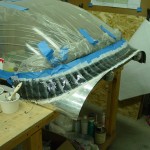
Applied packing tape to the forward spinner bulkhead, laid a bead of flox on the inside of the spinner at the contact point, and clecoed it in place.  There was a moment of concern when the spinner didn’t want to release from the tape after curing for a few hours–I wanted to let the flox set up to hold proper shape before removing the spinner.  After pushing, prodding, tapping, and finally whacking it on an angle (it took quite a few good double-fisted whacks…that’s a strong piece of fiberglass…), one section popped loose and I was able to work it free.  Trimmed the squeezed-out flox off with a knife, to save weight and keep the spinner as balanced as possible, since this is part of the rotating mass.

Hours: 8.3 | Posted in Cabin & Interior, Cowling & Baffles, Engine | Comments Off
6th March 2012

Spinning around

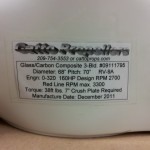
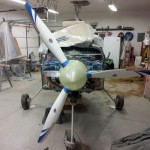
More work on fitting the spinner; finished the blade cutouts to an even 3/32″ width from the blade.  Set up a ladder to hold a fine-point sharpie while rotating the prop & spinner to ensure that the spinner was centered, then marked a line around the circumference at the rear bulkhead.  Using tape and a rivet fan, spaced 5 holes between each prop blade and drilled  #40.  These will later be enlarged to final size.  Clecoed the spinner in place and checked centering again, before removing and installing the forward spinner bulkhead.  This also requires trimming to clear the blades, and final-sizing the bolt holes to the required 7/16.”  The initial fitting of the spinner is done; the next step will be to add a bead of flox around the inside at the station of the forward bulkhead, to take up any remaining gap and minimize screw stress & vibration.

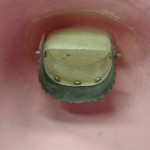
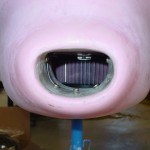
Cut the nosegear log slot 3″ longer in the lower cowl, to make it possible to clear the 3-blade prop.  I may extend it another inch still.

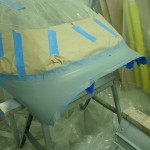
Sanded down the micro that I’d applied to the voids in the lower cowl nose, and marked lines on the top cowl where I’ll lay up some glass to close the inboard ends of the inlet ramps, to prevent cooling air from being dumped to the lower cowl without doing any cooling work.

No work for the next couple nights due to other commitments…

Hours: 3.0 | Posted in Cowling & Baffles | Comments Off
5th March 2012

Canopy & spinner

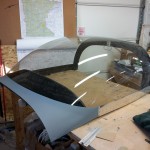
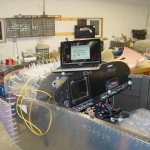
Finished the canopy skirts by stripping off the excess Sikaflex that oozed out of the joint and riveting the skirts in place.  All rivets were easily squeezed except five, which were bucked.  One of the nice things about Sikaflex versus something like Proseal is that, while it sticks with vigor to any properly primed surface, it doesn’t stick to things not coated with Sika primer; so it’s easy to not worry about the ooze-out, and once it has cured, just scrape or rub it off.  Cleaned all the dust off the canopy frame & underside.

Pulled out the prop and various related pieces — spinner, bulkheads, spacer, crush plate — and set to work making the blade cutouts in the spinner.  Measuring, making cardboard templates, and cutting, then shaping with a file, followed by lots of iterative fitting and filing, was the order of the day.  Got it to the point where it fits, though the cutouts will need to be cleaned up for a consistent gap width.

Hours: 4.0 | Posted in Canopy & Frame, Cowling & Baffles | Comments Off
25th February 2012

Working the list

Finally, a work session with something more than sanding.  Worked a bunch of list items over a full day in the shop:

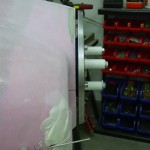
Brushed epoxy on the front of the top rudder tip, filling the pinholes in the micro which was sanded yesterday.  Added a blob of micro to the trailing edge, where the glass tip ended short of the metal portion.  I’ll refit this to the rudder tomorrow and sand the tip TE to match the rudder.

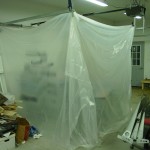
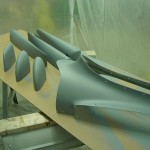
Set up a plastic-sheet spray booth, cleaned the HVLP gun,  and sprayed PPG DPLF epoxy primer on the canopy fairing, HS and VS tips, elevator tips, rudder bottom, and empennage fairing.  After that, it was time to air out the shop and bring it up to temperature again, as the epoxy primer and subsequent gun cleaning step kick off a lot of fumes.  I found only two pinholes in the canopy fairing, both over screw heads.  The emp fairing has a goodly number still (as I expected), and the tips have a few.  I’ll let the primer cure overnight, then fill the holes and sand level before laying down the K36 which is the next step in finishing.  That puts the second coat on schedule for Monday or Tuesday, though it looks like I may have to work on Tue night.  The recoat window is one week.


On to the cowling, I cleaned up the cut line on the rear of the inlet duct, then fabricated a piece of airseal and a metal backing strip, fitting them around the bottom of the duct.  This will mate up with the top piece, which is installed on the airbox, to seal the gap between duct and airbox.  A test fit, after tweaking the alignment of the airbox, showed it worked well.


Next, I countersunk all the rivet holes for the cowling hinges, and drilled some “ooze holes” in the hinge to give epoxy something extra to bond to.  Sanded the cowling and the hinges with a rough grit, and laid a bead of epoxy/flox along the hinge lines.  Clecoed the hinges on, then riveted them down, and cleaned up the flox that squeezed out all around.  Ran hinge pins through the hinges to make sure none of the eyes were epoxied shut.  Also floxed/riveted the oil door hinge to the cowl and door.


Put rivets in the remaining 5 holes under the left side canopy deck, originally left open to attach clips to hold the static line.  One hole was behind the center section cover, and inaccessible for bucking, so I used a Cherry rivet instead.

Torqued the nuts on the control cables at the quadrant, and the stopnuts on the control horns attaching the cables to the quadrant levers.  Verified that cotter pins were installed on the horns (they were).

Hours: 10.4 | Posted in Canopy & Frame, Cowling & Baffles, Wing & Tail Joins | Comments Off
16th February 2012

Yep, more glasswork

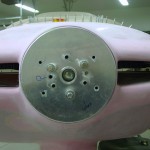
After a trip to the store for more electrical tape, including several bright colors to be more distinguishable from the black colored glass, laid down the first layer of (black dyed) micro mixture on the canopy fairing.  I’ll hopefully sand this tomorrow, then I expect it will take one or two more applications before it’s done.

Sanded & re-drilled the oil door where I had epoxied some misdrilled holes closed.  This is ready for more finish work before riveting the hinge.  Also did some sanding on the top cowling to remove bumps of epoxy and overlap edges of glass fabric.

Hours: 2.5 | Posted in Canopy & Frame, Cowling & Baffles | Comments Off
14th February 2012

Lay on, sand off

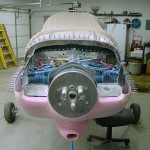
More fun with cowling to start the day: added some glass to a spot in the nose of the upper cowling that was thinned out by sanding, and laid up a couple plies at the sides of the oil door (+ peel ply).  Took the extra epoxy and squeegeed it on the inside of the top cowl.

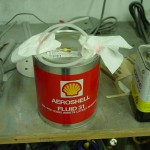
Taking a break from fiberglass work, I filled the brake system with fluid.  This was pretty easy with the use of the brake bleeder tank I picked up from ATS, which came with the correct bleeder fitting for the calipers.  I filled up the tank with fluid, attached a NPT-to-hose-barb fitting to the brake reservoir in place of the cap, with a clear nylon tube to the empty fluid canister, and pumped away.  Once a stream of uninterrupted fluid had flowed out of the reservoir, I switched sides and repeated.  No leaks apparent, but I still need to climb in and test the system under pedal pressure, as well as check the operation of the parking brake.

Back to work: spent considerable time sanding down the fillet of Sika at the canopy base.  I decided to do a layup of glass here, for a number of reasons.  To enable that, I pared down the Sika fillet, exposing some plexi above it, and some aluminum below it.  Scuffed everything up well, and laid out edge lines with electrical tape.  I cut a ply of “Rutan Bid” glass cloth, and a ply of a cloth with a tighter, denser weave to place on top of that; both were curves cut on a bias, for a smooth fairing with no ply overlaps.  Mixed a batch of epoxy with added black colorant, and laid up both plies of glass, plus a layer of dacron peel ply.  Today was the first I’ve used the peel ply, so we’ll see tomorrow if I did it right.

One more little item on the list, plugged into the VP-X and updated it to the latest firmware version.  The cheap USB to RS-232 converter I bought for $9 is junk and won’t install on my computer, so I haven’t been able to service the APRS unit.  I’ll borrow the one from work that I was using before, and find a better one to get for the shop.

Also looked at the fit of the Crow crotch straps, which look like they’ll fit into the brackets without trouble.

Hours: 9.5 | Posted in Cowling & Baffles, Electrical, Gear & Fairings | Comments Off
11th February 2012

Like sand through the fiberglass…

More cowling work, always more cowling work.  Though things are looking up, as I can see a path forward from here.  Tonight I managed to reshape the taper of the top cowl to the right diameter, plane back the nose of the bottom cowl, and reshape that to the right diameter.  There is the beginning of a consistent 1/4″ spinner gap now.  I marked the areas that were over that 1/4″ (the right side was narrow, while the left was wide), and will build them out with some filler, then sand and shape again.  I also have a few voids that opened up during sanding, that need to be filled.  I feel like this is good progress.

With the nose work in progress, and needing to do a bunch of epoxy work, I decided to postpone that due to the time of day.  Instead, I moved to the oil door, another spot that I’d been fearing.  This turned out to be not a big deal.  First, I trued up the edges of the oil door blank using a small square and a sanding board, then marked and sanded a radius at each corner.  Located the hidden hinge in the proper spot, and drilled it to the cowling.  Put the oil door in place and drilled it to the hinge, then adjusted the drill points because it was off (argh; the elongated holes will be epoxied shut).  Formed the door more precisely to the curve of the cowling using a heat gun, then drilled the latches to the door.  I’ll need to layup an additional ply of glass along the side edges of the cowling cutout, since the door rattles a bit; the geometry of the latches and required mounting location to clear the cutout edges require that the cowl be a bit thicker to latch firmly.

Hours: 4.4 | Posted in Cowling & Baffles | Comments Off
9th February 2012

Dust to dust

Dug into the cowling fitting tonight.  In order to get a real sense of how it could fit, I decided to install most of the camloc receptacles, leaving out only the ones that would interfere with setting rivets later (near the upper engine mount bolts, and the sensor manifold — the rest I can reach around using my favorite, the longeron yoke).  To match this, I drilled out the holes in the cowling so I could use the camlocs to secure the upper cowl in place.

Started fussing with it and after trying a few things and taking some measurements, decided to cut off the flange from the lower cowl on the right side.  This, interestingly, solved about 40% of the problem, so it appears that the two cowl halves may not have been true to each other, and I “coaxed” them too much when fitting them together.  The lower cowl stands proud of the upper by about 1/8″ which will need to be sanded off, so it may need a couple more plies of glass on the back of that side, still.  And, a new flange will need to be laid up.

After making some markings using the spinner backplate as a guide, I got after it with sanding blocks and the orbital sander, which can make this job easier/faster, despite the clouds of dust it kicks off.  Called it a night after achieving a 1/4″ gap on the top cowl.  The bottom will be next, then the taper of the nose will have to be reshaped, as the circle grows in diameter as the nose is sanded back, and the nice round edge is removed as well.

Hours: 3.3 | Posted in Cowling & Baffles | Comments Off

8th February 2012

Sanding

Fast hardener worked well overnight, with the shop heat on.  Spent tonight trimming and sanding to the original cowl edge.  Then staring at it for awhile and trying to decide how to proceed.  I need to fit the cowls together before the nose can be reshaped, so some work on the overlap flanges will be necessary.

Hours: 1.8 | Posted in Cowling & Baffles | Comments Off

7th February 2012

Glass & rubber

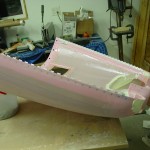
Broke out the “fast” hardener and laid up several plies of glass inside the nose of both cowl halves.  Once it cures, the cowls will be mounted on the plane, and the nose sanded back to a consistent distance behind the spinner.  This may require some work on the cowl overlap flanges too, since thickness has been added.  I think I’ll have to either sand the bottom flange (the “inside” piece) back before fitting, or cut the bottom flange off entirely, and lay up a new one once the nose job is finished, which would have the additional bonus of fitting perfectly (using the top cowl as a mold for the layup).

After leaving that to cure, started work on sanding the fwd canopy fairing, which so far is a giant bead of Sikaflex.  It’s tedious to sand, but doesn’t wear the sandpaper at all.  I found several air bubbles as I sanded down, though.  Not sure yet if I’ll leave the Sika as is for now (with a primer for UV protection), or lay up a couple plies of glass on top…those who have gone before report mixed results with the Sika-only fairing — the air bubbles, and possible paint cracking due to the flexibility are of concern.  I need to read up on the process for glassing the fairing.

Hours: 3.8 | Posted in Canopy & Frame, Cowling & Baffles | Comments Off