22nd August 2010

Canopy skirts & stick grips

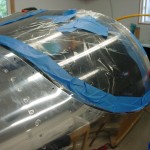
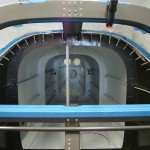
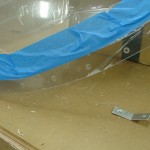
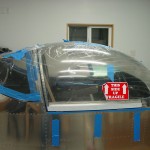
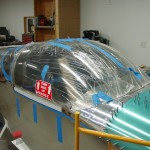
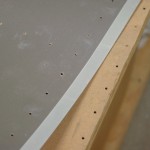
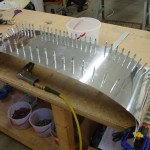
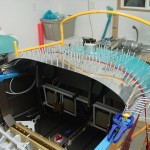
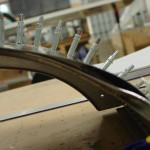
Removed the canopy from the fuselage for eventual sanding to true up the back edge; I also need to read and see how wide of a gap is needed here to allow proper opening of the canopy.  Fit and drilled the canopy skirts, the countersunk/dimpled, masked off the area at the top which will get sealant, and primed the rest.

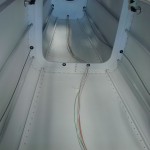
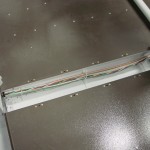
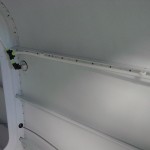
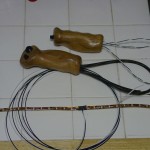
Measured out a section of LED strip light to go under the channel that runs behind the seats; this will serve as baggage lighting for loading/unloading in the dark.  The power for this will feed from the center of the strip, so I spooled off some 20ga wire and soldered it on.  While I was soldering, I also wired up the pigtails to the stick grip switches; the pilot’s grip got some expandable sleeving to keep all the wires in a nice bundle, as well.  Both grips’ wires will terminate in a connector at the base of the stick–either a Dsub or CPC for the pilot, and a 3.5mm mini-jack for the copilot, which will be easy to access to allow for stick removal.  I may also have a second PTT somewhere for the right seat, when the stick is removed.

Countersunk for canopy skirts Canopy skirts fit and primed Stick grips, baggage lighting soldered

Last but not least, I was able to find a good description of gluing a tip-up (illustrated, even) from Jim Ellis on the Matronics Wiki — I think this is the procedure I will use, minus the screws of course.  Fitting the canopy and then inserting the adhesive should be easier and less messy to handle with only two people, compared to applying the sealant bead and then lowering the canopy onto it.

Hours: 4.1 | Posted in Canopy & Frame, Electrical | Comments Off
20th August 2010

Map lights

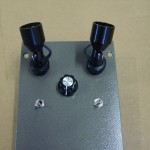
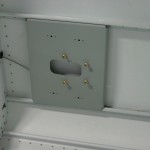
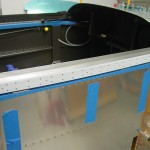
Wired up and tested the map light panel, with the lights, switches, and dimmer module.  This panel will close out the bottom of the roll bar brace, and will receive power from the interior illumination circuit.  Two switches provide for independent control of left and right lights.  A single dimmer knob controls the brightness of both lights, via a PWM dimmer module.

Hours: 1.8 | Posted in Electrical | Comments Off

18th August 2010

Canopy trimming and more

Off-and-on in the shop today while working through other non-RV projects, eating away at the canopy stuff one bite at a time. The day started by jumping in to dangerous waters: drilling the holes in the rear window.  One hole was drilled at a time, then deburred from the inside, and a cleco inserted–from the inside out, so that the spreading “nibs” on the cleco wouldn’t be putting force on the plexi…rather, the large diameter body of the cleco would be holding the plexi out against the skin.  While it was clecoed, it was marked for the final trim on the forward edge, as well.  Off it came to finish the holes–30 holes, countersinks, and step drill enlargements later, plus final trim of the forward edge, there were still no cracks in the plexi!  It was reattached and held in place with a few screws for fitting of the main canopy.

Rear window drilled Rear window drilled & clecoed Rear window holes finished

Marking and trimming of the main canopy was easy enough…by the end of the day, the canopy & rear window trimming was finished.  All that’s left is to do some block sanding on the aft edge of the canopy to even up the line and provide the necessary clearance gap.  A few on-off cycles were required to get everything fitting nicely, including the lower side trims and the little part where the plexi goes under the “ears” of the canopy skin.

Canopy fitting nearly done Canopy fitting nearly done

Sent an email checking on the shipment status of the SikaFlex supplies.  In other news, my latest order from SteinAir showed up today–the highlights were air vents and map lights, along with the usual wires, connectors, and the like.  I couldn’t resist, and I drilled my overhead panel for the lights, switches, and dimmer knob.  Looks good, I think, and seems like it will work well.  I also put some zip-tie bases up the rear channel of the flap housing, which will hold wires for the flap motor, position sensor, baggage lights, and phone/mic jacks (and perhaps other things, too…).

Map light panel

I decided to put the headset jacks at the aft end of the armrest, in the vertical bulkheads, rather than in the roll bar brace — it seemed like a better place after reading several threads, and thinking about the loading/unloading of baggage, and the possibility of hitting the plugs, or having to remove them each time a suitcase needed to go in or out.  Since the plane will usually have the same people in the seats, the headsets in this position shouldn’t need to be unplugged very often.  It also leaves open the option of having a place (the armrest behind the seat) to hold an ANR box, should one or us end up with a headset that has one…I’ve never liked to dangle boxes from connectors, so this fits with that well.  In any event, I drilled the headset jacks and temporarily fit them in place with the isolation washers.  I’ll need to look at my headset and see what the orientation of the plugs is to get the correct jack position (mic/phone inboard/outboard), for the volume control box to be right-side-up.

Hours: 7.5 | Posted in Canopy & Frame, Electrical | Comments Off
17th July 2010

Tailcone wrapup, canopy frame

Installed various tie-wrap bases for the tailcone wiring runs, and pulled the aft nav/strobe, pitch trim, pitch servo, VOR and transponder antenna cables into the tailcone.  Installed standoffs for the static line in the tailcone and secured the line, checking for clearance with the harness anchor bracket.  Installed the ELT mounting bracket.

Wiring run in tailcone Wiring run down side of tunnel Static line secured in tailcone ELT mount installed

Worked on fitting the canopy frame by clecoing the skin to the forward frame weldment and fitting to the fuselage.  After several on-off cycles and adjustments, it was fitting pretty well, so the splice plate was drilled to the forward bows.  Removed the skin and cleaned out the chips, then re-clecoed and checked the fit on the fuselage.  Fits the same, with the usual slight gaps at the left & right front sides, that require spacers under the front skin.  An initial check of where the hinge holes will fall shows that the holes are almost dead center in the hinge goosenecks…I’m pleased with that, though I do need to fabricate spacers to go between the goosenecks and the forward bows (that distance is set by the holes in the skin, and mine has a gap…no biggie, it looks like a piece of .063 and .040 will fill it nicely.

UHMW tape on canopy skin Fitting skin to canopy frame First fitting of canopy frame to fuselage

The issue at the moment with the canopy frame is that, for the outboard three holes of each side’s aft tube, the skin does not sit down to the tube…there’s quite a gap.  I’ll have to read up on what others have done here, whether make spacers, omit these holes, or what.  Also trying to figure out when the canopy stiffener kit should be fit, as there is no mention of it that I can find in the manual.

Gaps at sides of canopy frame

Hours: 7.6 | Posted in Canopy & Frame, Electrical | Comments Off
19th April 2010

Vertical Power

Vertical Power announced their new VP-X system a few weeks back, which–at least to me–is sort of a hybrid of their existing systems.  It has a boatload of power circuits, 10 assignable switch inputs where you can use whatever type of switch you desires, built in wig-wag control, trim speed adjust, flap positioning system, etc.  There is no dedicated display unit; instead, you can use your own switches, and it connects to your EFIS for display needs and to allow switching of individual circuits (beyond what you have access to with the switch inputs).  I was sold on the VP stuff when it came out a couple years back, but their systems didn’t allow for the switchology I had in mind, so I had resolved to use fuses & such.  This new system is exactly what I needed, so with the fuselage coming together, I called up Marc and Vertical Power and ordered the wiring harness kit, and an empty control unit (CU) shell.  I was also inspired to start fooling around with panel designs in Turbocad, and looking at different switch options.

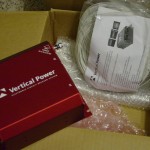
Anyway, my order with the CU shell and wiring kit arrived today, after a UPS delay:

VP wiring kit and CU shell

…of course, there’s still another several hundred dollars worth of wire, connectors, and so on to be bought for antennas, sensors and the like…I have a good part of my electrical design scratched out, and an order list for a bunch of wire from Steinair; hoping to get some wiring in before the tailcone closes and avoid as much belly-crawling as possible.

Posted in Electrical | Comments Off