13th
July
2009
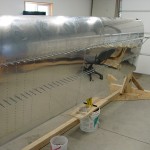
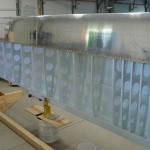
In a morning and an afternoon session, Allison helped rivet the second pass on the top skin ribs. After that was done, I slid the J-channels in place and clecoed them to the skins. I also squeezed the rear spar-skin rivets, so all that remains on the top skins are the skin-spar rivets and the J-channels.
Also picked up lumber and a sheet of 3/4″ MDF to build a box for flap & aileron construction.
Hours: 2.1 | Posted in Skin Panels |
11th
July
2009
This morning, spent a couple hours at the quarterly meeting of the Twin Cities RV Builders’ Group, chatting about planes and listening to stories. Had the chance to visit Mike Behnke’s recently flying -9A and sit in the copilot seat. A well done airplane. Really liking his panel; even better in person than in pictures. Playing with my paper cutouts, I figured that two AFS screens (my long-term plan) should be configured one on the pilot side, and one on the copilot side, with the radio stack in the middle. Sitting in Mike’s cockpit (where both screens are in front of the pilot), I had no problem seeing both screens from the right seat–and since the displays share data and any screen can appear on any display, the right-hand display could be configured as the flight data screen if the copilot is flying. He also still has room on the far right of the panel for a third display; I think an AFS 3400 would fit there, or a Dynon of some variety for dissimilar backup. His panel is ~1 1/4″ longer than stock, but legroom didn’t seem to be an issue (I was able to sit with my knees bent up), and I think it might be possible to tighten things up a bit more, if a person was concerned about the panel length.
In the evening, Allison helped rivet the rest of the first pass on the top skin rivets. After that, we fixed the few rivets that needed drilling out, and I pulled clecoes in preparation for the next session. Also drilled out the rivets on the left wing that I squeezed into the holes intended for the root fairing screws…a stupid oversight of plans-reading on my behalf. All those holes have also been dimpled, so I’ll be reading ahead in the manual to see whether that’s a problem, or if I need to flatten them out.
Hours: 1.2 | Posted in Skin Panels |
10th
July
2009
Allison helped rivet the first pass on half the top skin to rib lines.
Hours: 0.6 | Posted in Skin Panels |
8th
July
2009
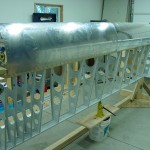
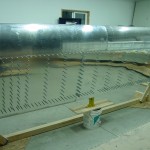
Dusted off the right wing skeleton and dropped the fuel tank in place. It clicked right into the dimples and lined up nicely–all the bolts for the Z-brackets lined right up, save for the inboard-most bracket, which needed a little finagling (as it did on the left wing). Inserted & torqued all the spar-tank bolts, then all the screws. Used a new screwdriver bit, and only managed to mangle two screw heads…gotta get one of those “grippy” bits with the tiny serrations on the tip, maybe those hold on better.
Followed up by clecoing on the top skins, interpolated with plenty of wing-twist measurement checking. All’s good…ready to rivet!
Hours: 2.2 | Posted in Skin Panels |
6th
July
2009
Primed the top skins, wing walk doubler, and J-channels for the right wing, along with the retainer brackets for the landing light lenses. Discovered that small bugs are attracted to the large, freshly primed skin panels as the light dims in the late evening–probably because they’re rather white.
Hours: 1.5 | Posted in Skin Panels |
5th
July
2009
Summer is the time for working on projects…and this summer, that’s meant remodeling the bathroom more than building an airplane. I’ve spent the last three weeks on that project, with at least a week to go, taking into account the fact that I need to go to “real” work at least occasionally… A complete strip-to-the-studs and buildout of our small bathroom, to follow on the (unplanned) porch and patio projects from last summer.
Not to say there’s been no work on the plane…I set Allison to work deburring and dimpling wing skins when she complained of being too bored. Several nights ago, I reconfigured the shop for riveting the right wing, plumbed and leveled the skeleton. Tonight, I did primer prep on the top skins and J-channels for the right wing; hoping to get a chance to prime them tomorrow after work. I’m guessing we’ve found 6 hours or so in the last month.
Time flies, even if I don’t; school will be starting again before we know it.
Hours: 6.0 | Posted in Skin Panels |
9th
June
2009
Allison was bored enough today while I was at work that she dimpled most of the holes in the right wing top skins. I also spent some time fiddling with the Gretz pitot mount when I came home…looks like it should be relatively easy to fit up. Need to read up on the best location (inboard or outboard of the bellcrank bay?) to install it.
Hours: 1.7 | Posted in Skin Panels |
5th
June
2009
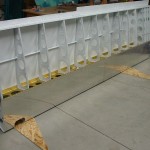
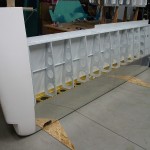
One last session with Allison to finish up the skin-spar rivets on the left wing top skins. With that, this wing is ready to come out of the stand! Of course, I forgot to take the “finished” picture in the stand…but here it is after removal from the stand (stand parts being used to build the roll-around wing cart). Couldn’t resist clamping the wingtip on there for a minute to see how it looked.
Hours: 0.9 | Posted in Skin Panels |
4th
June
2009
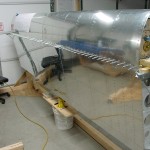
Later in the evening, Allison helped rivet the J-channels into the wing assembly, and re-install a handful of bad rivets that were drilled out from the last session. All that remains to be riveted on the top skins are the skin-front spar rivets.
Hours: 0.8 | Posted in Skin Panels |
2nd
June
2009
Completed lots of little tasks on the wings today…
- Deburred the top skins and J-channels for the right wing; they’re ready to be dimpled, then etched & primed.
- Finished up the skin-rib rivets on the left wing top skins with Allison.
- Clecoed the left wing J-channels in place; ready to be riveted (along with the skin-spar rivets).
- Riveted the skin-rear spar rivets on the left wing. Easy enough with the squeezer and 4-inch yoke, but the 5 inboard-most rivets are a bear, due to the thickness of the reinforcing bar and doubler plates that comprise the root of the spar. Some creative combinations of squeezing and bucking were required here (eg. half-squeeze to hold the rivet in place, then wiggle the bucking bar in place and finish with the gun, since the squeezer is off center due to the spar bars).
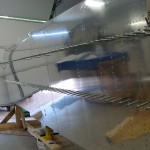
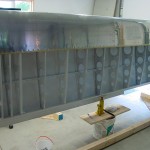
With any luck, the left wing structure ought to be fully riveted by the weekend, and the right wing should be ready to go. I’ll need to look at the plans for the wing cart, as well, and see what I need to pick up for parts. The time is drawing near for the wings to come out of the stands! (Stands were built January 2, 2009.) I also have a plan for adding a second level of shelving to the rollaround workbench to increase its part-storage capacity, which (along with the removal of the wing jigs) will get the fuse parts organized, recovering one space in the garage for summer storm season, and allowing access to the bathroom remodel parts currently stored behind the fuselage kit…
Hours: 5.8 | Posted in Skin Panels |


